Mark

Objective: Establish and Maintain a Supply Line For 3 Turns
Turn Limit: 6
Echelon Limit: 6
Recommended Echelon(s): RF/HG (x2), AR/SMG (x1), Dummy (x3)
While I recommend two RF/HG echelons, you can do this with one, just have a good AR/SMG squad with +FP or grenades. The video demonstrates this.
Welcome to the wall. This and Vengeance are where most people stopped when CT originally came around. However, since you're totally prepared and ready for this ahead of time, you'll be fine, right? Riiiiiight?
This map forces you in one of two ways. Either you take the side paths and run the supply line, or you go through the shorter route that has you defend 4 separate paths versus Hydras and other fun Military units. For the purposes of this guide, we'll be taking the side routes so we only have one echelon doing most of the combat. The problem with doing it like this is that we need to be aggressive with how fast we do this. If we take too long, we'll hit the turn limit. To add to that, you also need to be able to control the Typhon's aggro so they don't interrupt the supply line. So, we got a lot to cover to get all this ready.
The start for this map involves you expanding your AP count as well as pushing to start working on the supply line. For our supply line, we'll be running it to the left of the Command Center. It'll look like this when finished:

To add to our turn 1 activities, we also need to get one of those dummies to go to the right of our Command Center so we can get into the Typhon's area to the right of the Rally node. That's what we're gonna bait the Typhons with, and we need them in there ASAP. So, we're going to deploy a HOC on the Heavy Heliport, and a dummy on our Command Center. Then, we're going to move them out to encircle the two Heliports to the left and right of our starting point. You won't be able to deploy anything extra just yet, but you don't need to.
Turn 2 we'll move our dummy to take the Heliport just after the one way we're heading to. This gives us a platform to deploy more dummy echelons, as well as redeploy the one we're using. We'll also deploy our main combat echelon from the Heliport we captured to the left of our Command Center. Swap the HOC we used to encircle it in the last turn and start establishing the supply line further. Remember to use encircling to speed up the process.
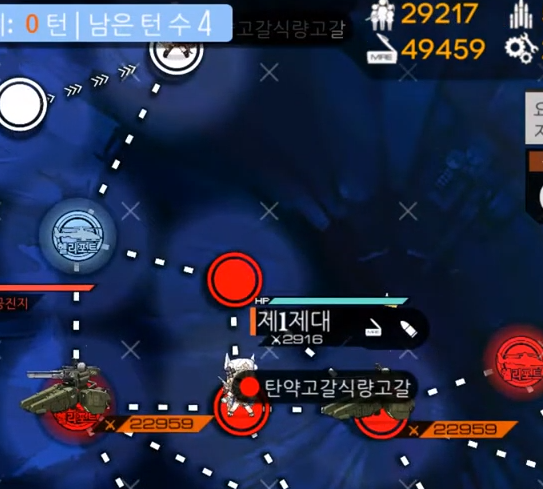
Turn 3 is going to be a big turn now. Now we're starting to really bait the Typhons away and we also need to defend the Heavy Heliport we started with. Deploy an echelon on the Heavy Heliport and let them do the defending. Move your main combat echelon up to take another node in our supply line. For baiting the Typhons, it's best to just stay right next to them to be sure where you're moving them to. So, we need to be able to redeploy the dummy constantly. To be able to do this, we need something to keep vision on the Heliport we captured in the Typhon's area. There's a safe spot in the Typhon's aggro radius that's directly above the captured Heliport, just after the one way we took. Move a dummy up there and deploy another to bait the Typhons. For my runs of this map, I've had the Typhons like so:

If you don't have it like that, well, use your head. You ideally want the Typhons off to the right side of the area. You should have some spare AP to deploy another dummy to get some extra AP for what we're doing next turn.
In turn 4, we're finishing up the supply line and the hard part of the map. Use the Heliport we took in the Typhon area to deploy the other combat echelon you have as well as redeploying your dummy. Push up to the Rally node with your main combat echelon, then use your other combat echelon and dummy to take the other two nodes you need to complete the line.
For the rest of the turns, keep your main combat echelon defending the Rally node, while using your dummy and possibly your other combat echelon to keep the Typhons away from breaking the supply line. If you can do that, congrats, now CT is gonna only get easier. Probably.
Video of me clearing this map
Author: Kazuki
Tags: continuum turbulence


