


Against The Light II EX/UX
Objectives: Elimination, destroy all of the teleporters
Echelon Limit: 3 Griffon echelons/HOCs
Recommended Echelon(s): AR/SMG, RF/HG, HOC
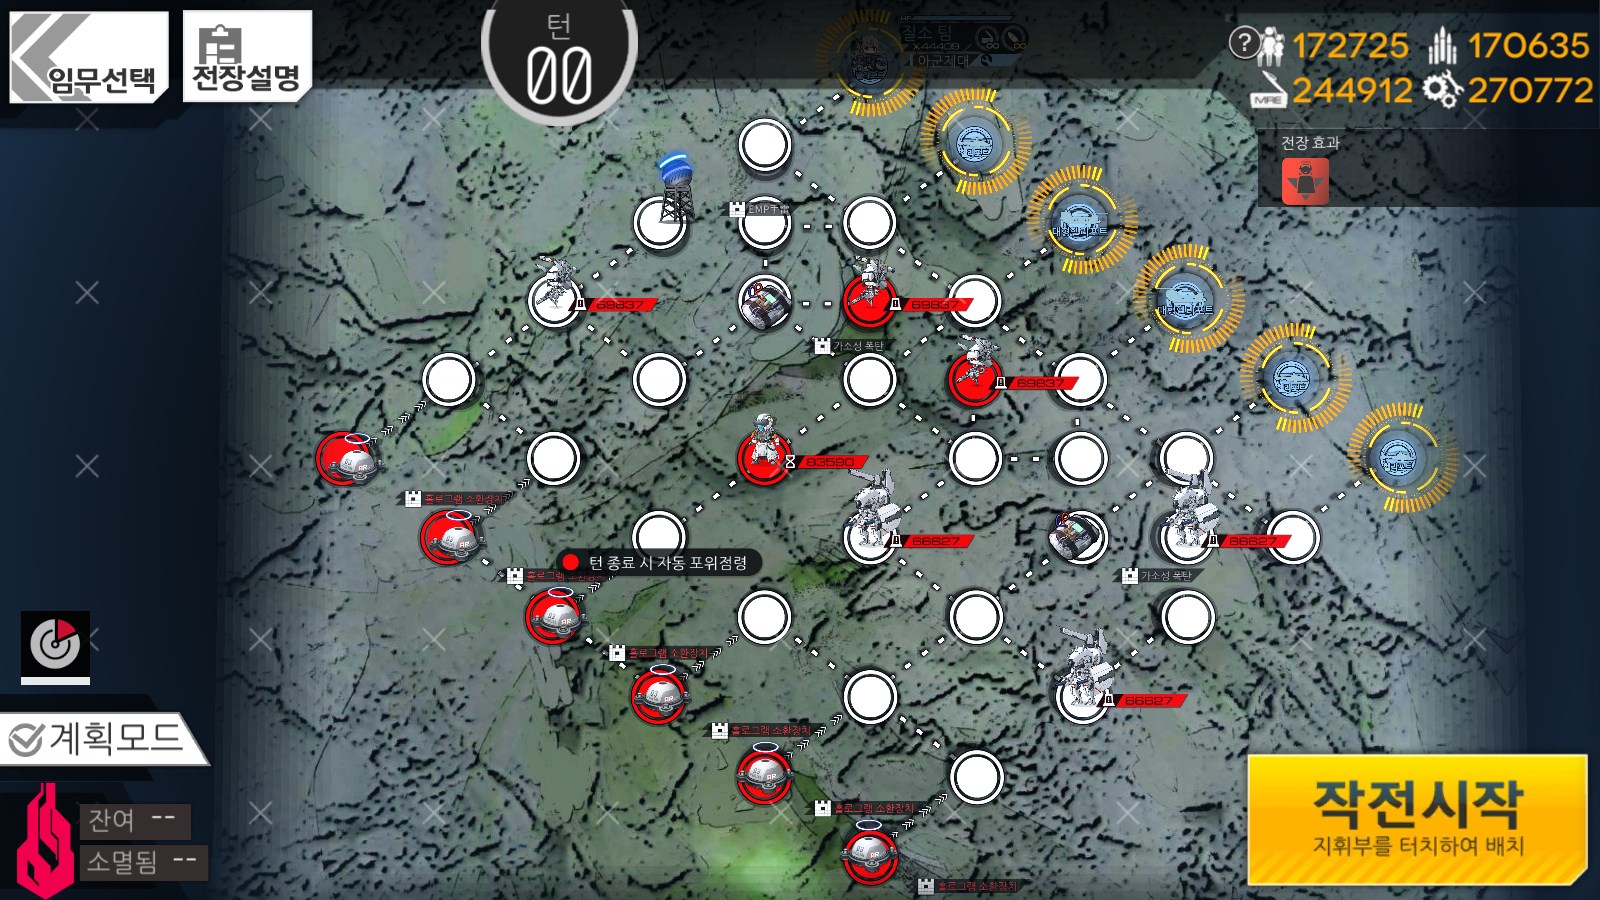
This map has a few gimmicks to start with. First up, we have a global debuff on us. You can view what it does by doing a long press and hold on it. For this map, the debuff comes from the Commander echelon in the middle of the map. Killing it will remove the debuff and apply a global buff to us, also viewable in the same way. Next, we have access to an NPC echelon that has two free movements per turn. Lastly, the teleporters we need to destroy spawn enemies that become increasingly difficult as you destroy them. Like, having one destroyed means that stronger enemies will be summoned from the remaining teleporters. This scales. So, if there's one teleporter remaining, it'll be spawning enemies that boast something around a million CE per unit. Not ideal for living. There's methods to assist us with dealing with them, but the idea is to destroy as many teleporters as you can in one turn, to limit how many obscenely strong enemies we need to fight.
With all that in mind, let us begin.
To start things off, we have way more Heliports than we can actually make use of. If we toss numbers on the Heliports, with 1 being the one on the left and 6 the one on the far right, we want to deploy our AR/SMG echelon on 2, HOC on 4, and RF/HG echelon on 6. The first order of business is to take care of the global debuff on us. As mentioned earlier, that means we need to take out the Commander. Move your AR/SMG echelon down, then left, then down again. Grab the explosive charge then move to the bottom right and engage the Commander. Once that's done, move to the left again.
Now move over to the NPC echelon. Move it to the explosive charge and pick it up. With our remaining AP, move the RF/HG echelon to the left one node and end the turn.
We're going to do the majority of the work setting up explosives on turn two here. Start off with the NPC echelon, move it to the Rodelero on the left and take it out. Continue moving one more node to the left and leave the NPC echelon there.
Switch over to the RF/HG echelon on the right. Move it to the explosive charge on the right and grab one. Head down to the cluster of three teleporters and park yourself next to the middle one. Next, move your HOC from the Heavy Heliport and move to the explosive charge. Grab one and move next to your RF/HG echelon, then swap the two.
On turn three, we're going to destroy five out of the six teleporters. Start with the NPC echelon, move it to the down right and toss the explosive charge on that teleporter. Move them back to where you started. For your AR/SMG echelon, toss the explosive on the teleporter you're next to. The RF/HG side will have a bunch of movement to do this turn. Have your HOC drop the explosive it's carrying on the teleporter it's next to. Swap with your RF/HG echelon and have it move to one of the other teleporters and toss an explosive on that. Move back and swap with your HOC again. Move up to the explosive to grab a third explosive then move back to your HOC, swap with it, and then put the last explosive you need down there.
With all the explosives more or less set up now, we can start moving the HOC over to the left side of the map. Since we've destroyed five teleporters, the enemy that comes out of the remaining one will be absolutely massive. Even with other tools, it'll still need fracture damage to kill it, so we want it over there. Thus, start moving your HOC that way with your remaining AP. Just be mindful of the remaining enemies around there.
On turn four, we want to destroy the remaining teleporter so it can't spawn too many death stacks, so this turn is mostly for that. Start off with the NPC echelon, since it has free movement. We just want them to move to the EMP sitting in the area. Now, with your AR/SMG echelon, move back to the explosive charge on the left side of the map. Grab one and head to the remaining teleporter. Toss the explosive on it and back off one node away. With the remaining AP, move your HOC closer to the left side of the map.
Turn five is mostly just cleanup at this point. Only thing left really is the death stack. Move your HOC within range of your AR/SMG echelon and let it sit there. Your RF/HG echelon should take out whatever stragglers it can. It should be low on ammo/MREs at this point, so when it's out, head back to a Heliport to resupply. After doing that, use your AP to kill what you can with it.
On turn six the death stack will be just slightly out of range of your AR/SMG echelon so you can just pass this turn. If you need to, use the AP you have to finish any cleanup you need to do.
For turn seven, make sure your HOC is in range for the fight. Have the NPC echelon grab the EMP it's on, then toss it on the death stack. Engage the death stack, and this should clear the map.
Video of me clearing this map
Author: Kazuki
Tags: Fixed Point