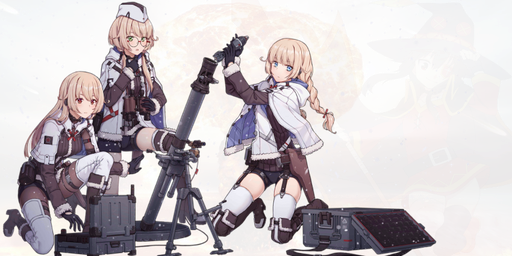
2B14 Podnos
#
When you call for fire support in an infantry section, the Mortar is your best friend. There may be heavier assets around, but even light infantry formations will probably have their own mortars organic to a unit. So too here. A properly raised 2B14 will utterly smash through any clustered enemy ranks and shred unarmored enemies completely and utterly. Pretty much "Airstrike, but better."
The downside is they suck at building destruction and are all but worthless against shields. Further, Mortars have awful armour pen (see HOC-FST page), making them less than ideal vs Hydras and the like. Still, generally regarded as the most useful HOC unless you actually need to break a force shield or a building, as you will generally be shooting at basic infantry types a whole lot still.
Regular attack
Shell impact for 1x Damage and Shield Pierce to all enemies within 2 units of impact zone.
Stats
| Stats |
| Lethality |
152 |
Pierce |
58 |
Precision |
135 |
| Reload |
160 |
Firing Range |
3 tiles |
Armour Piercing |
40 |
| Ammo cost |
600 |
Ration cost |
400 |
Grid
| Skill #1 |
| Name |
Battlefield Bombardment |
| Effect |
Launch a special shell that deals increased damage vs all targets every few seconds. Launches 1 at the start of the fight as well. |
| The big skill that lets 2B14 do her job. The major thing about this skill is it doesnt replace the shell, but rather fires an extra one on top of her normal firing cycle. As a result, the opening bombardment this team provides will generally do a huge amount of damage, as both this bad boy + the regular opening volley all impact in the first few seconds. Increase levels for more boom. |
| Skill #2 |
| Name |
Lesson in Pain |
| Effect |
Deals Bonus damage vs targets without a Force Shield |
| This skill doesn't actually work the way you think it does. Rather than making the shell check if you have a shield and provide a bonus, what it actually does is "anything without a shield takes a 2nd instance of damage equal to a % (based on level) of the unit's firepower"
Not nearly as high priority as the first skill. |
| Skill #3 |
| Name |
Obscuring Veil |
| Effect |
Chance to decrease Acc and Damage of enemies hit by mortar attacks. |
| Kind of really more an extra that got tacked on rather than what you'd mainly use it for, and it isn't great until you've invested some levels into it. Still, you're hitting someone with a chance to inflict debuffs at a similar level to some debuff HGs (12% Damage and Acc reduction at lvl10) basically for free, since you're ALSO killing them.
Work on it if you're done with the 1st skill and want some bonuses for your 2B14. |
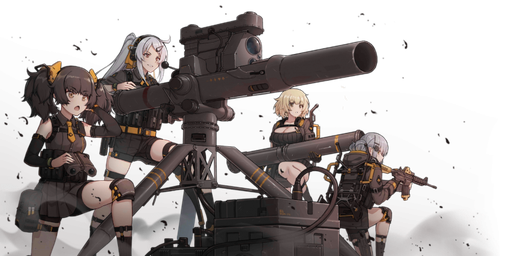
AGS-30
#
The sort of middle of the road starter with damage and piercing between the Mortar and TOW teams. Unfortunately not nearly as good as either at their roles, due to the damage being split evenly across the 3 grenades.
It tries to make up for it with extremely rapid fire in comparison, and the 3-shot burst looks REALLY cool, making it seem like a continuous stream of grenades. However, it lacks in sheer burst damage, which is unfortunately what you probably want your HOC for.
While it can deal with minor shields, most of those are easy to shoot through anyway, while they don't perform amazingly against heavier ones. To make things worse, FST attacks focus on the CURRENT HIGHEST ENEMY SHIELD, this means multiple heavy shields absolutely fuck them over, spreading the damage around but not really breaking any. It's a better than nothing solution, rather than a great one.
What it does excel at however, is smashing buildings. ATW teams have way more power to smash those, but AGLs have a range of 3, meaning you don't have to move as much (saving AP for your combat teams) and can be placed further back, closer to helipads for easy reload.
Also, the tetris tiles actually allow you to cap out ALL 4 stats, rather than just 3.
Unlike the other FSTs, all 3 members are named by the artist.
Regular attack
Fire a 3-shot spread that does 1/3rd Damage/Pierce per grenade.
Stats
| Stats |
| Lethality |
78 |
Pierce |
144 |
Precision |
198 |
| Reload |
386 |
Firing Range |
3 tiles |
Armour Piercing |
80 |
| Ammo cost |
400 |
Ration cost |
600 |
Grid
| Skill #1 |
| Name |
Super Grenade |
| Effect |
Every 4th Volley deals an increased amount of normal (not shield break) damage. |
| Actually scales very slowly, with every level only increasing damage by 6%. While it adds up, AGL also does not have great FP to begin with, and the fact the damage is split between the 3 grenades means you probably wont notice it until higher levels. |
| Skill #2 |
| Name |
Experience Highlight |
| Effect |
Increase Precision by a percentage that increases with skill level. |
| If you only want the shield break, this doesn't matter at all as shield break damage is unaffected by accuracy (it always hits). If you're after the regular damage, eh, maybe. |
| Skill #3 |
| Name |
AP Concussion |
| Effect |
Attacks have a 40% chance to inflict a shieldbreak DoT for a % of AGS-30's pierce stat for 6 seconds. |
| This is what makes her actually useful at all for shield break right now, except it's fairly unreliable and you usually want shields to be gone yesterday rather than "across a period of several seconds", and that's if it even lands.
The good news however, is the chance is calculated per grenade, which means a 3-shot volley, if it all lands close to each other, has a 78.4% chance to inflict the debuff.
That's all the good news you're going to get, since it's still less than what a TOW missile will do. If your TOW is busy elsewhere though, this makes them somewhat viable in a pinch at higher levels. It's still pretty unreliable though. |
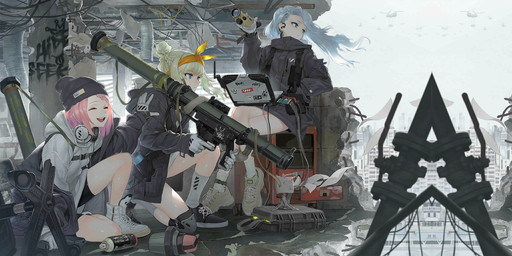
AT-4
#
A bit more of a generalist than TOW, with worse breaking power but more useful vs generic enemies, packing a number of useful side effects. The enemies she is ideal against have of course, not been implemented yet, so right now her main use is "I need another ATW somewhere for shield break."
Save TOW for the big boys who absolutely need shields caved in ASAP, and AT4 for less demanding threats or when you want some side utility.
Regular attack
Rocket hits for 1.5x damage and 1x piercing on target, and 0.5x damage and 1x piercing in a small radius around the target. The damage is affected by accuracy, but the shieldbreak effect is not.
Stats
| Stats |
| Lethality |
113 |
Pierce |
261 |
Precision |
284 |
| Reload |
134 |
Firing Range |
2 tiles |
Armour Piercing |
400 |
| Ammo cost |
500 |
Ration cost |
500 |
Grid
| Skill #1 |
| Name |
Impact Sputter |
| Effect |
Every Rocket has a chance (50% at lvl1, 100% at lvl10) to inflict extra damage (+100% at lvl1, +200% at lvl10) to enemies within a 2.5 radius if the attack was directed at a target with a Distortion Barrier. |
| It's actually a not insignificant damage boost, but only works if you have enemies with shielding in the way, As soon as the shields go down, you lose it. This seems kind of useless for now, but there are later enemies with REGENERATING shields, and this makes AT4 quite powerful against them. |
| Skill #2 |
| Name |
Blinding Flash |
| Effect |
Enemies in the blast range of AT4's rockets receive an accuracy debuff (10% at lvl1, 20% at lvl10) that lasts for several seconds (4 at lvl1, 6 at lvl10). Does not stack. |
| The Acc reduction lands regardless of whether or not the enemy is actually damaged, as long as theyre in the area of effect of AT4's rockets. It can help improve your overall stability vs certain enemies, but the main enemies you're liable to use AT4 on actually have auto-hit attacks (Doppelsoldner missiles, Rodolero lasers etc.). That said, it gives her some utility vs non-shielded enemies. |
| Skill #3 |
| Name |
Violent Burn |
| Effect |
Rocket Impacts leave a patch of burning flame for several seconds (3 at lvl1, 5 at lvl10) inflicting a percentage (10% at lvl1, 20% at lvl10) of AT4's lethality stat in burn damage every 0.5s |
| This actually deals more than you might expect, as a fully completed AT4 has 436 lethality stat, which thus hits for 87 damage a tick every half second. As a molotov type effect, it also does it per link. There's also certain enemies down the line that rely on mass respawning swarms of low individual HP enemies, and AT4 rocks them, but vs the typical enemies you use her against, it wont matter much. As with skill 2, this is mainly a side utility thing. |
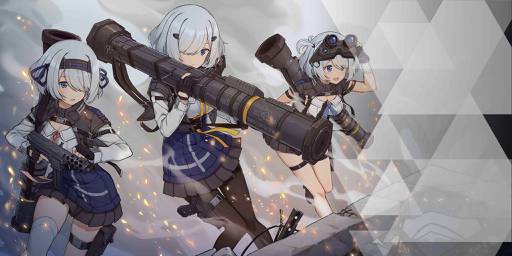
BGM-71 TOW
#
You get her for free at 1 star by existing and clearing Ch8 normal (which you need for HOCs anyway) and then trying the whole HOC room thing. She's your bread and butter HOC for general work, because this team kills the bajeezus out of shields with her immensely high shield pierce. Because shield pierce is also used for damaging buildings, they can also smash map buildings with extreme ease.
However, their ability to actually kill units (rather than shieldbreak them) is fairly meh, but that's generally not the big thing you want HOCs for most of the time anyway. If you only have the resources to raise 1 HOC, this is the one you want.
Regular attack
Rocket hits for 1.5x damage and 1x piercing on target, and 0.5x damage and 1x piercing in a small radius around the target. The damage is affected by accuracy, but the shieldbreak effect is not.
Stats
| Stats |
| Lethality |
155 |
Pierce |
402 |
Precision |
349 |
| Reload |
83 |
Firing Range |
1-2 tiles |
Armour Piercing |
400 |
| Ammo cost |
500 |
Ration cost |
500 |
Grid
| Skill #1 |
| Name |
Charged Missile |
| Effect |
The first missile, and every 2 missiles after that, is enhanced to deal extra damage and shield pierce. |
| Given that the primary job of this HOC is busting through shields, prioritise this. This really is pretty basic. Because it works from the first shot, it's helpful even if you only need to fire once. |
| Skill #2 |
| Name |
Reload Procedure |
| Effect |
Stacking reload speed increase every shot. The boost is multiplicative. |
| It doesn't seem like much, but the TOW is so slow compared to other HOCs that this makes a world of difference if you're engaging multiple targets. The skill itself is simple and self-explanatory. |
| Skill #3 |
| Name |
Thrill of the Hunt |
| Effect |
Stacking damage increase with every successive shot on a target. |
| Not as useful as it seems, because it does NOT affect the ability of the unit to bust through shields. More annoyingly, even with the 2nd skill, her RoF is pretty slow still, and FST mechanics prioritise the highest shield, so it'll only really get use on bosses and targets with super high HP. Work on this after you've gotten others. |
Mk153
#
She has a REAAAAAAAAALLY weird shape for her Tetris grid which actually makes her annoying to properly set up, but her anti-shield capability is comparable to AT4 and she has a range of three nodes. Her regular firepower is pretty decent (helps that all her skills focus on it), and while not comparable to a mortar, she's much better at blowing up buildings, plus the whole three-range thing. Hell, KR server loved her during the Mirror Stage ranking and it was literally impossible to have a 5 star Mk153 then. Seriously, "Three-range Anti-Tank Weapon" is that ridiculous for ranking purposes.
Regular attack
Rocket hits for 1.5x damage and 1x piercing on target, and 0.5x damage and 1x piercing in a small radius around the target. The damage is affected by accuracy, but the shield break effect is not.
Stats
| Stats |
| Lethality |
107 |
Pierce |
224 |
Precision |
233 |
| Reload |
107 |
Firing Range |
3 tiles |
Armour Piercing |
400 |
| Ammo cost |
500 |
Ration cost |
500 |
Grid
| Skill #1 |
| Name |
Assault Shell |
| Effect |
When attacking a new target, fire an additional round dealing 100% of a normal attack's damage and fracture damage. |
| Assault Shell lets you quickly shatter shields or do initial damage to new targets. Either this or Pinpoint should be your initial investment. |
| Skill #2 |
| Name |
Pinpointing Signal |
| Effect |
Fire a tracer shot prior to each normal attack, dealing 1x damage to the target and debuffing its Evasion by 20% for six seconds. Stacks up to three times. If the tracer shot lands, the additional area damage of a normal shot will have perfect accuracy. |
| Pinpointing Signal is a stupid name and not actually what it originally said (It's closer to "confirm point of impact"). Regardless, a useful skill if you're hitting things you want to reduce the evasion of. Honestly Assault Shell is handier, but YMMV. |
| Skill #3 |
| Name |
Follow-Up Suppression |
| Effect |
When dealing fracture damage to a target, inflict a 15% damage amplification on the target for eight seconds. If an attack from this unit breaks a distortion barrier, stun the target for two seconds and deal an additional 0.8x damage to the target. |
| Follow-up Suppression is awkward because it doesn't stack. It also doesn't affect targets who don't have distortion shields. The stun would be nicer if most things that had distortion barriers weren't also immune to stun. |