


Cat and Mouse III EX
Objective: Capture enemy Command Center.
Recommended Echelon(s): RF/HG (x2), Dummy (x4)
Also Required For This Strategy: 3 range HOC with 200 pierce MINIMUM. AGS is a good pick for this.
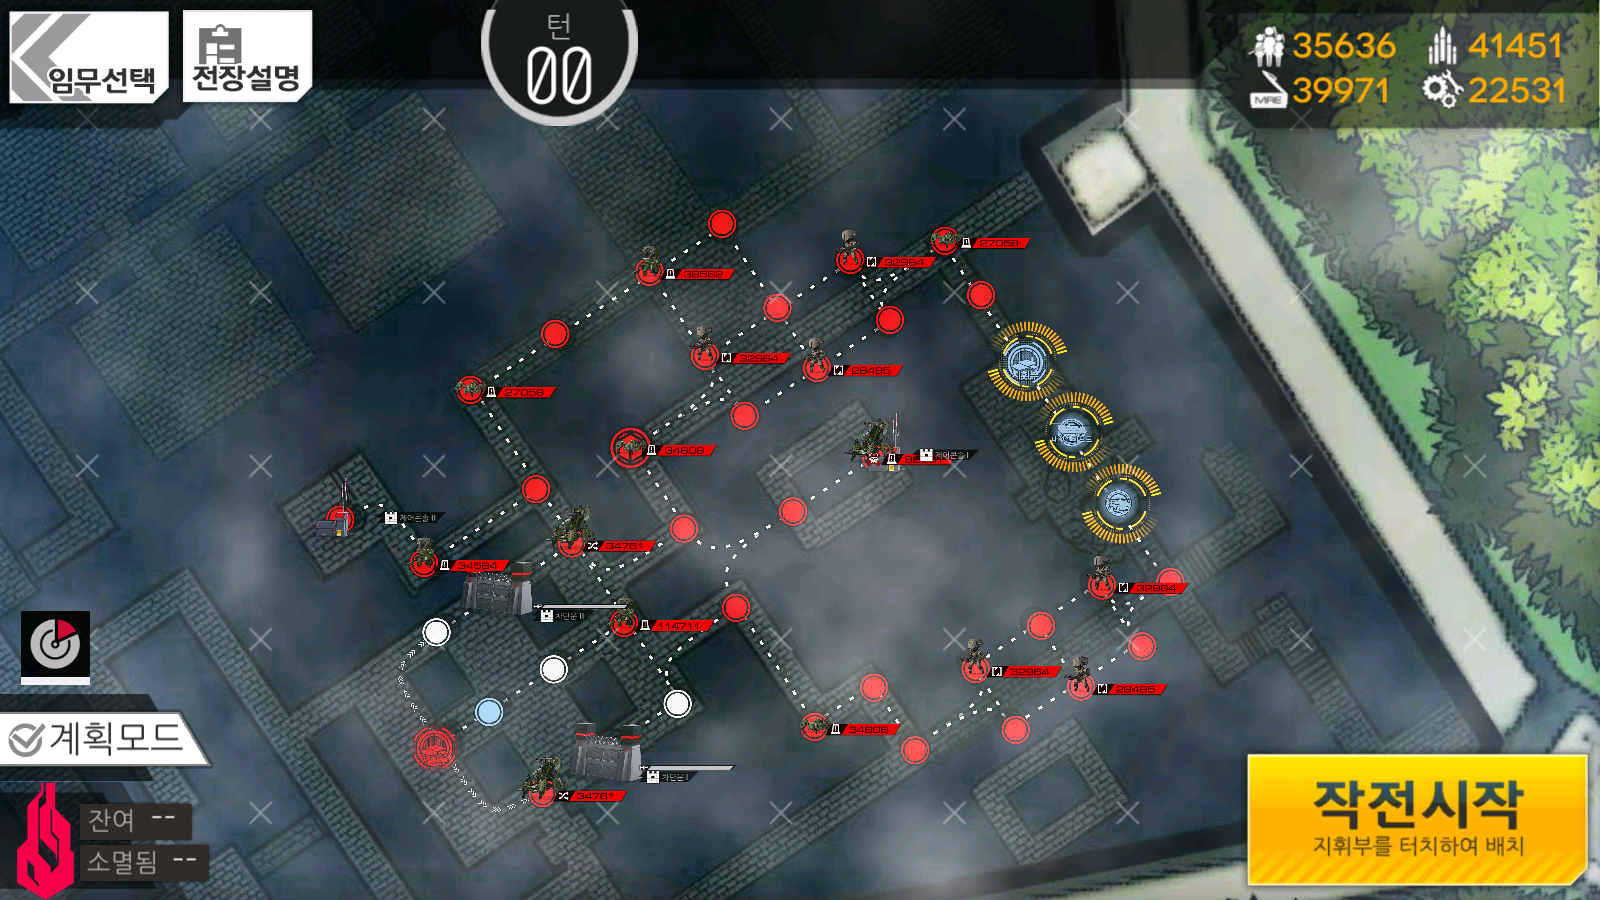
This map has a bunch of consoles and stuff guarding those consoles, and they're just all over the map, and it's a bad time. So we're going to completely skip all of that and just blast the gates that the consoles would open. Much simpler. However, to pull this off, we need a billion AP and a decent HOC to blast the doors open. I will say that I've asked quite a few people, and 200 pierce on AGS isn't too much to ask for if you're at all ready for clearing EX.
Most of turns 1~3 is building AP and posturing all of your combat echelons and HOC outside of the alert radius of the Hydra death stack. You don't even need to worry about things taking your Command Center either, nothing moves towards it.
Turns 1~3 can be summed up as: clear out the bottom of the map with the three patrolling Cyclopses and the Dactyl, deploy your four dummies, and move your important units here:
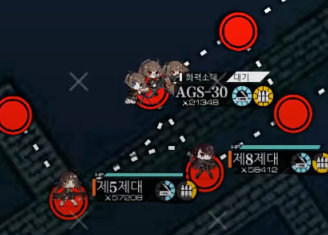
This is just outside of the Hydra's aggro radius. The order of all that doesn't really matter, just get it done. The only key thing you need to make sure of is that your HOC is fully supplied with rations/ammo as you form up at the picture's location. If you don't have your HOC's rations filled, you'll likely not be able to destroy both of the gates. If you wanted a decent order to go with, killing all of the enemies, deploying all your dummies, and then resupplying your HOC and forming up is a good plan.
Once you've formed up and are ready to move on, we can finish the map up. The first move is to get an echelon near the gate on the left side of the map. Since we don't have enough AP to bust the gate open as well, we'll just have one echelon make the trip past the Hydra death stack and move the rest of our units up near the other gate. I like to move next to the Resupply Node; since it's safe from both of the big stacks of enemies you don't want to fuck with, you can also resupply there if needed, but it is optional. Just be sure to keep your other units safe while moving up to the other gate.
On the next turn, you can blast the gates open and start moving in. You may need two turns to capture the two nodes, but it shouldn't cause any issues. If it does take multiple, be sure to keep your HOC safe. When you've captured both nodes, the enemy Command Center will be encircled next turn and you'll clear the map.
Video of me clearing this map
Author: Kazuki
Tags: Isomer