


Chapter 11-3 S Rank Guide
PLEASE NOTE: The map position of the enemies will not be accurate, it is just there to show you where to move! If you need more visual aid, check the video for each clear which follows the same steps.
Requirements: ARSMG echelon (2), RFSG/RFHG echelon (2), dummy echelon (2), friend echelon (2)
(The dummy echelons are only needed if you get bad RNG)
Key to letters I may use in the images: AR = ARSMG echelon (yours), RF = RFSG/RFHG echelon (yours), D = Dummy echelon (yours), F = Friend echelon
So there's some RNG in this map and you might have to be a bit flexible, but it should be doable regardless of RNG. If you get bad RNG, there is a section after the normal two-turn method that hopefully will cover this for you. If not, I don't really know what to suggest other than to try it again, cause I couldn't even get the worst case RNG to happen when testing, and I've tried to cover that here. You want two echelons with rifles and shotguns in front in case you get Uhlan spawns. You can use regular RFHG echelons instead, but I wouldn't recommend it. I use one in the video as an example, and it gets wrecked fairly hard. You could probably mitigate this with fairies if you absolutely had to, but...if you have the shotguns, I would highly recommend bringing them. Your movements may not be exactly the same, as I just have a general pattern here for the worst possible enemy movement, but it should be obvious by turn two which way things are going/if you will have enough AP to finish it out that turn.
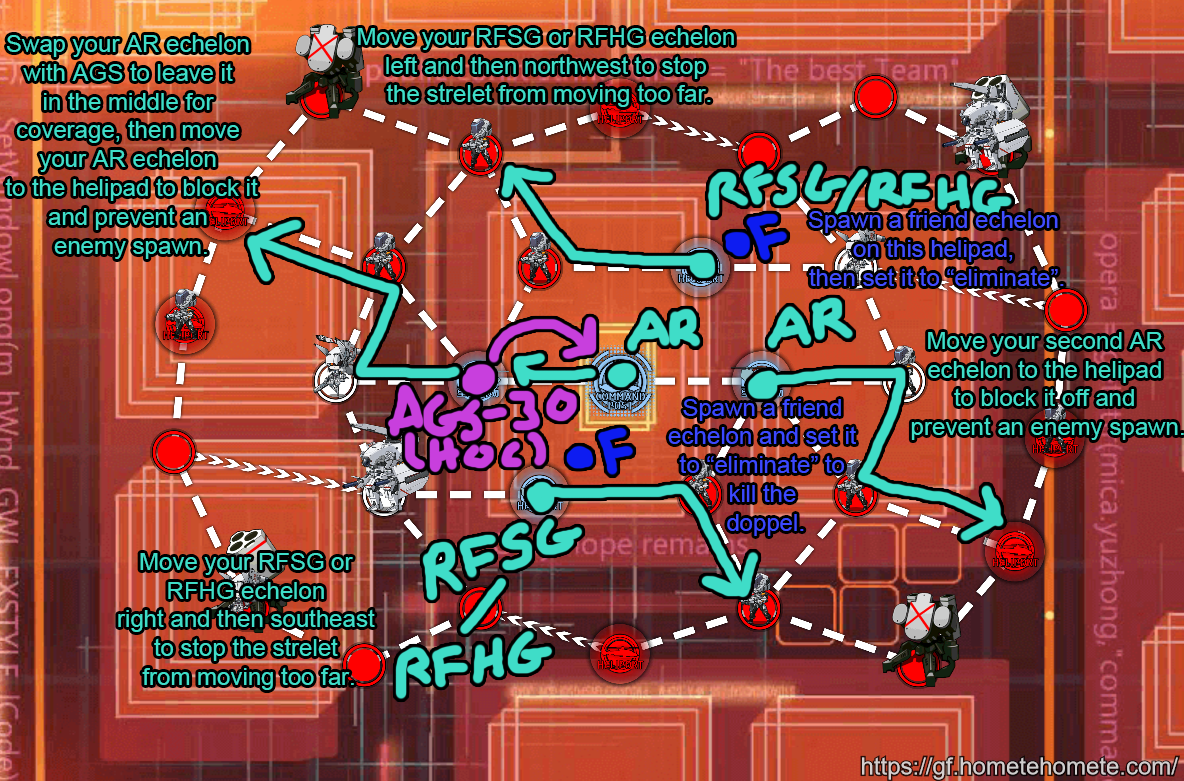
Turn 1
The diagram is a bit cluttered, but to be fair, this map is more than a bit cluttered. Basically, all your AP is going to be used blocking off helipads or minimizing enemy movement/killing as many of the enemies already on the map as possible. In order to get a low turn count, we want to avoid enemies moving into the upper left and lower right corners. Why those specifically, you may ask? Well, it just creates too much variance in potential enemy movements to be able to cover it with a decent success rate in two turns. Also, keep in mind that the mortar enemies are stationary on this map for future turns.
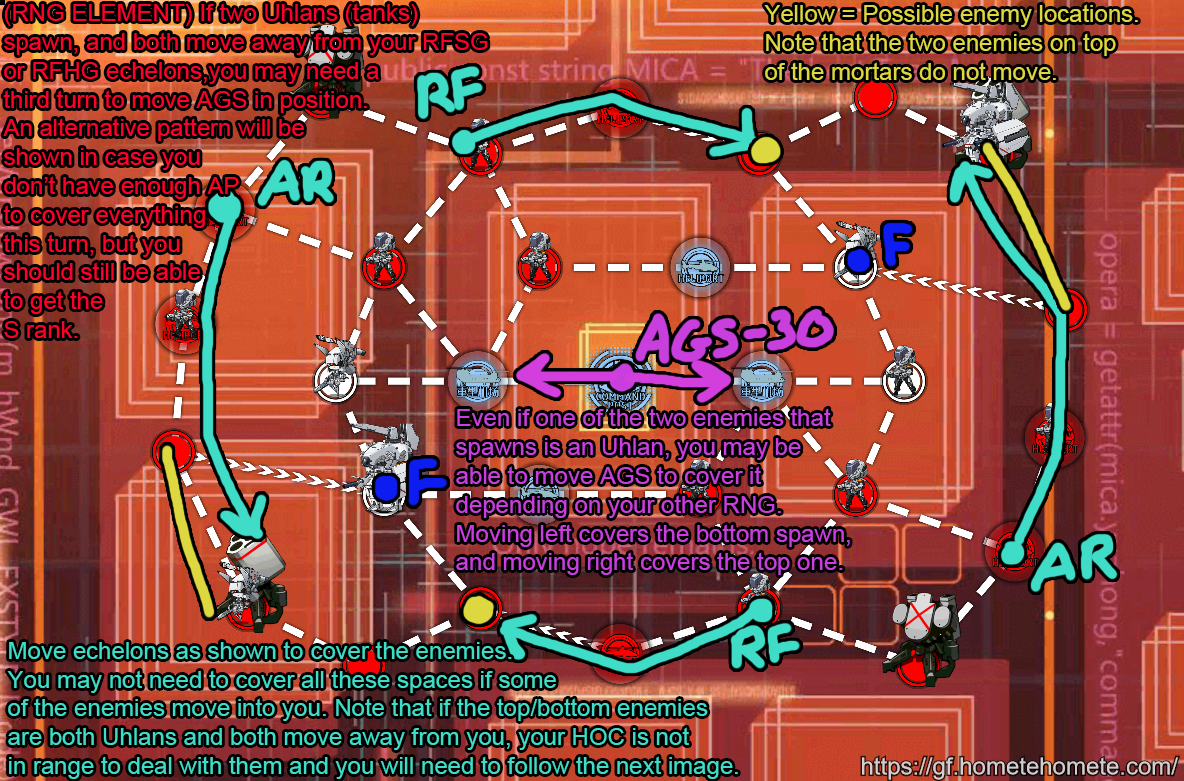
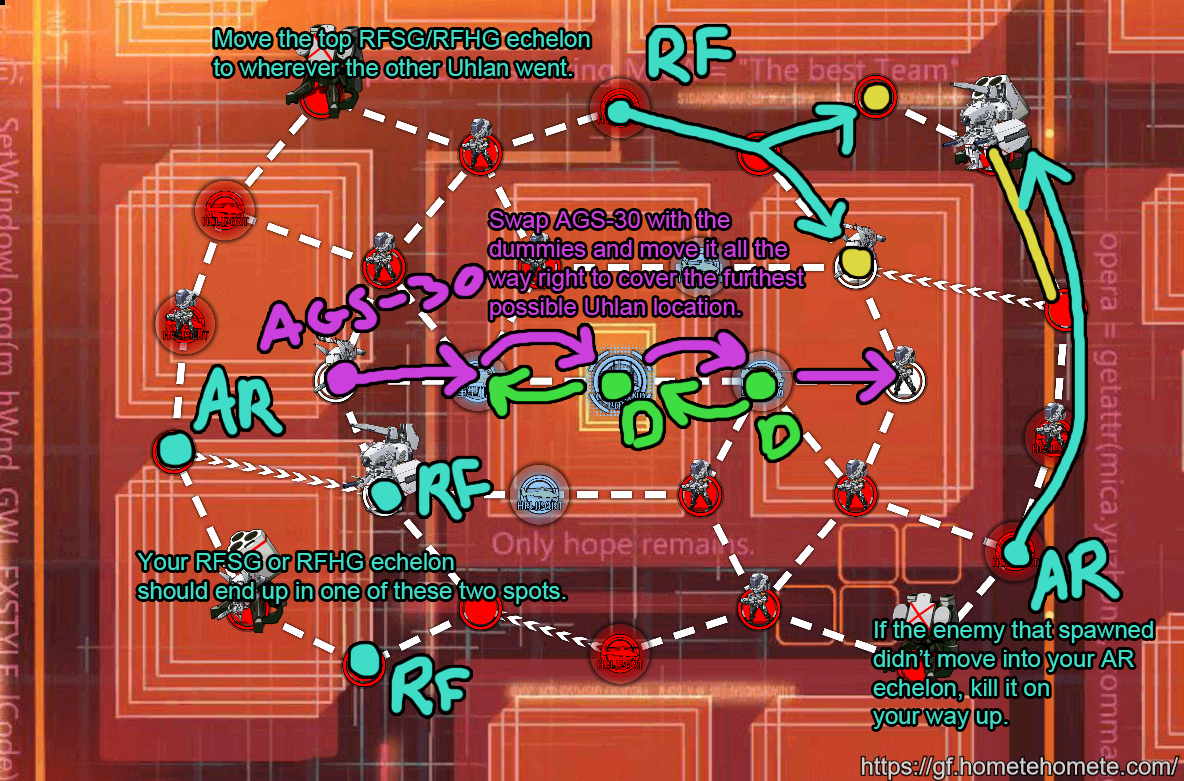
Turn 2
So hopefully, everything can be cleaned up this turn. The only problem is if Uhlans spawn and move away, since you need a HOC for them. If that does happen and you can't move the HOC to cover everything and have enough AP to kill everything, then move on to the section below instead of doing these moves. Also, even if you do have the AP, your movements will likely be different, since you probably won't have to cover the worst possible enemy movement RNG. Just adjust movements accordingly so everything dies (if it's possible this turn).
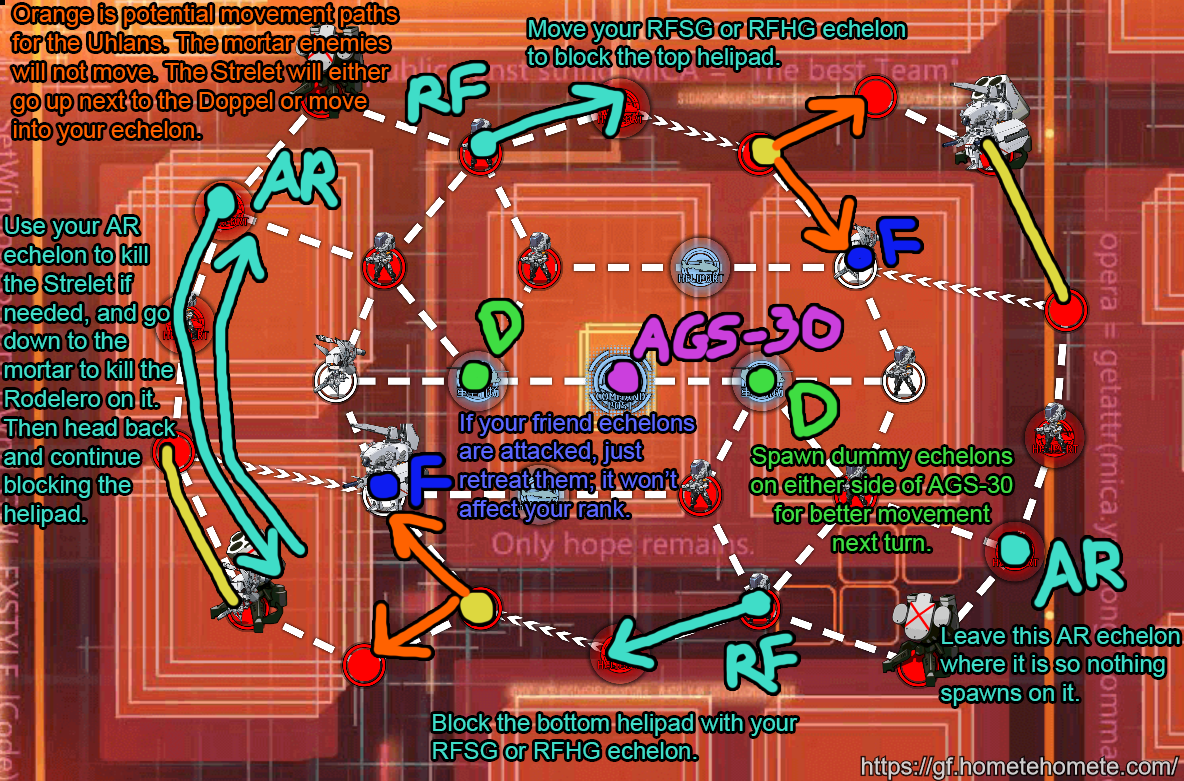
Turn 2 (Bad RNG)
If you get both Uhlans and they move away, or you don't have the AP to finish up turn two, you should be able to follow these movements instead. The enemies spawn from every helipad, so we want to block as many as we can. We only really have the AP to sweep the left or right side if we still want to block four helipads, so use your AR echelon to kill the enemies on the left side and then head back to the helipad. The other echelons just move onto the helipad next to them or stay put. Don't forget to spawn two dummy echelons at the end to maximize movement next turn.
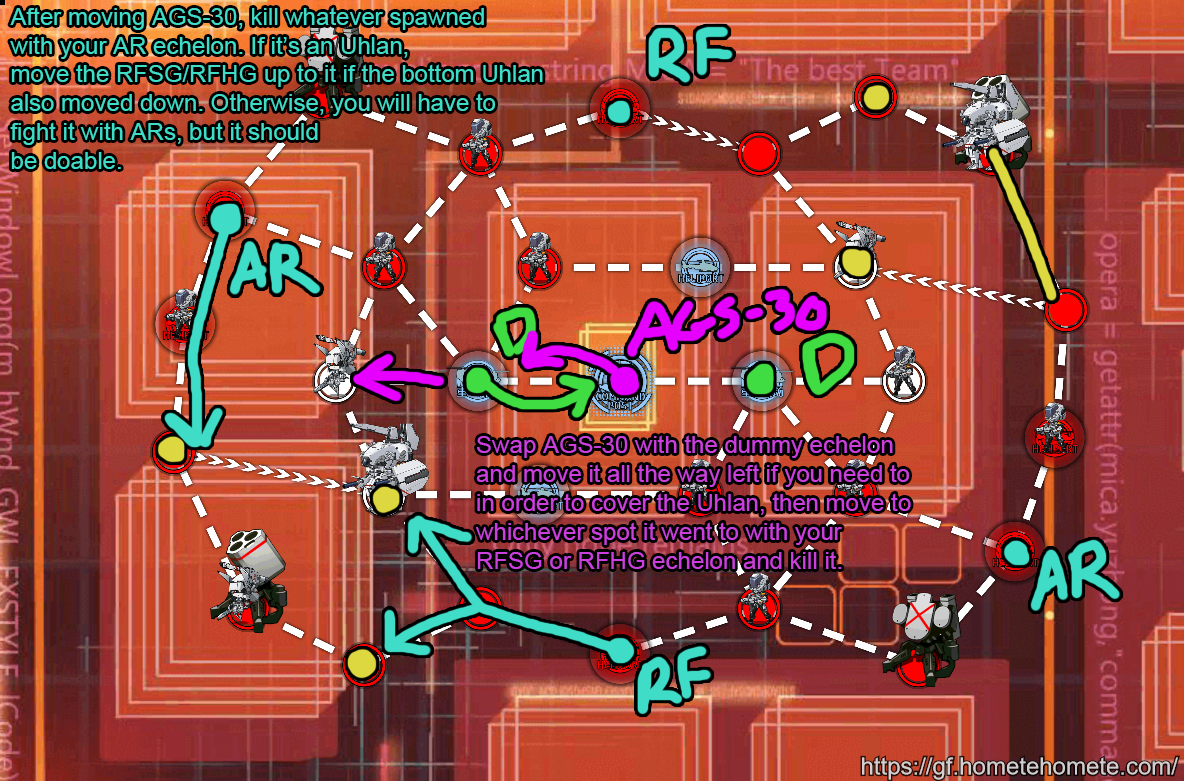
Turn 3 (Bad RNG)
Video of this clear (2 turn version)
Author: Miyako
Tags: S Rank