


Lonely Island I EX/UX
Objectives: First, hit the boss with one of the turrets, then eliminate the boss and activate all other turrets.
Failure Condition: Boss reaches enemy Command Center
Recommended Echelon(s): AR/SMG (x2), Dummy with Parachute fairy, HOC (2B14/M2 recommended)
Echelon Limit: 6 Griffon Echelons (HOCs count towards this)
Because every enemy on the map has random AI, we can't really have a very concrete guide, so I'll be giving some general strategy here. Also, just like I mentioned in Old Rain EX/UX, you may want to lower the difficulty and obtain QBZ-191 from later in the event if you're struggling with enemies here. This map also has the gimmick of having enemies get stronger as turns go by, so we want to wrap this map up fairly fast.
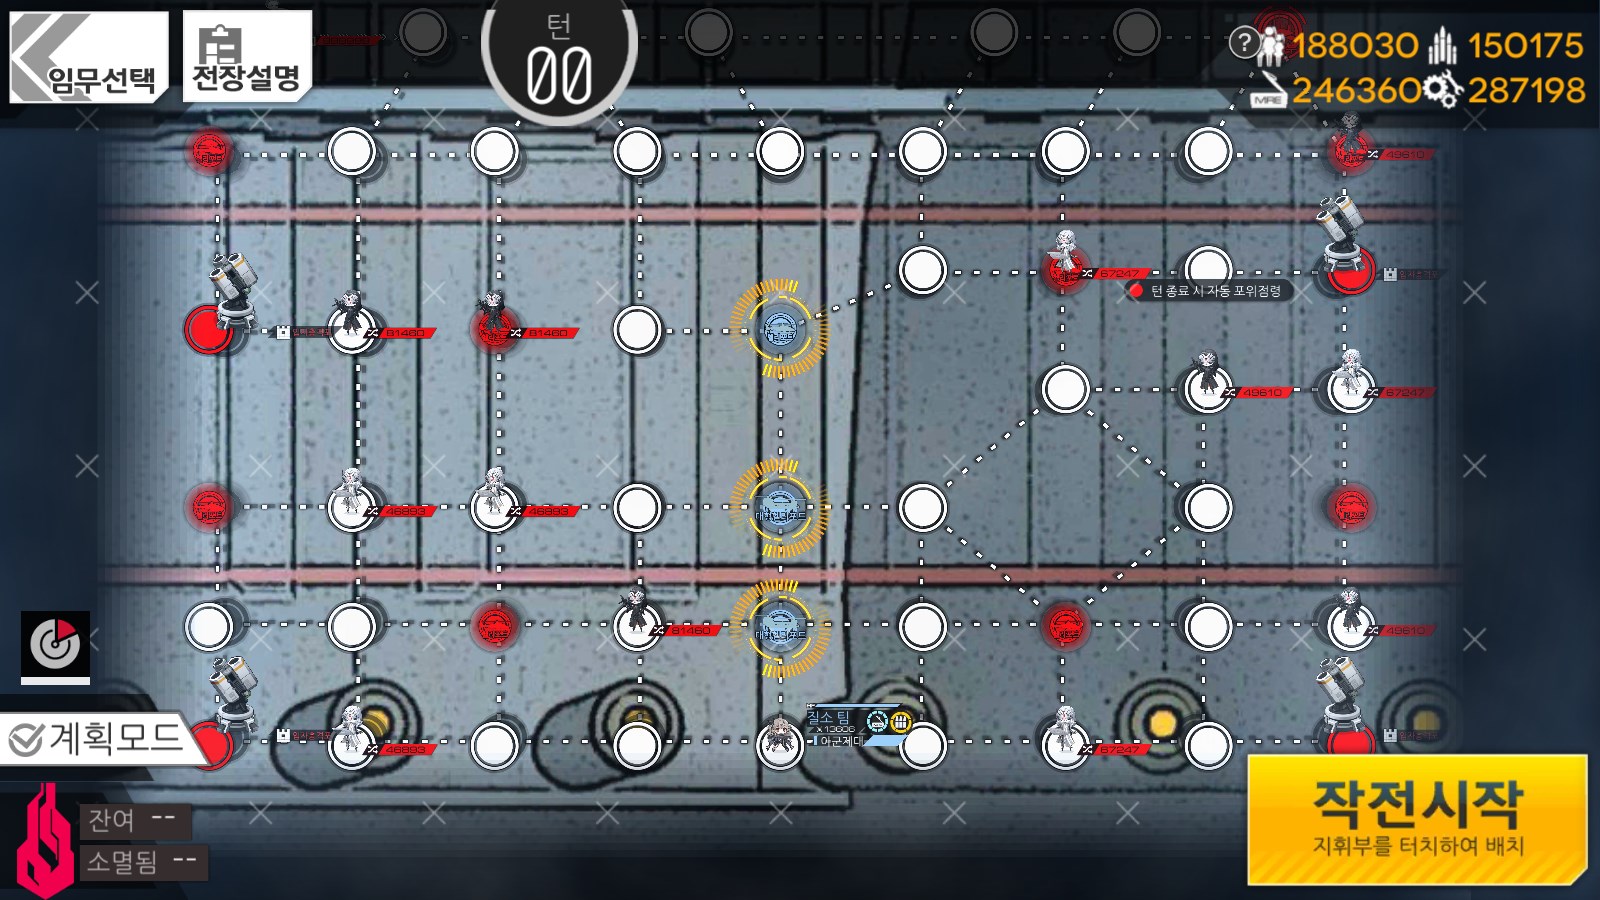
To start with, we have a bunch of Heliports in the middle of the map, primed and ready for all of the enemies to possibly assault us. With that in mind, we need to keep something nearby to make sure they're not taken. This is why we want at least two AR echelons for this. Those will also be handy for moving out and taking other Heliports and expanding our reach.
For turn one, I can give some more precise choices here. First up, we want to trigger the first objective. Ideally since none of the Heliports across the map are active, we want to use a dummy echelon to parachute over to one of the turrets. I'd recommend deploying said dummy echelon on the bottom Heavy Heliport and parachuting to the top left of the map. The left side of the map feels a bit more restrictive, so I prefer going there first. I'd also deploy a HOC and an AR echelon at the start as well.
After you've started, parachute over to the turret at the top left and use it on the boss. This triggers the second part of the objectives. Deploy another AR echelon where your dummy echelon was. You have two choices with this AR echelon: move it two nodes to the left, or two nodes to the right. I preferred moving to the right, but either works. Going right risks your Heavy Heliport being captured, but I wanted to get the right side done ASAP, which is also why I would recommend moving your first AR echelon to the Heliport on the right as well. That should be all your AP.
Turn two is where things start getting more freeform. I'd recommend focusing on getting to the right side turrets, as you can also make use of them to delete enemies off the map. If you've chosen to go right at this point with your second AR echelon, going to the bottom right turret is what you'd want to do. Use it and then retreat that echelon. We want some defense in the middle, so redeploy it there. It can also pivot to going to the bottom left turret. That pivot is also a recommended plan for me. Going to the left Heliport option from turn one gives you a nice spot to repair if needed before pushing to the bottom left turret.
Turn three is ideally when you'd push to the bottom left turret. If you can, make use of the other turrets on the right to delete some of the harder enemies in your way. Once you've used that turret, you can now down the boss. That part is pretty simple.
You can redeploy or even deploy another echelon at the middle Heliports and easily get to the boss at this point. HOC support can help with this fight, but it's not particularly needed. Once you've engaged the boss and gotten her to 75% HP, you'll clear the map.
Video of me clearing this map
Author: Kazuki
Tags: Fixed Point