


mega EX

Objective: Use a certain console with Dandelion
Failure Condition: Dandelion, AR team, or 404 is defeated
Recommended Echelon(s): AR/SMG, HOC (Rec: AT4)
Echelon Limit: 6
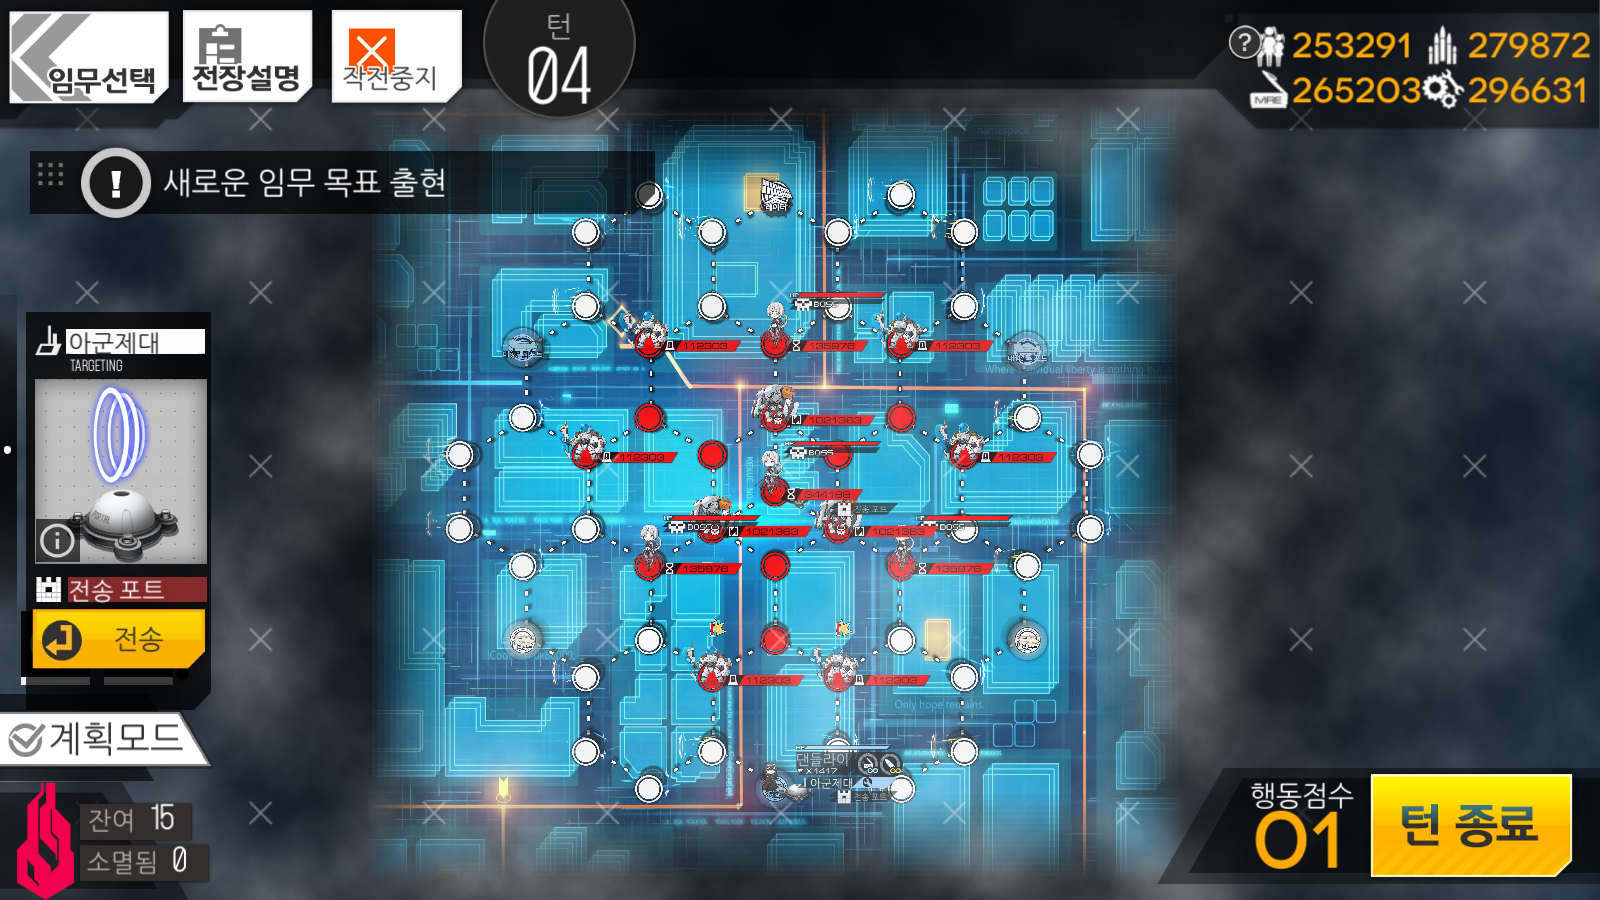
A little bit of a two-parter of a map. The first section has you control a few NPC echelons to open the path to the second bit. The second part is when you have to kill multiple Brahmeds (or, well, just one, but doing just one is...) For now, we'll take things piecemeal. starting with the first part.
This first part is fairly simple. For now, move 404 up to the right, then up. Move AR team up to the left, then up. End the turn.
On turn two, 404 up to the right, then up to the console. Move AR team up to the left then up to the console. End the turn.
On turn three, we now move Dandelion up to the left, then up to the right, then up twice. Use both consoles. This will give Dandelion a prompt to open all of the gates. Use it and end the turn.
On turn four, dodge the Cherubs and go up to the portal with Dandelion. Use it. This will open up the second layer of the map and changes our objective to killing Brahmed. You'll want to take Dandelion back through the portal she came through. End turn here.
On turn five, we can move Dandelion through now. On the second layer now, move Dandelion to the left, then left again. This moves her over to the right of the map. Move her down to the Heliport. Time to get some real echelons out. At the top right Heavy Heliport, deploy an AR/SMG echelon and move it down. Deploy a HOC on the same Heavy Heliport. End the turn.
On turn six, we'll start engaging the weaker Brahmeds. Every time you kill one of them, the main one in the middle of the map gets weaker. For this walkthrough, I kill the main one after killing two of the weaker Brahmeds. You can kill more if you so wish, but I don't think her fight is particularly difficult such that it warrants killing more than two. In fact, you could probably kill her after one dies. Or you could try zero. I never bothered since you're liable to kill at LEAST one while doing other bits of the map.
Anyway, bring your AR echelon down to the Brahmed on the bottom right section of the map. You can bring HOC support if you feel like it, but it's not needed. When you're done, move back up to the Heavy Heliport. You want HOC support for the Hannibal fight, so bring your HOC up as well if you brought it down. With whatever remaining AP you have, move Dandelion up from her Heliport toward your echelon/HOC. Ultimately you want her to go up to the Radar Tower at the top of the map, so keep her moving in that direction.
On turn seven, we want to engage the top Brahmed. Do so. After she's dead, move Dandelion up to where the Brahmed was, then swap with your combat echelon. Move to the left, then up, then onto the Radar Tower. You should get a prompt on the side to spawn in an EMP tower thing. This will give you an EMP tower that you can snag EMPs from once per turn. Have Dandelion take an EMP and end the turn.
On turn eight, move Dandelion left, down, then right. EMP the Gladiator death stack and move Dandelion back to the EMP. Grab another EMP. I'd use this time to move your combat echelon back to the Heavy Heliport and repair. You're going to be fighting the actual Brahmed now.
On turn nine, there should be a gap in the death stacks that you can move through. Move Dandelion to it. If you need HOC support, you'll likely need an additional turn to do this, so keep that in mind. But if you don't need it, you should have just enough AP to move Dandelion to Brahmed, EMP her, then move your combat echelon to Brahmed so you can engage her. After winning, I'd retreat your echelon, since the patrolling death stacks will move onto the portal if you leave it there.
On turn ten, you should be able to move Dandelion through another gap in the death stacks onto the portal. Do so, and then activate the portal. This takes you the final layer of the map. Move up to the console and use it to clear the event.
Video of me clearing this map
Author: Kazuki
Tags: Poincare Recurrence