


Chapter 5 Night
Intro#
Chapter 5 is where things start picking up in difficulty for night battles. In light of EN getting this soon, I thought it'd be a good idea to go over the maps quickly to give people an idea of what they'll be facing.
I won't be giving an indepth explanation for my formations and such for this. Just what would be recommended to use. As a general warning, you'll want 3 or more capable echelons for this chapter. There's a slightly tight turn limit in (some/one) of the map(s) which makes the extra AP pretty valuable.
Do note that I'll be using whatever I have on hand. I won't do any strategies that you couldn't pull off in EN, however. You can replicate these strategies with other dolls.
5-1#
General Notes:
Zero armoured units, not a good idea to bring RFs or MGs to this.
5 turn limit.
Ideally you'll take 2 AR/SMG and 1 dummy echelon to this.
Enemies in battle spawn pretty close to your units. Makes kiting a bit less effective.
Strategy:
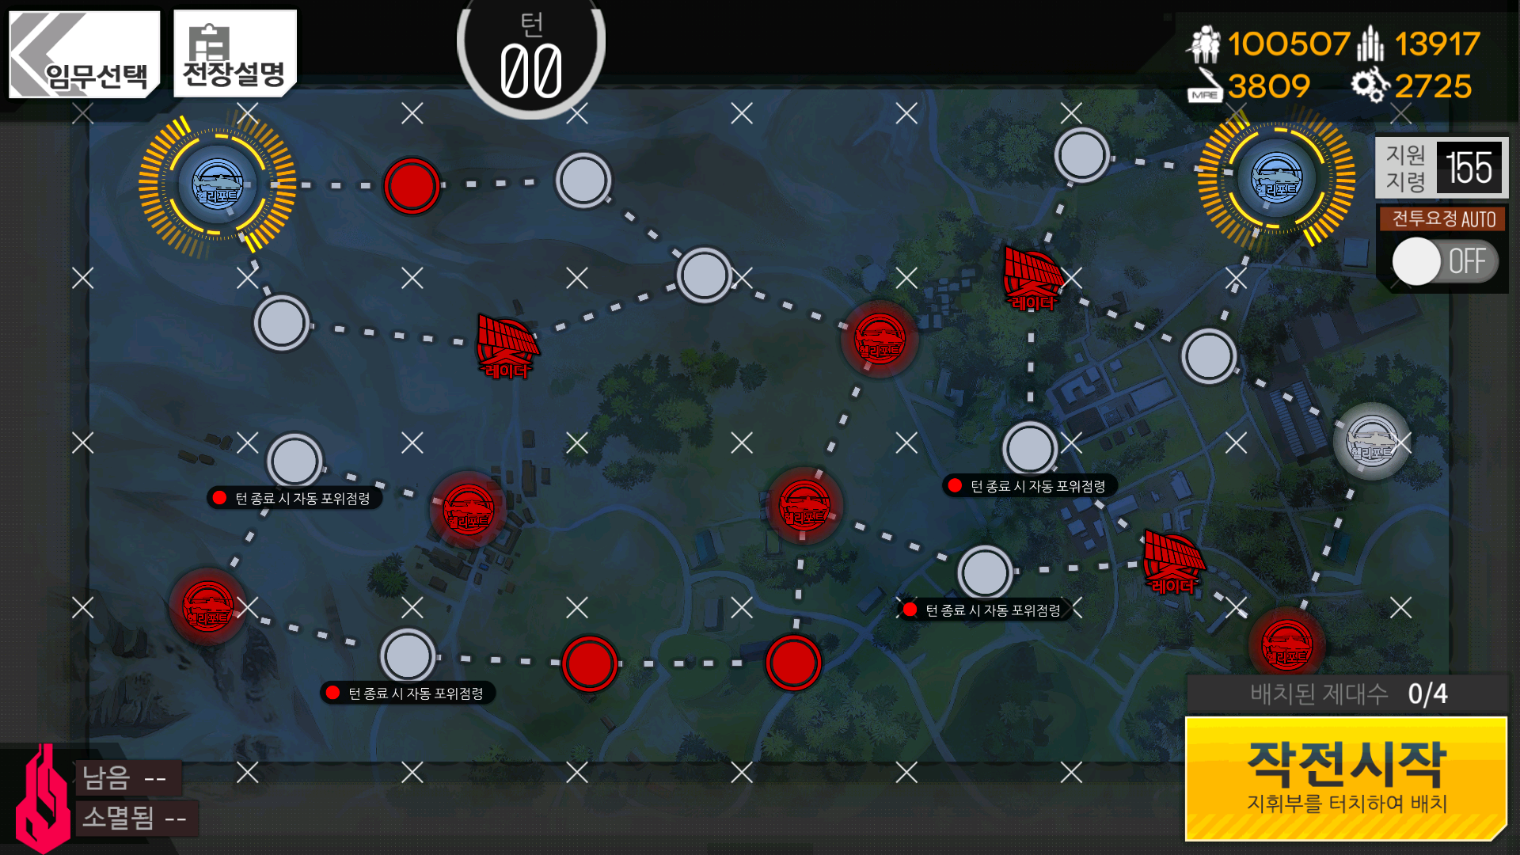
The sangvis taken nodes are the general locations for all the enemies. Keep this in mind as the map progresses.
A good method for clearing this would be to just clear out the few units near your starting helipads then moving towards the the bottom left of the map. The way I found to work well is to take the radar tower near your right helipad, while taking out the enemy next to your left helipad. With that, you should have 1 AP to summon your dummy echelon which you can use to swap around next turn if needed.
Turn two should be spent clearing out the bottom right side of the map, while taking any heliports over there if possible. This may take another turn to fully finish, but it should be fine. Any remaining AP should be used to get your left side echelon towards the chokepoint that goes south.
The rest of the turns is just cleanup. You'll have to go through the bottom left side of the map as well, so keep that in mind.
Video:
5-2#
General Notes:
All armoured units.
2 turn limit.
Ideally you'll want to take at least two echelons with armour penetration capabilities.
It's recommended to field as many echelons as you can due to the turn limit being quite tight.
Strategy:
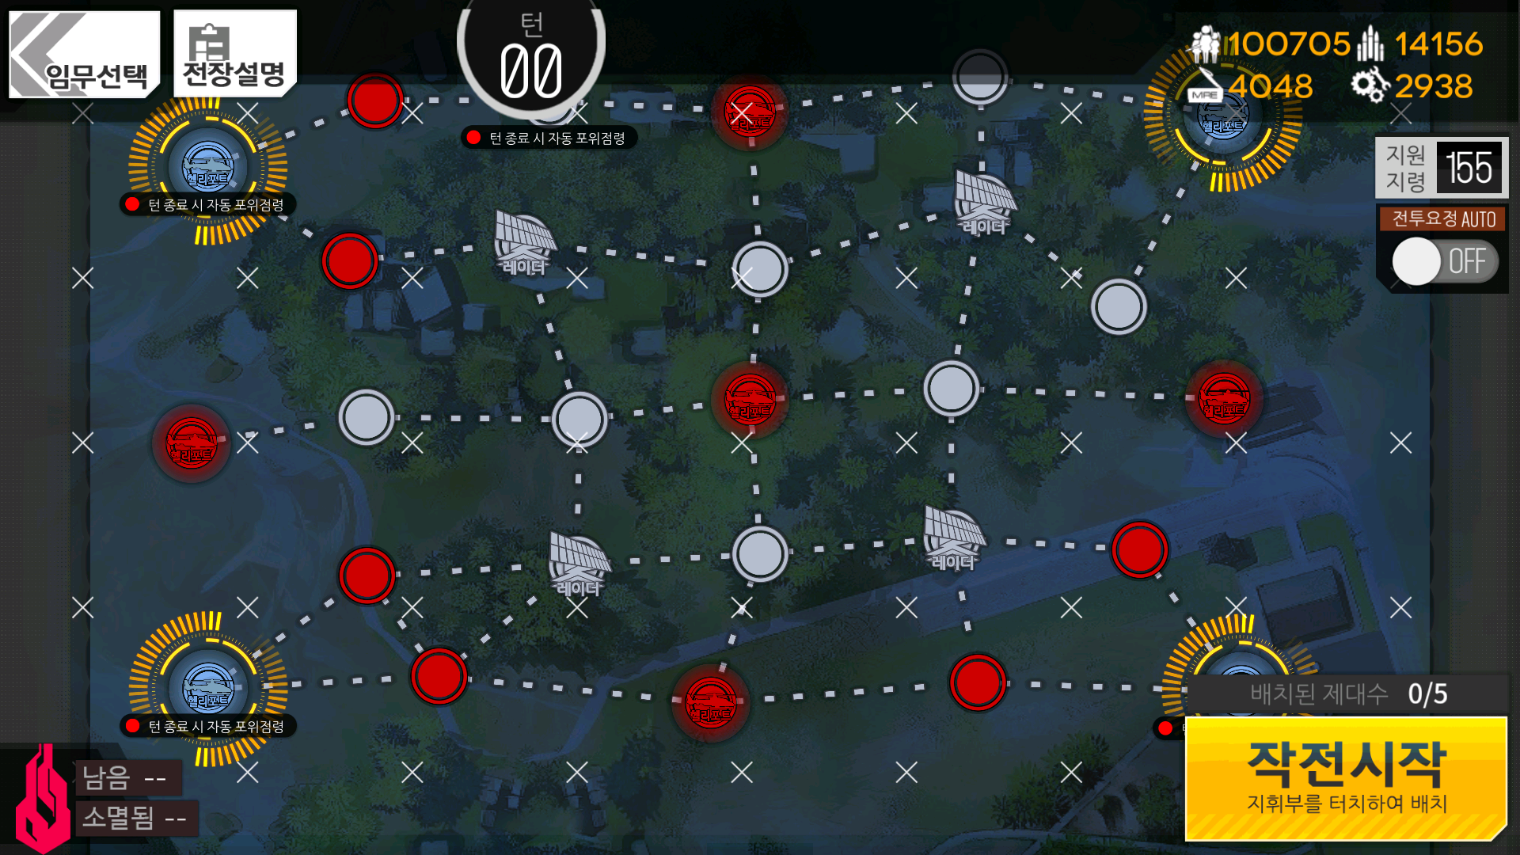
Most of the units on the map are either around your heliports or in the middle line of the map. The enemies around your helipads are pretty weak, while the harder, more heavily armoured units are in the middle. The south end of the map also has armoured dinergates (tarantulas), which I'd recommend not using RFs against. They're fast and come in large enough packs that they may get a hit off on your units due to sheer numbers. They have low HP so strong ARs shouldn't have a problem dealing with them.
As this is a very low turn count map, each move you make counts. You'll want to clear out all of the enemies around your helipads and then move towards the middle to clear the enemies out there. It's recommended to use a friend echelon here, it doesn't matter how strong it is. Using it for a swap is key, especially on the top left or bottom right corners. I'd recommend using it up top left so you have a better position for that echelon going into turn 2.
You're likely to have the sides of the middle for where the last few enemies are. If you're out of AP to clear out the last few enemies, you can still get a clear by having your echelons block them in; they'll most likely move into your echelon to fight.
Video:
5-3#
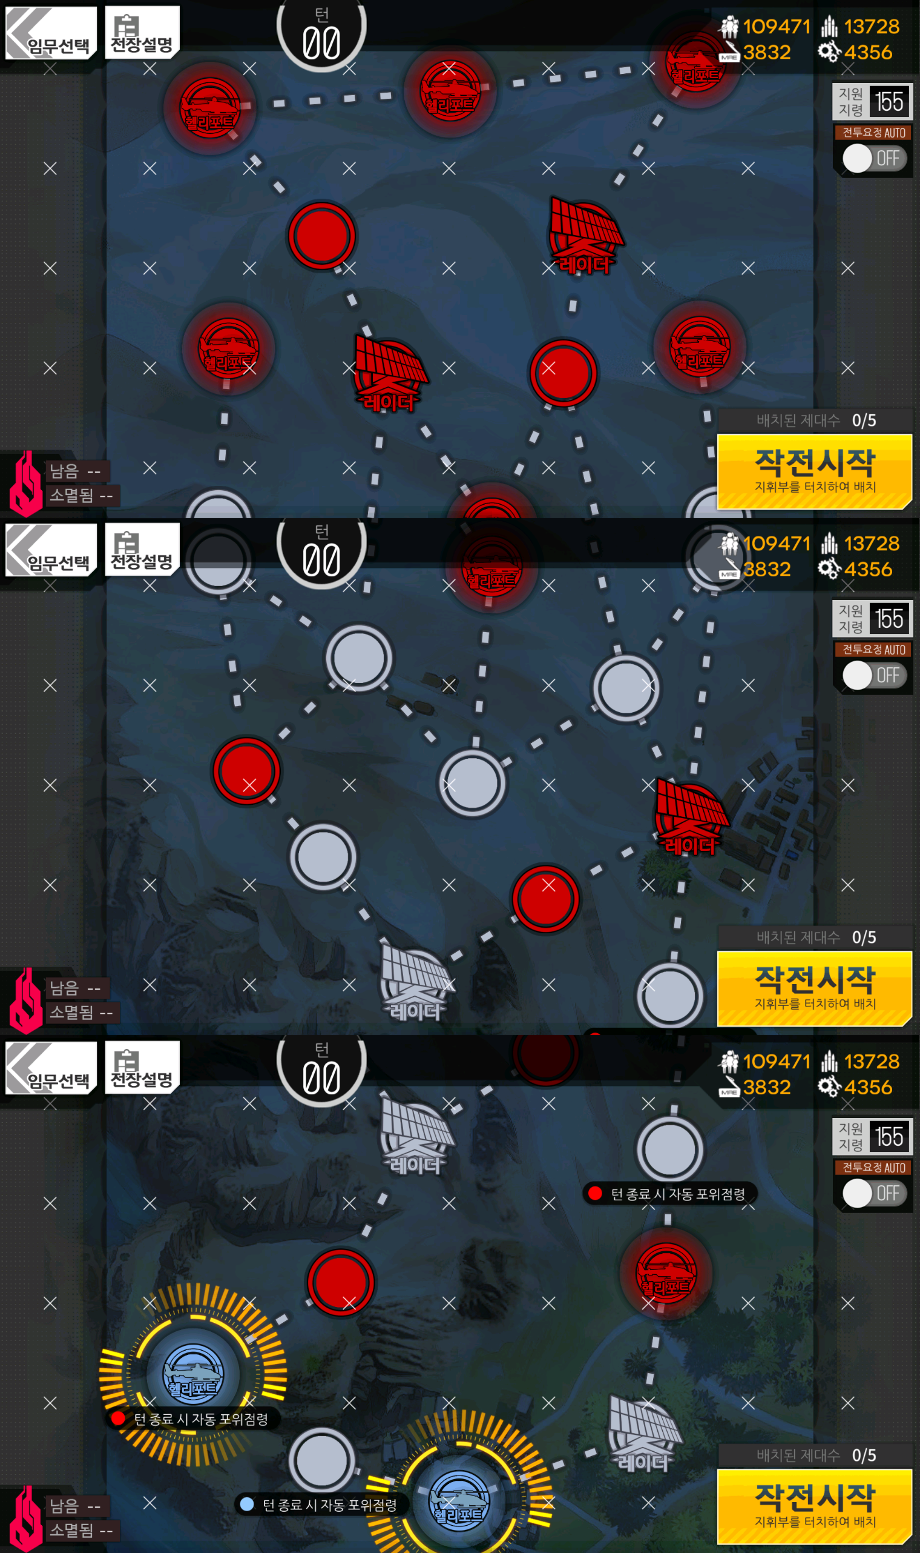
(Picture is three peices stitched together cause the map's dumb. There's some overlap between pictures.)
General Notes:
Zero armoured units. Bad idea to take MGs/RFs here.
Enemies have especially high evade for some reason. Taking an acc boosting HG may be helpful.
5 turn limit.
You can get by with two AR/SMG echelons plus a dummy echelon.
Strategy:
The idea for this map is pretty clear cut. You clear up the map slowly while taking heliports as needed to keep your supplies going as well as to increase your AP.
Your first turn should be spent controlling the bottom of the map. Taking the heliport on the right and making sure your left heliport doesn't get encircled is a good idea. From there, it's just a matter of pushing towards the top of the map. You'll be doing the majority of the fighting in the middle, so taking the heliport there is a decent option. It really depends on enemy movements.
The main trouble you'll have is most likely going to be from the Jaeger echelons and the Scout echelons at the top of the map. The Jaegers come in a large force along with Guards, while the Scouts come with a Jaeger entourage.
Video:
5-4#
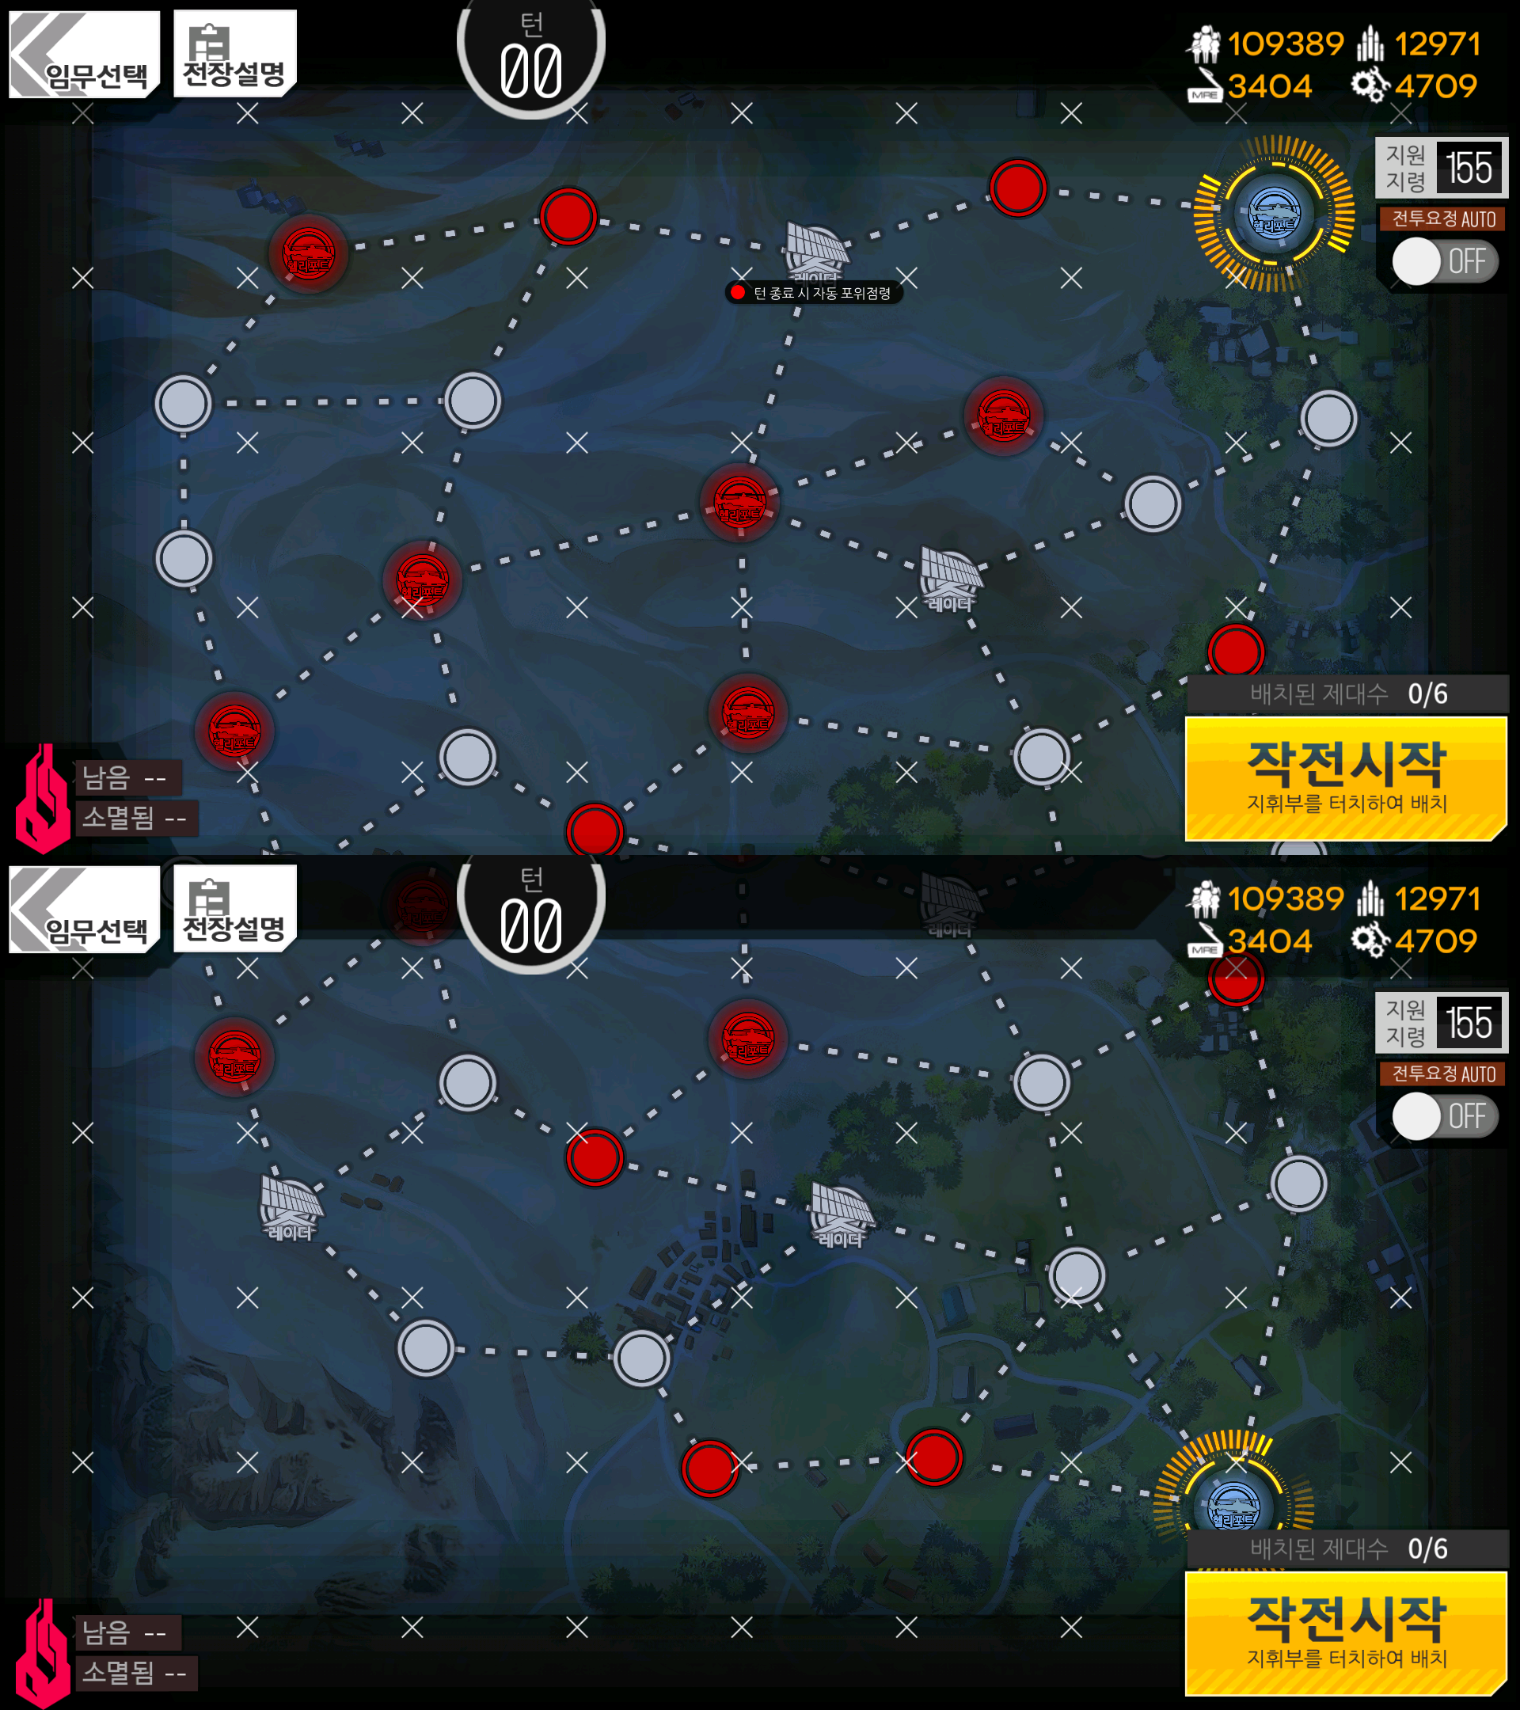
(Like 5-3, this picture is stitched together. There's some overlap.)
General Notes:
All armoured units.
6 turn limit.
2 Manticore mini bosses. Both have a chance of dropping the Hayha chip.
Don't absolutely need armour penenetration, but it's very helpful.
Strategy:
This map's pretty big, but you can clear the map fairly quickly if you're using 3 or more echelons. Most of the fighting will be in the center and top left of the map.
The main strategy for this map comes down to taking one of the central heliports and flying in your other echelons from that to clear the rest of the map. Make it a priority on turn 1 to take one of those heliports. Ideally you'll use the echelon from the upper heliport to do so. The lower heliport has an enemy right next to it, so it's best to take that out to ensure you don't lose the heliport. From that point on, it's just search and destroy.
You should use an AR echelon to take out the Manticores since they have an evade stat.
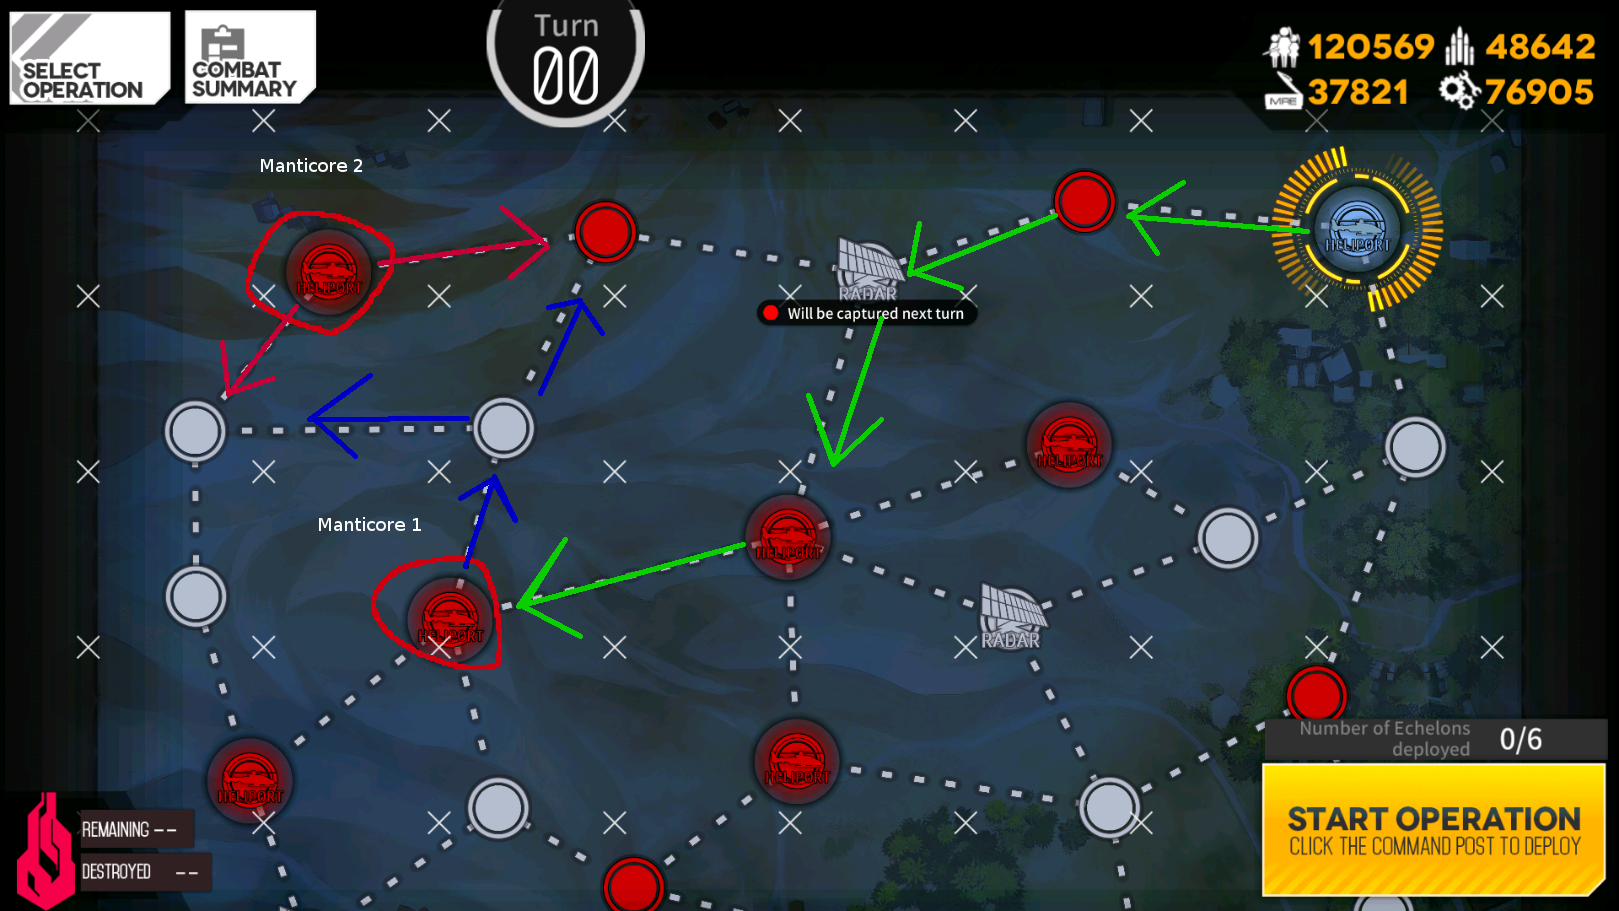
Farming Strategy:
You want to start with your main echelon in the top right of the map and a dummy on the bottom right. The idea is to rush down to one of the manticore spawns and kill one. Turn 2, kill the other manticore. The manticore has two possible locations it could be, but it's easy to see which it went to if you pay attention to the nodes near the top left most heliport. If no new nodes get taken by sangvis, it went to the right of the heliport. If the node south of the heliport gets taken, the manticore is there. After that, if your bottom right heliport didn't get taken, you can move to a helipad to extract, or you can terminate the mission right then and there. If you'd like to preserve resources, you can take a turn 3 to capture a heliport if needed, or to just summon up a dummy echelon to extract with.
Do note that your dummy echelon can be attacked by enemies, but you can just withdraw from that battle. It doesn't affect getting to the manticore.
Just use whatever can actually get the run done.
Green is turn 1 route. Blue is turn 2, you have to see where the manticore goes before moving to that panel.
Video of me doing this route:
Video:
Author: Kazuki
Tags: Chapter Overview Night Battle