


Chapter 9 Night
Intro#
I hope you like using your brain, 'cause the night missions in chapter 9 will make you use it. This is content from Post-Isomer, and it really shows with the enemy compositions as well as the map objectives.
The main thing to know about these stages is that there's mixed-stat enemies like Manticores that sport armour as well as evade. Combined with the escorts they usually come with that have mid-tier (~110) armour, you may have some issues with them. Then to add to that, most of the maps have a mix of enemy types, some with high evasion units like Scouts, some are entirely armoured. It can be a real annoying task on figuring out what to bring to solve a lot of the maps.
9-1n#
Objective: Elimination
Echelon Limit: 3
Turn Limit: 4
Recommended Echelon(s): AR/SMG (x2), RF/HG
Note: The AR/SMG echelons need to be sufficiently strong to punch through 110-ish armour Aegises and then kill Manticores. If you can't, use some RFs and hope they don't miss. Or just use Grapecano and laugh.
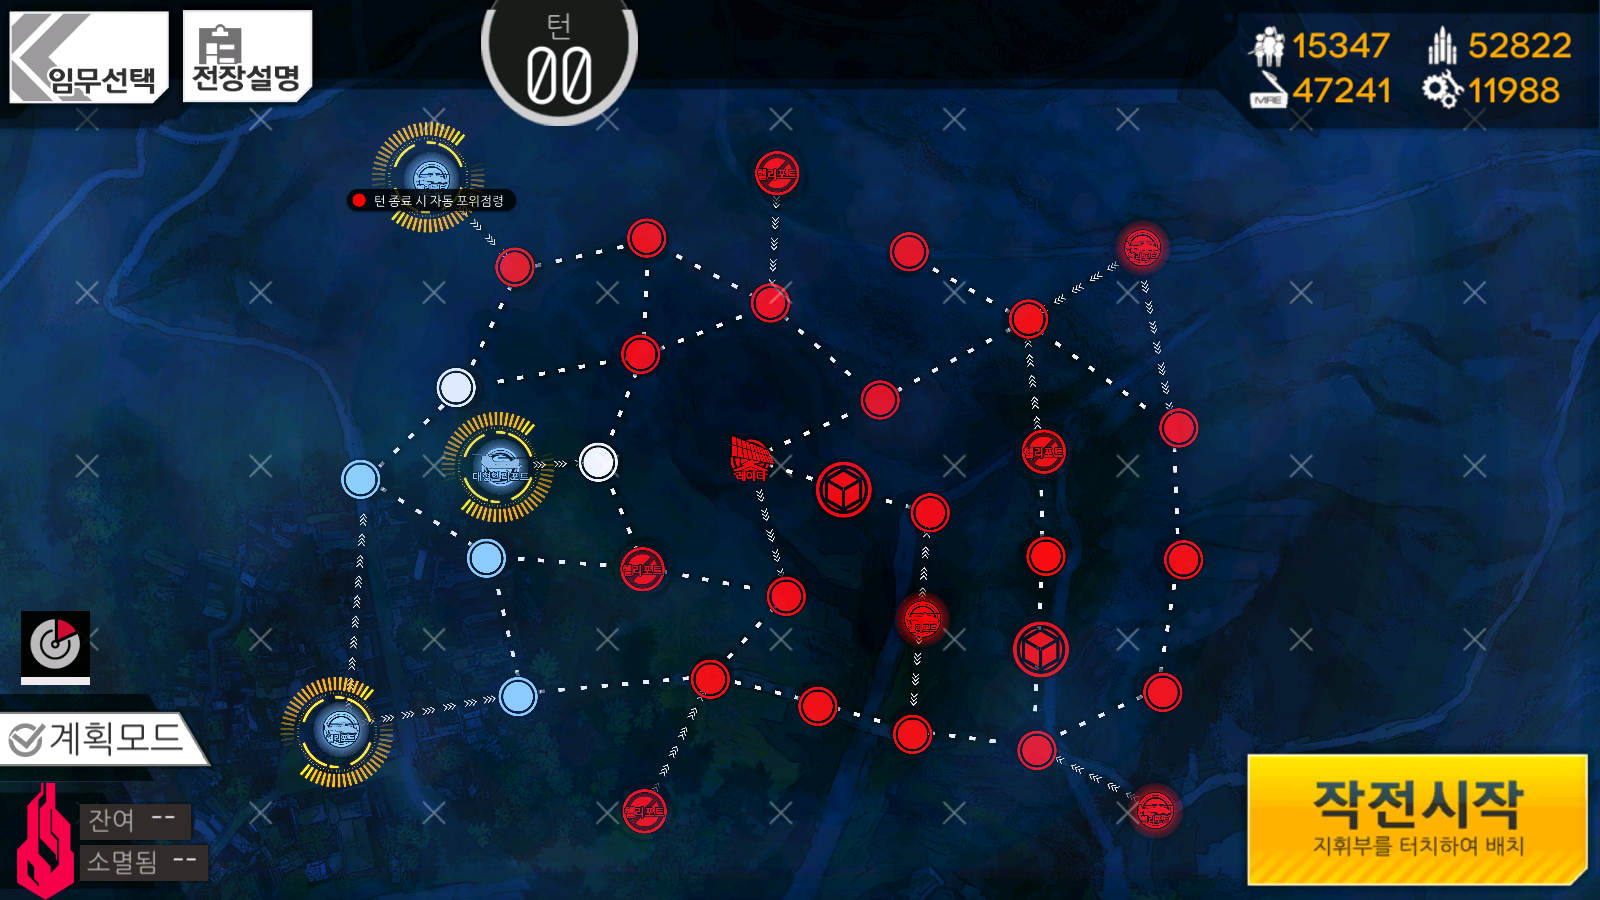
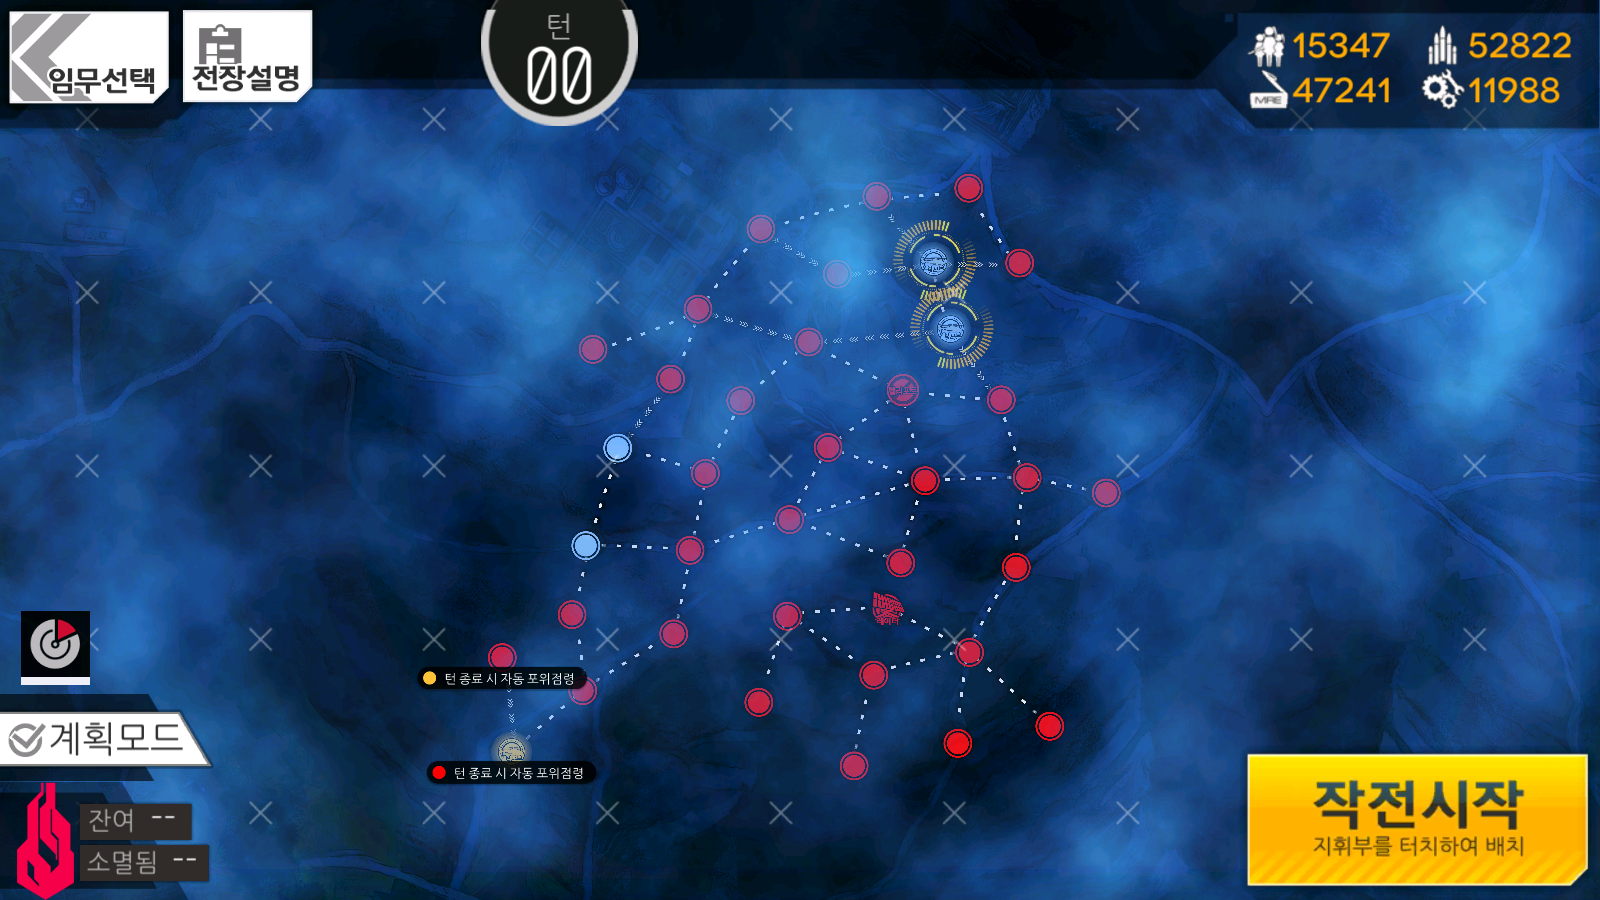
Hey, you know what's fun? Elimination maps at night where enemies continually spawn. Yeah, that's this map. It's not as bad as it sounds, but it can be really annoying if you don't keep the enemies in check. The three open Heliports that Sangvis hold at the beginning are where Scout echelons continually spawn, so you'll want to start keeping them in check early on to prevent them from wandering around too much, as well as wasting too much ammo. You cannot resupply normally outside of the two Supply nodes in the map. Yeah, that's also one more thing to keep track of. All of this combined makes this the hardest map in this chapter to solve. So here's the rundown on how we do this...
First up, turn one we need to secure as much additional AP as we can. One of the Heliports we start off with is in danger of being surrounded, so take care of that. Next, capture the two closed Heliports on the bottom side of the map. You can capture one of them by moving from the middle Heavy Heliport, and the bottom Heliport gives you easy access to capturing the one on the bottom behind the one-way path via surround capture. Taking these two closed Heliports also forces pretty much all the enemies in that area of the map to die by you running into them or by them running into your echelons. Easy kills. With the last AP you have, deploy a HOC, preferably 2B, so you have some additional AP in the following turns. You'll want these closed Heliports pictured here:

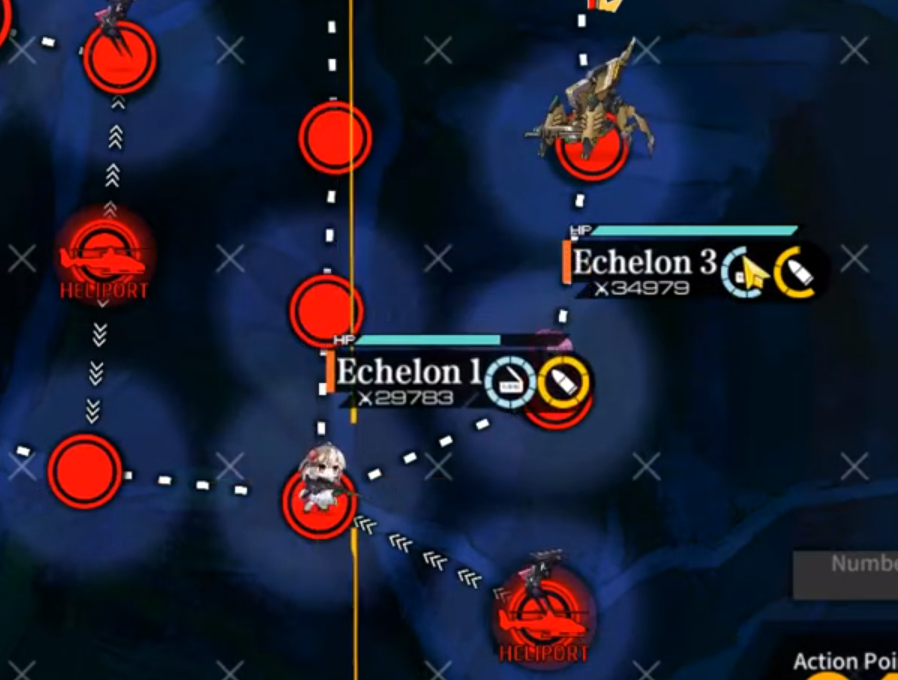
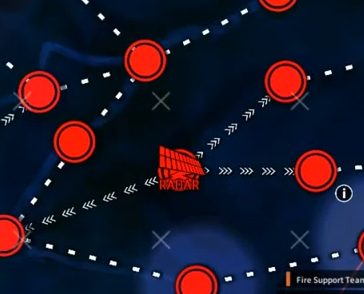
On turn two, we need to start pushing to the right side of the map to start controlling the enemy spawns on that side, as well as to restock resources on our echelons. The top left of the map needs to also be cleaned up before the enemies start roaming to bad spots. Wherever the enemies go in this area, be sure to eliminate them. Now, start moving to the right side of the map with your echelons. I'd suggest leaving the top echelon on top of the Radar Tower in the middle of the map to deal with any Scout spawns from the Heliport up there, as well as to maintain easy access to the resupply node. Here:
For echelons on the bottom, you can either try and block off the Heliport on the bottom right, or catch any Scouts going down from the middle Heliport. I'd recommend the latter option, because of how low a echelon's ammo can get at this point.
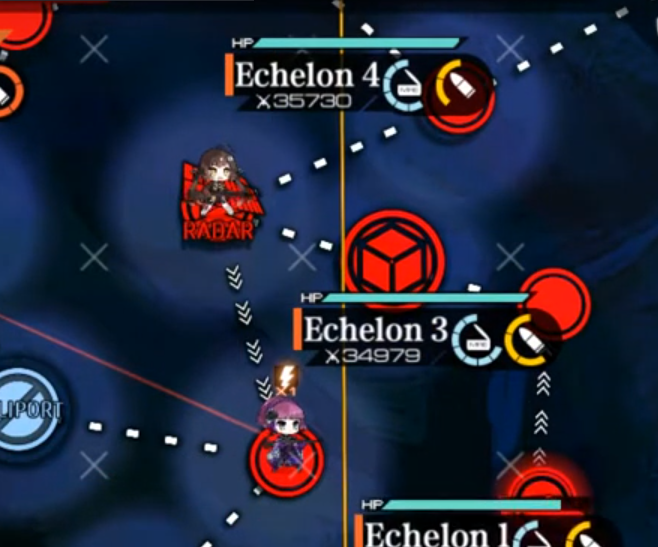
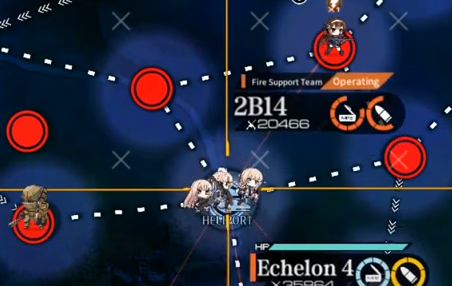
Turn three, it's time to set up your echelons to finish the rest of the map. We'll be resupplying the lowest ammo echelon here while cleaning up/setting up for enemies to walk into us. Most of the action will be with the two echelons that you have clearing the bottom of the map. The idea is to move both into the bottom right of the map next to the Heliport that spawns Scouts there. You can then have one echelon stand next the beefy 80k CE Manticore so it walks into you, while having another echelon stand next to the Heliport spawning Scouts. At this point, you'll also want to grab the Resupply node nearby to keep up the assault, so do that. With the positioning down here, you can easily deal with the Scout spawn from the middle Heliport if it chooses to go down, as well as to go up to the close Heliport on this side of the map to deal with the Manticore that hangs out on that. In addition, you'll clear out the bottom right Scout spawn because you're standing next to the Heliport. Something like this is how I set myself up:
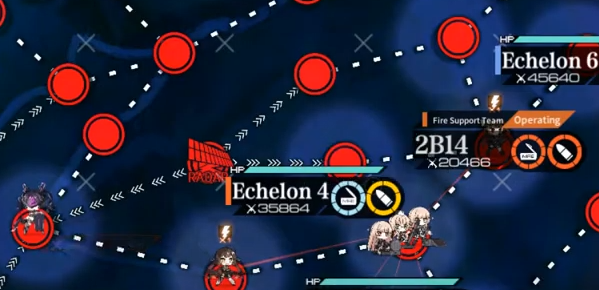
On turn four, it's time to end it. Provided you have the Radar Tower in the middle, you should be able to see the rest of the enemies that would be unaccounted for. Generally, the top echelon will deal with Scouts that move up from the middle Heliport, then go back and wrap around to the top right Heliport to kill any Scouts remaining. The echelon on the bottom will take care of any Scouts that go down from the middle Heliport, and then go up to meet the Manticore on the closed Heliport. This should end the map.
Video of me clearing this map
9-2n#
Objective: Rescue and extract one hostage
Turn Limit: 6
Recommended Echelon(s): AR/SMG (x3), Dummy (x4)
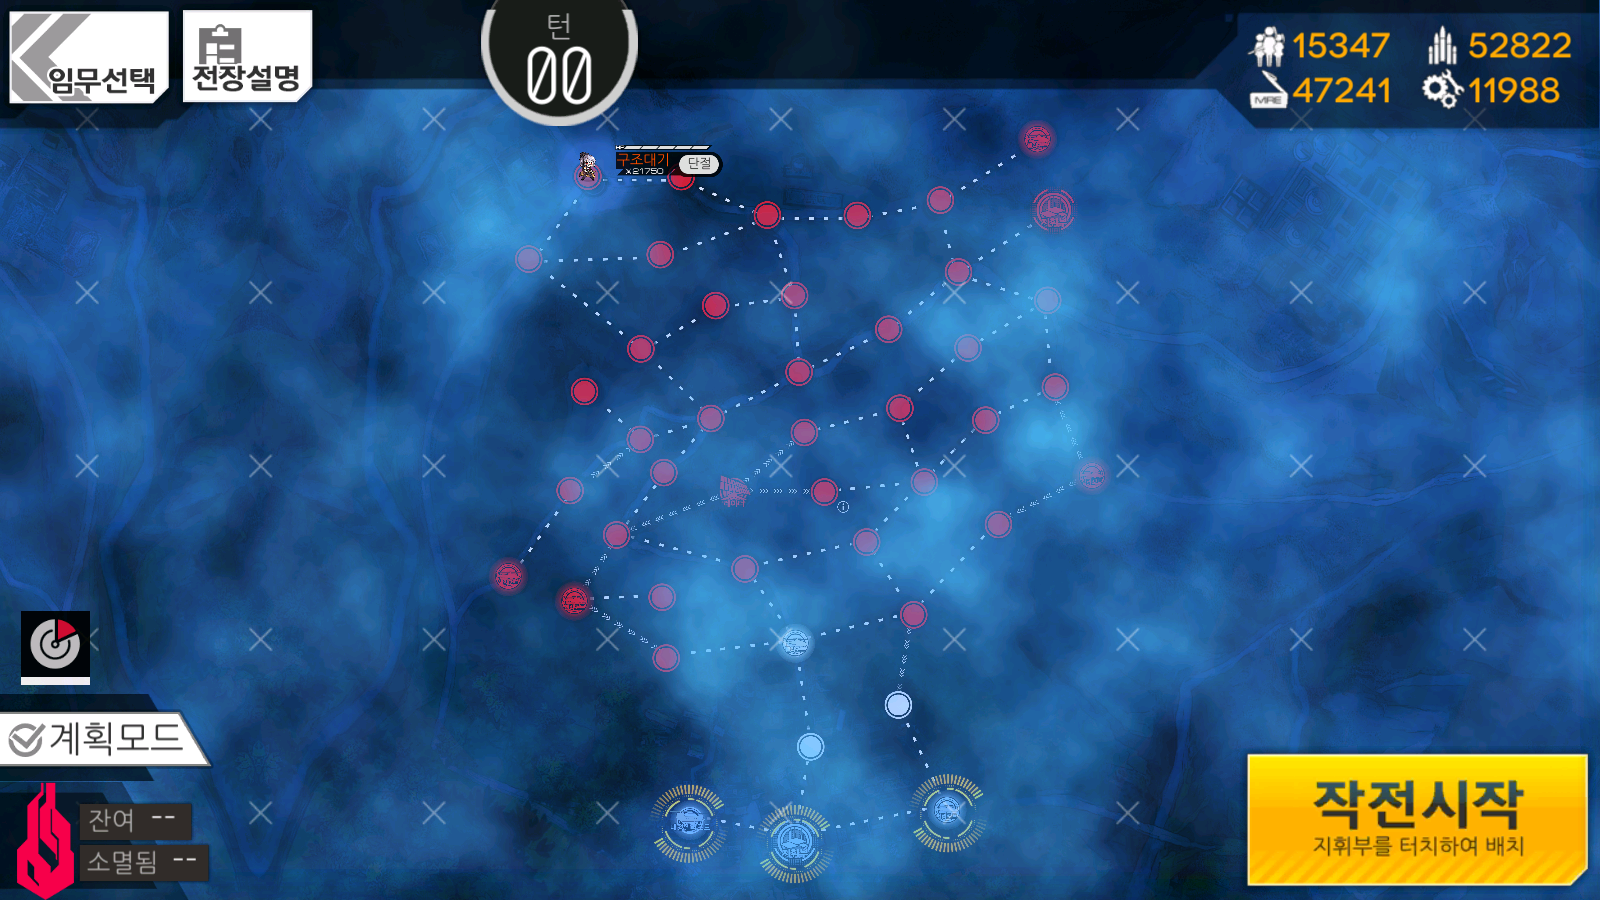
So we got a lot of shit between the Command Center and the hostage. Red Golyats, Manticore death stacks, and a some deadly Sangvis units all come together to make this a real fun time. The idea behind this map is to capture the only Radar Tower on the map, pictured here.
This changes the AI of the Manticores patrolling around. The problem with this is that you need to surround capture it, and Manticores are patrolling right next to it. So let's get into figuring out this mess.
The main thing you need to do is to capture that Radar Tower on turn three. The patrolling Manticores will start giving you issues with capturing it if you do it later. So we need to rush and do that ASAP. Turn one should be setting up the massive amount of AP you'll want to have ready to accomplish this. This Heliport will be where you do most of your activities, as well as where you extract the hostage:
So taking it on turn one is the big priority for the turn. You'll also want to deploy dummies to get as much AP going as possible.
Turn two is when things start getting heavy, we need to set up our units so capturing the Radar Tower on turn three can happen. The nodes near the Radar need some setup to be captured due to all the other Sangvis nodes around it immediately surround capturing them if you just run in without setup. The focus will be the right side of the Radar Tower for this turn. You'll want to grab the node directly above the Heliport you captured on turn one, and the two nodes to the right of that. Be sure to deploy a combat echelon from the Heliport there to assist with this, because you'll be fighting with two echelons at this point. It should look like this:
You'll also want to deploy even more dummy echelons and one combat echelon from your captured Heliport, mostly just for the AP. But most importantly, you'll also want to deploy a friend echelon at the Heliport you took on turn one, and set it to eliminate. It'll move to the left and handle trash that spawns from the Heliport there. It also seemingly makes the map more consistent because there's a chance that one of the Guards will move and block some Manticores, so you can't rescue the hostage despite following how others do the map. I, personally, can't say why aside from enemy pathing AI, so...take that for what you will.
Anyway, on turn three, you can now move your echelons to take all the nodes around the Radar Tower. You'll need to have two units on the top right node, so be sure to take your third combat echelon you deployed last turn to take one of the nodes, since a Nemeum is rolling up from the right. If you take it out it'll save you trouble later. Lastly, take the second combat echelon you deployed and take the node to the left of the Radar Tower. This will capture the Radar Tower on the next turn.
On turn four, you'll have to retreat your units on the right of the Radar Tower before you get run over by Manticores, but it doesn't affect the ranking of the map (not like it matters). At this point you'll be looking for an opening to grab the hostage. Turn five is when you'll be able to grab Thompson, so redeploying your echelons that you retreated on turn four is a good idea. Just be sure not to get killed by the additional enemies that spawn from the Heliports. On turn five, run in, grab Thompson and run back to extract the hostage.
Video of me clearing this map
9-3n#
Objective: Capture the Third Party (yellow) Heliport.
Turn Limit: 4
Echelon Limit: 2
Recommended Echelon(s): AR/SMG (x2)
Okay, so we finally got through all of the hard night maps in Chapter 9. Thank god. For this map, you'll need to split your two echelons up to take two different objectives. The main one that clears the map is blocked by a wall of Manticores you're not killing. So the first thing we need to do is to capture the Radar Tower on the right side of the map.
To set up for this, we need enough AP to go there in one turn, because there's plenty of Manticores that will murderize you if you don't. Turn one will just be taking the closed Heliport right next to your starting Heliports. This will give you a good position to move to both objectives when the time comes.
On turn two, go immediately to the Radar Tower with the closer of your two echelons. This will change the AI of the Manticores blocking you so they move out of the way on turn three.
On turn three, if you care about getting an S rank, move your echelon on the Radar Tower away from the Manticore, then move as far as you can with your other echelon towards the objective Heliport. On turn four, capture the Heliport to end the map. Much easier than 9-1 and 9-2, right?
Video of me clearing this map
9-4n#
Objective: Kill the boss (Judge)
Turn Limit: 4
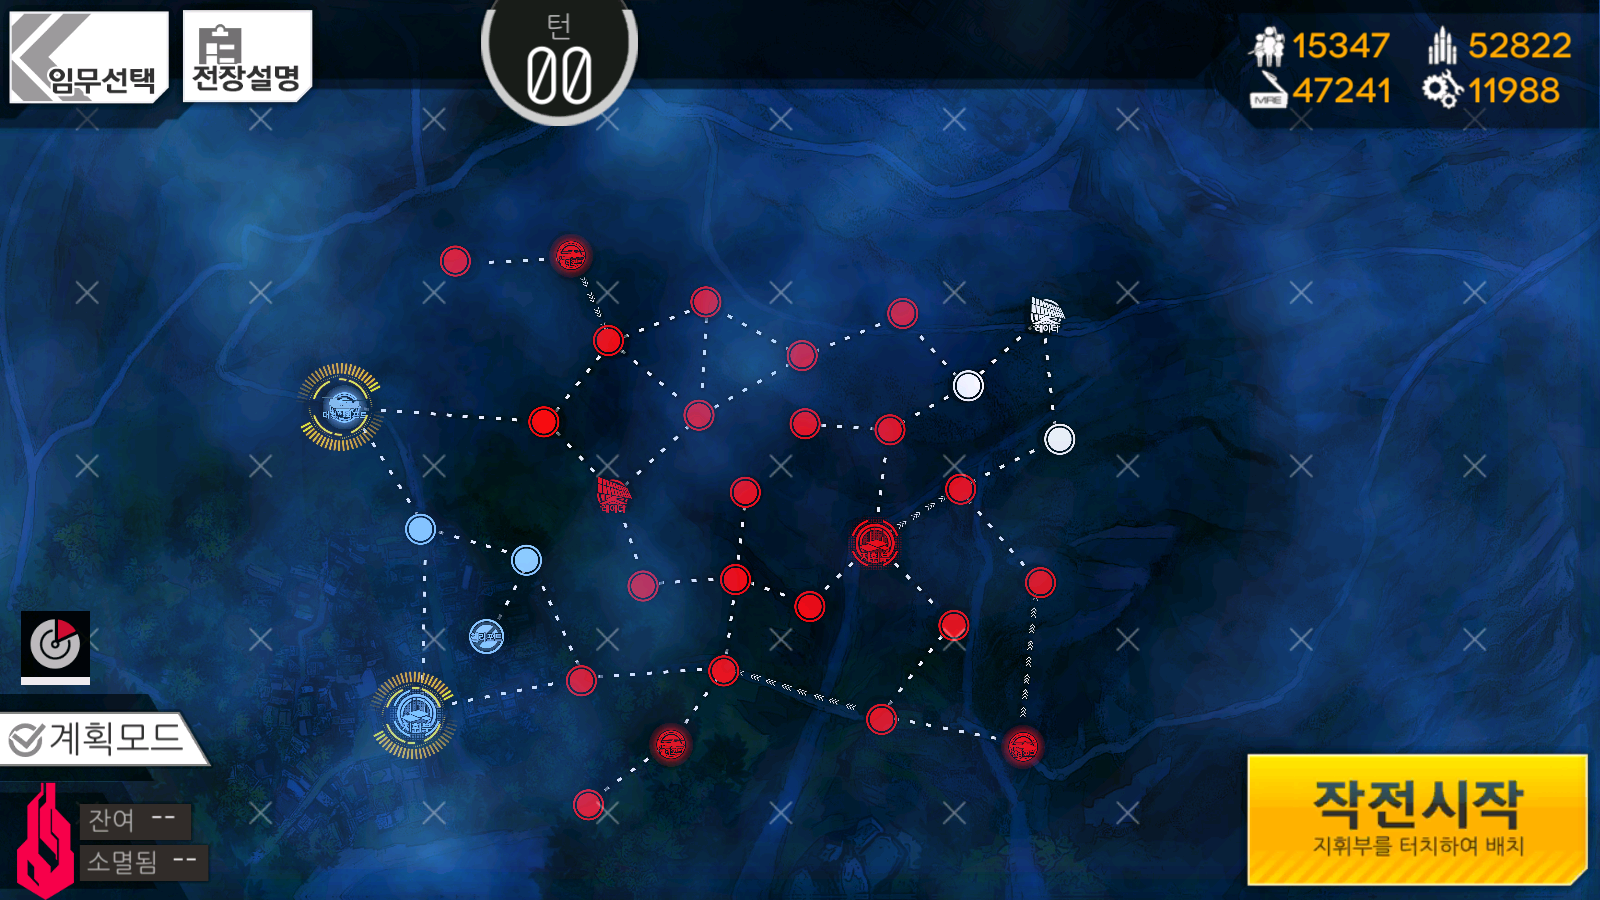
Recommended Echelon(s): RF/HG, Golyat Buster, Judge Team, Dummy
Alright, let's clarify the two echelons above. The absolute easiest way to clear this map is to actually bust two Red Golyats that guard the way to Judge. Your alternative is trying to bait them, which some may find infinitely harder to understand and do. I will be including a video of how to bait them, but the guide for this map will be of the Golyat clears. Judge sits on top of the enemy Command Center, so you need to deal with them somehow, as the other path is blocked by very deadly Manticores.
For the busting echelon, you'll want at minimum a level 10 smoke and level 10 flashbang skill, as well as a level 1 smoke skill. This can all be adjusted depending on what you have available but the composition I used was: MP5 Mod (skill level 10), M16 (skill level 2), UMP9 (skill level 10), UMP45 (skill level 10), and M1911 (skill level 1). The force shield skill can be level 1 but the timing gets harder to do. The force shield and one of the flashbangs were put on manual skill, so there is a little bit of micro involved. This is how I arrange my Golyat echelon:
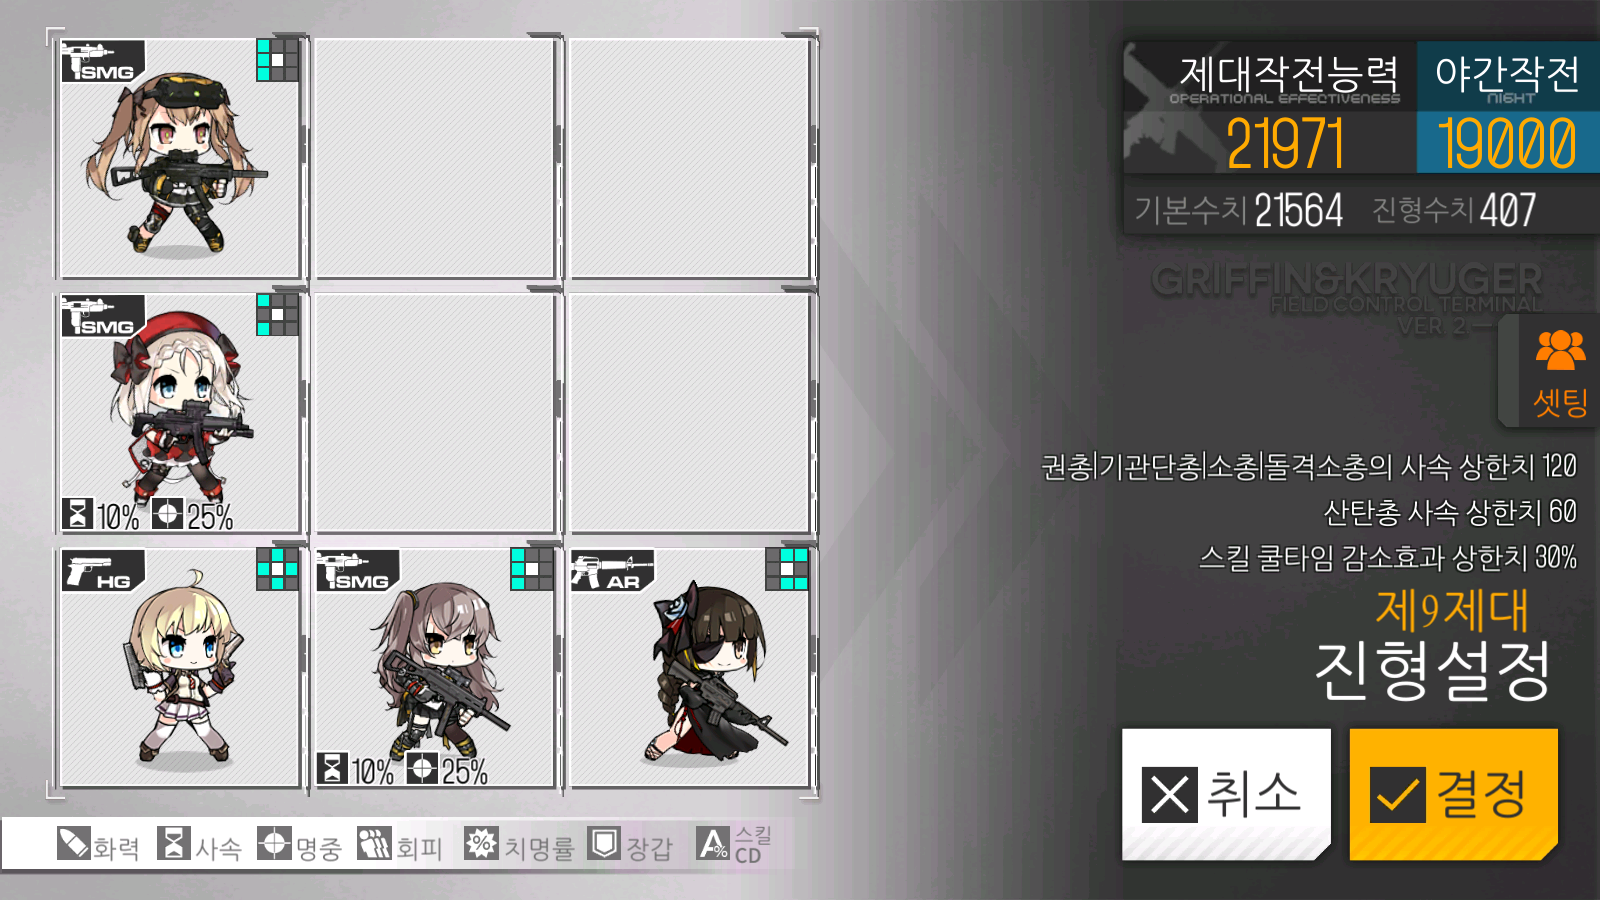
As for the Judge echelon, you either stack as much armour as possible to drop Judge's damage to 1s after she enrages, or go all in on damage and hope you can kill her before it becomes a problem. For the armor stacking method I use two armour boosting MGs such as Negev or QJY-88 along with two high armour SGs such as KSG. The main DPS you'll keep on the field is M4 mod due to Judge having evade. M4's cannon does a number on Judge while bypassing that evade issue. Keep in mind, you'll need a fairly good Armor Fairy if you want to effectively do this. This is how I arrange my echelon for this setup:
Your other option is to run two HGs to tile buff M4 so she can burn through Judge before your SGs die a horrible death. Same-ish results. Probably.
So since we're covering the Golyat clear method things are a lot simpler. The goal is to open a way to the Golyats for your busting team to clear them out then have your Judge kill team rush in. This is a two turn clear, so let's get this started.
Start off with your RF/HG and your dummy echelon deployed. We're going from the Command Center, so start your RF echelon there. Move your RF echelon right until you're next to the Red Golyat. Don't worry about this, the Aegis takes priority on movement, so you won't get beaned. Deploy your Golyat busting echelon and get it next to your RF in preparation for turn two. You'll also want to move your dummy echelon down, away from anything that can aggro to it and ruin your S rank.
Turn two will have you kill the two Golyats in the way to the enemy Command Center with your busting echelon. Now, how do you actually kill these beasts? There's three within a single fight, so things can get a little dicey.
The first thing you need to understand is why the smokes exist for this. You're trying to do two things, buy time for your flashbangs to come up and to group the first two Golyats together. To accomplish both of this with the echelon I used, we let the two smokes go off, and then wait until just before the second Golyat comes into contact with the smoke grenades. As soon as that happens, retreat both smoke grenade users so the smokes disappear. At this point the flashbang will go off, and you're pretty much golden. Wait a bit for the third Golyat to come in, then use the forceshield to walk through all of the Golyats. Done. Repeat this again and you'll be clear to move your Judge echelon in.
Deploy your Judge killing echelon and make your way to the enemy Command Center. Kill Judge. Good luck, standard Judge tactics apply here. Beat her and you'll be done.
Videos of me clearing this map
Golyat Kill Route
No Golyat Kill Route
Author: Kazuki
Tags: Chapter Overview