


Fractured Cognition IV
Objective 1: Fight, but do not kill M4A1, it's a minigame or something, idk
Objective 2: Rescue and secure one hostage
Recommended Echelon(s): AR/SMG, Dummy (x2)
Objective 1
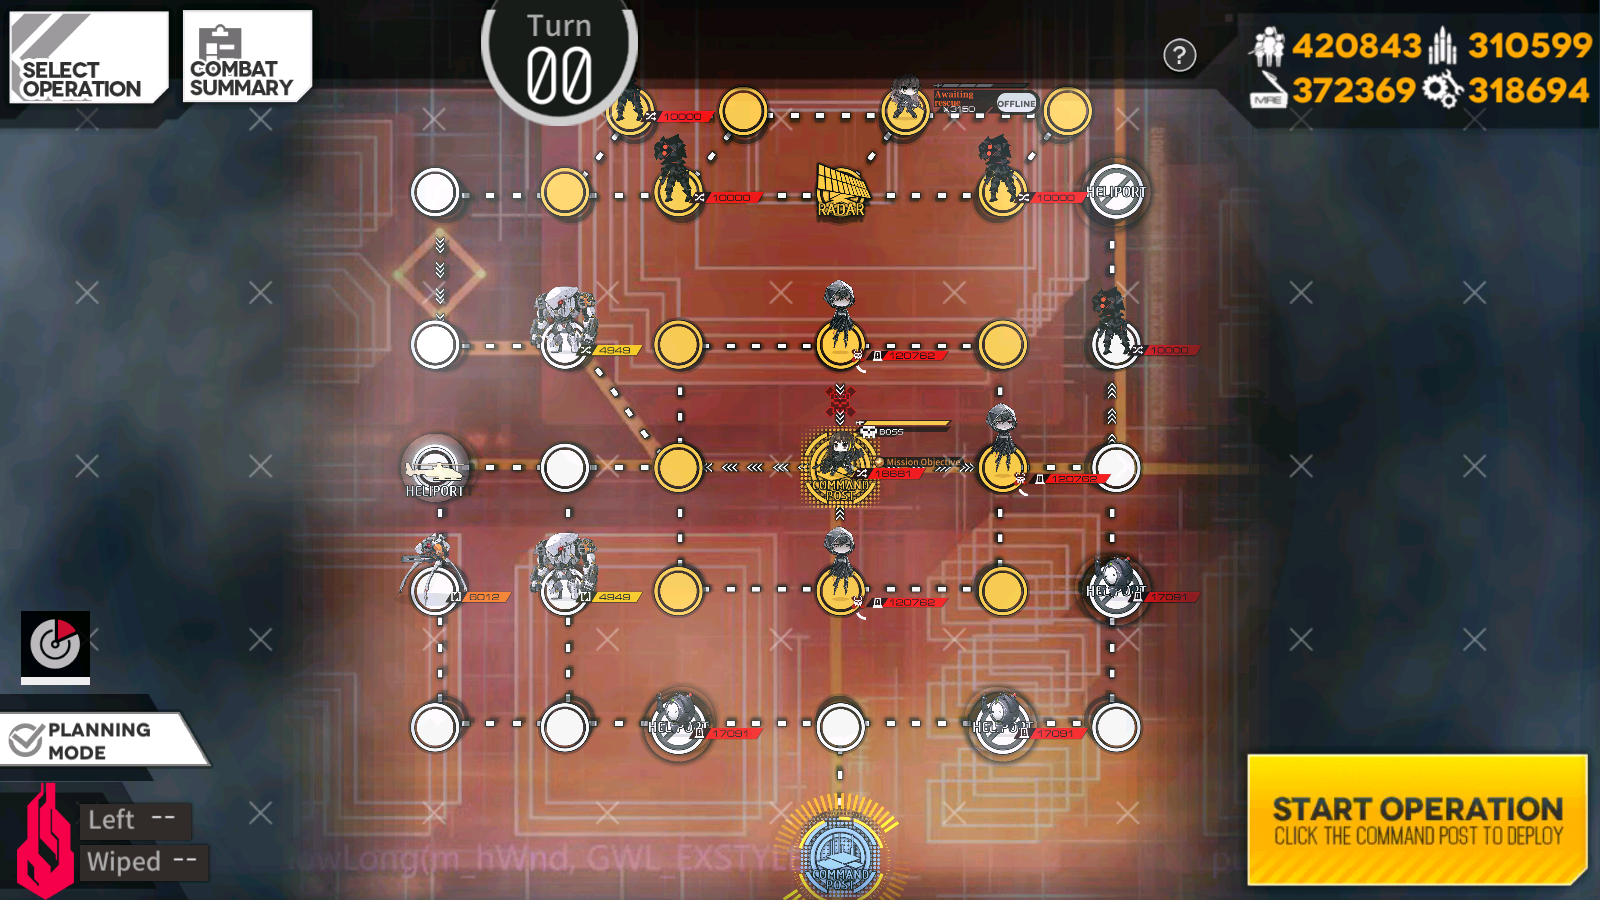
So, we need to step on the Radar Tower at the top of the map to get the Isomers moving, then engage M4A1. That's the tl;dr of this map, but it's mildly more complicated than that since we need to deal with being able to supply enough ammo/MREs to our units to finish the map up. The main issue is the randomized movement of the data zombies at the top of the map. This can make things a little bit of a crapshoot, but if you have issues, it's entirely possible to retreat your combat echelon after touching the Radar node, and redeploy it at your Command Center. You'll have to use either the left path or go midway up the right path and come into the middle of the map. You just need to wait for an opening in the Isomers to start doing a loop around to M4.
So, for our first order of business, we'll need to grab some additional AP before we head up the right pathway to the Radar Tower. The first closed Heliport we'll nab is the one to the left of our Command Center. Grab it on turn one.
On turn two, deploy a dummy echelon on your Command Center, and then move your combat echelon to the right to the other closed Heliport. You will want to resupply as you pass your Command Center by swapping with the dummy echelon. The additional ammo/MREs will be much appreciated. After taking the next closed Heliport, we'll rush down the right-side path up to the top of the map. From here, we want to touch the Radar Tower so that the Isomers start moving. However, it may be a good idea to end the turn a few times to let the hostage absorb some of the extra data zombies. You'll have to make that call when you get there, but just be aware of your remaining rations. Regardless of how you handle it, when you get the chance, touch the Radar Tower. When you get a good opportunity, make your way out of the top side of the map. Clear the Gladiator blocking your way and then you'll be able to get into the middle of the map. You'll want to look for a space in the patrolling Isomers so you can squeeze your way to M4. When you get to the node above the enemy Command Center, head in and engage M4.
M4A1
So, this really isn't fighting her, since we need to avoid killing her. The goal for this fight is to kill the failed Isomers that M4 will continually spawn in; once you've killed enough to fill the bar at the top of the screen, you'll win.
There's not much in the way of mechanics for this, but M4 does have her cannon skill, Avenger's Mark. It's nothing particularly hard to deal with, she'll just fire at one of your T-Dolls with it. She will put your T-Doll into critical with one hit though, so try not to get hit by it.
To clear this, I would recommend staying out of range and shuffling your SMG back and forth so you don't get into firing range of M4. Remember, your T-Dolls will fire and attempt to kill M4, so keeping her out of your range is the easiest method to not fuck that up. Once you've killed enough failed Isomers, you'll complete the fight, and the map.
Objective 2
I'm gonna be real, this objective can have some issues with RNG pathing making things more difficult than it needs to be. The data zombies at the top of the map near the hostage have random movement, which can cause some issues with having sufficient ammo, but it's not too likely to happen. As long as you have enough ammo to defeat the Gladiator guarding the exit on the top half of the map, you should be fine.
So, for our first order of business, we'll need to grab some additional AP before we head up the right pathway to the hostage. First closed Heliport we'll nab is the one to the left of our Command Center. Grab it on turn one.
On turn two, deploy a dummy echelon on your Command Center and then move your combat echelon to the right to the other closed Heliport. You will want to resupply as you pass your Command Center by swapping with the dummy echelon. The additional ammo/MREs will be much appreciated. After taking the next closed Heliport, we'll rush down the right side path up to the top of the map. You'll be able to grab the hostage on turn four.
On turn four, it's important that you step on the Radar Tower as we grab the hostage. This will cause the Isomers to start patrolling, and will also give us our escape route later down the line. The exact way out of the top part of the map is a little iffy, due to the data zombies having random movement, but you'll want to leave through the left side of the map. Be sure to dodge as many battles as you can, since you still need to be able to take out the Gladiator blocking the way out to the middle of the map.
From here, we need to go through the Gladiator, which will likely make you run out of ammo. At this point, our only option for returning back to our Command Center is to go through the middle of the map. Thankfully, there's a nice hole in the patrolling Isomers that you can safely go between to get there. Stick in that safe area and try and make it to the exit on the far right side of the map. Once you're there, you just need to run back to your Command Center to extract the hostage, ending the map.
Videos of me clearing this map
Objective 1
Objective 2
Author: Kazuki
Tags: Shattered Connexion