Isomer II

Objective 1: Defeat the boss
Objective 2: Capture enemy Command Center
Recommended Echelon(s): AR/SMG (x2)
Objective 1
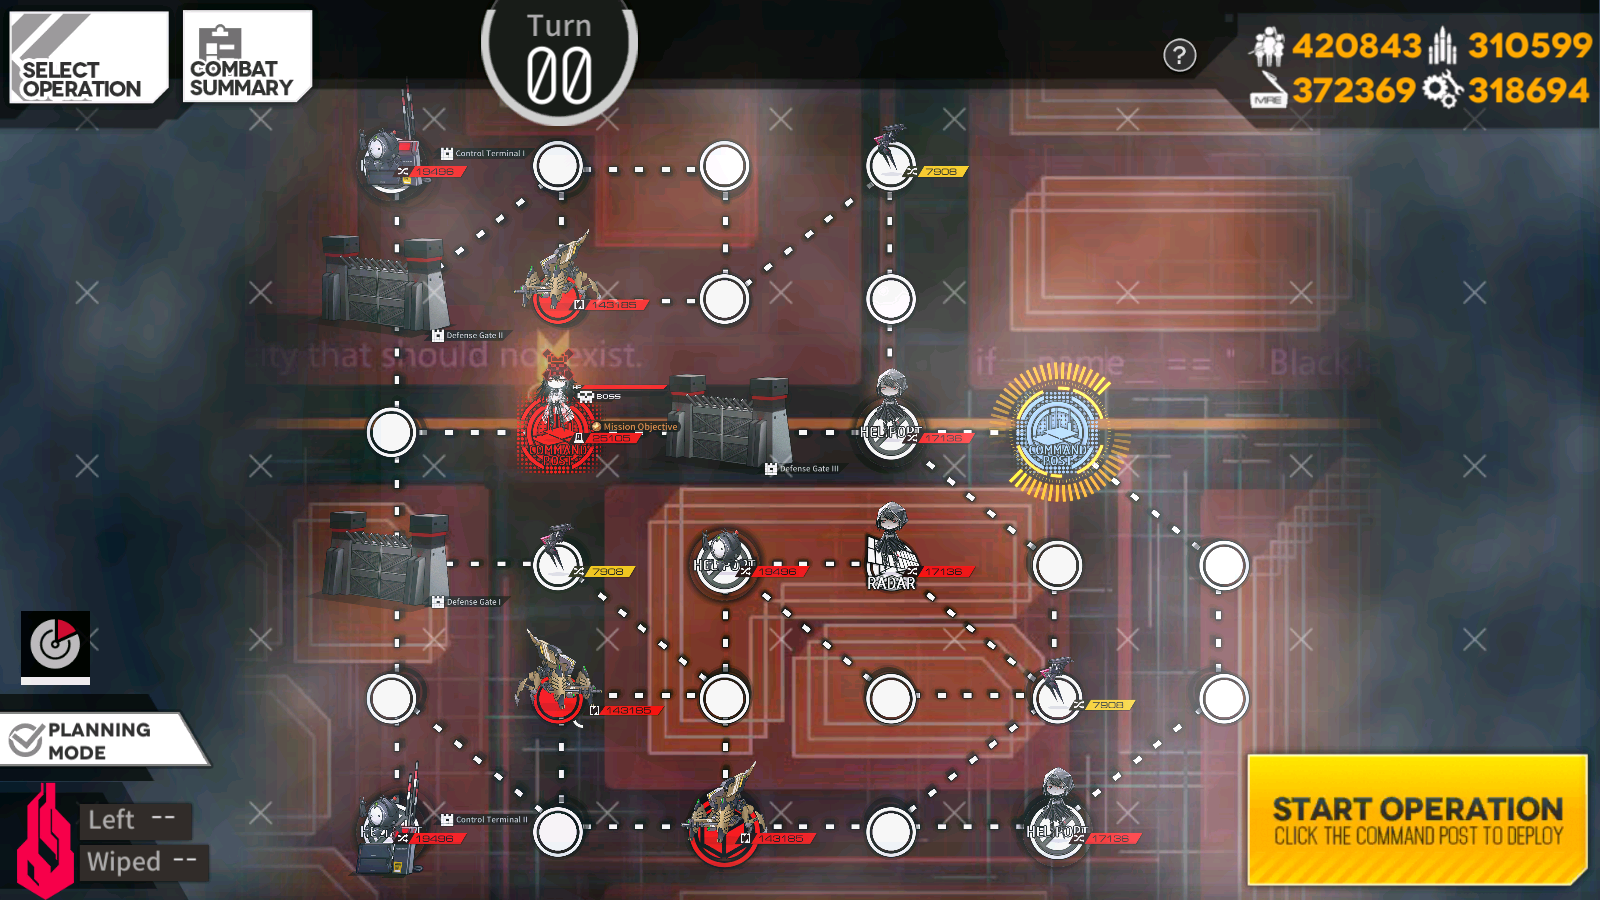
So, unlike EX, normal is a lot more straightforward. There's only one real route we need to take and it's the same for both objectives. The end's different, since we have a little extra to do on objective two, but that's it. For this objective though, all we need to do is use the one console at the bottom of the map, and then engage the Nyto Isomer White.
To start us off, we want our combat echelon out and ready. Use it to take out the Isomer to the left of your Command Center, then deploy a second combat echelon. We're gonna be leaving that second echelon on our Command Center so we have some defense if needed.
On turn two, swap and resupply our first echelon, then swap back. It's time to move out. We're gonna head down from that closed Heliport to the Radar Tower, which will despawn one of the Manticores from the map. Move on to the closed Heliport to the left of the Radar Tower and take it.
For turn three, move down to the Supply node and use it to resupply. We can now go and use the console to open up the gate to the enemy Command Center and the boss. Open it and get ready to fight the boss.
On turn four, we can go straight to the boss and engage her.
Nyto Isomer White
So for this boss, she'll do a lot of shit that doesn't really matter, since it's a debuff. Her main thing is that she has failed Isomers coming in constantly, that you need to take care of before they stun you with an EMP. For these, once they start getting close to you, retarget your ARs so they focus fire them.
She does a lot more than that, though. Every so often, she'll pick one of your T-Dolls and put them into a stasis. She will then summon a clone of herself that will start shooting you. The clone has a taunt effect so all your T-Dolls will focus it down. Killing the clone will end the stasis. These clones, I believe, also give an HP shield to all enemies on the battlefield at the time. Fun. Oh, and the clones also have different targeting, because they change type of weapons depending on what T-Doll gets hit with the stasis!
Oh, but that's not it, she also has skills. At around every quarter of her HP, she'll use her skill called Epiphyllum Illusion, which will, once again, stasis one of your T-Dolls. However, now there's multiple clones with HP shielding to cut through. The amount of clones she spawns is equal to how many T-Dolls you have left on the field. Five T-Dolls up? Five clones spawned. This is a hard DPS check, since if you don't kill the clones fast enough (within 15 seconds), the stasis will become permanent for the battle, and there now will be a clone that is invulnerable and will stay there for the rest of the fight. So...DPS hard and fast.
Once you've beaten her, you'll finish the map.
Objective 2
So, this is the exact same as the first objective, but with added steps at the end. Wow, cool. The extra steps are using another console, and then baiting the Nyto so you don't need to fight her. That's it. I'll copy some of the objective one stuff and add more just for a guide, though.
To start us off, we want our combat echelon out and ready. Use it to take out the Isomer to the left of your Command Center, then deploy a second combat echelon.
On turn two, swap and resupply our first echelon, then swap back. It's time to move out. We're gonna head down from that closed Heliport to the Radar Tower, which will despawn one of the Manticores from the map. Move on to the closed Heliport to the left of the Radar Tower and take it.
For turn three, move down to the Supply node and use it to resupply. At this point, you may have been accosted by a Scout echelon near your Command Center. Now's a good time to take it out if you have been. If not, well, that's great. Either way, move your second echelon to the left and deploy a dummy echelon. We'll be using it for bait and extra AP. You could use your second echelon for that, but this way is safer and uses less resources. Make sure you swap your combat echelon back to your Command Center.
On turn four, move to the console and use it. Open both gates that can be accessed from the console. Stay outside of Nyto Isomer White's alert radius as you move your first echelon up towards the other console. You can access it on turn five, which should open the gate that goes to your own Command Center. The Nyto will move towards your dummy echelon, letting you take the Command Center on turn six, which clears the objective and this map.
Videos of me clearing this map
Objective 1
Objective 2
Author: Kazuki
Tags: Shattered Connexion


