


Operation Defang II
Objective: Establish and maintain a supply line for three turns
Recommended Echelon(s): AR/SMG (x2), RF/HG, Dummy (x2)
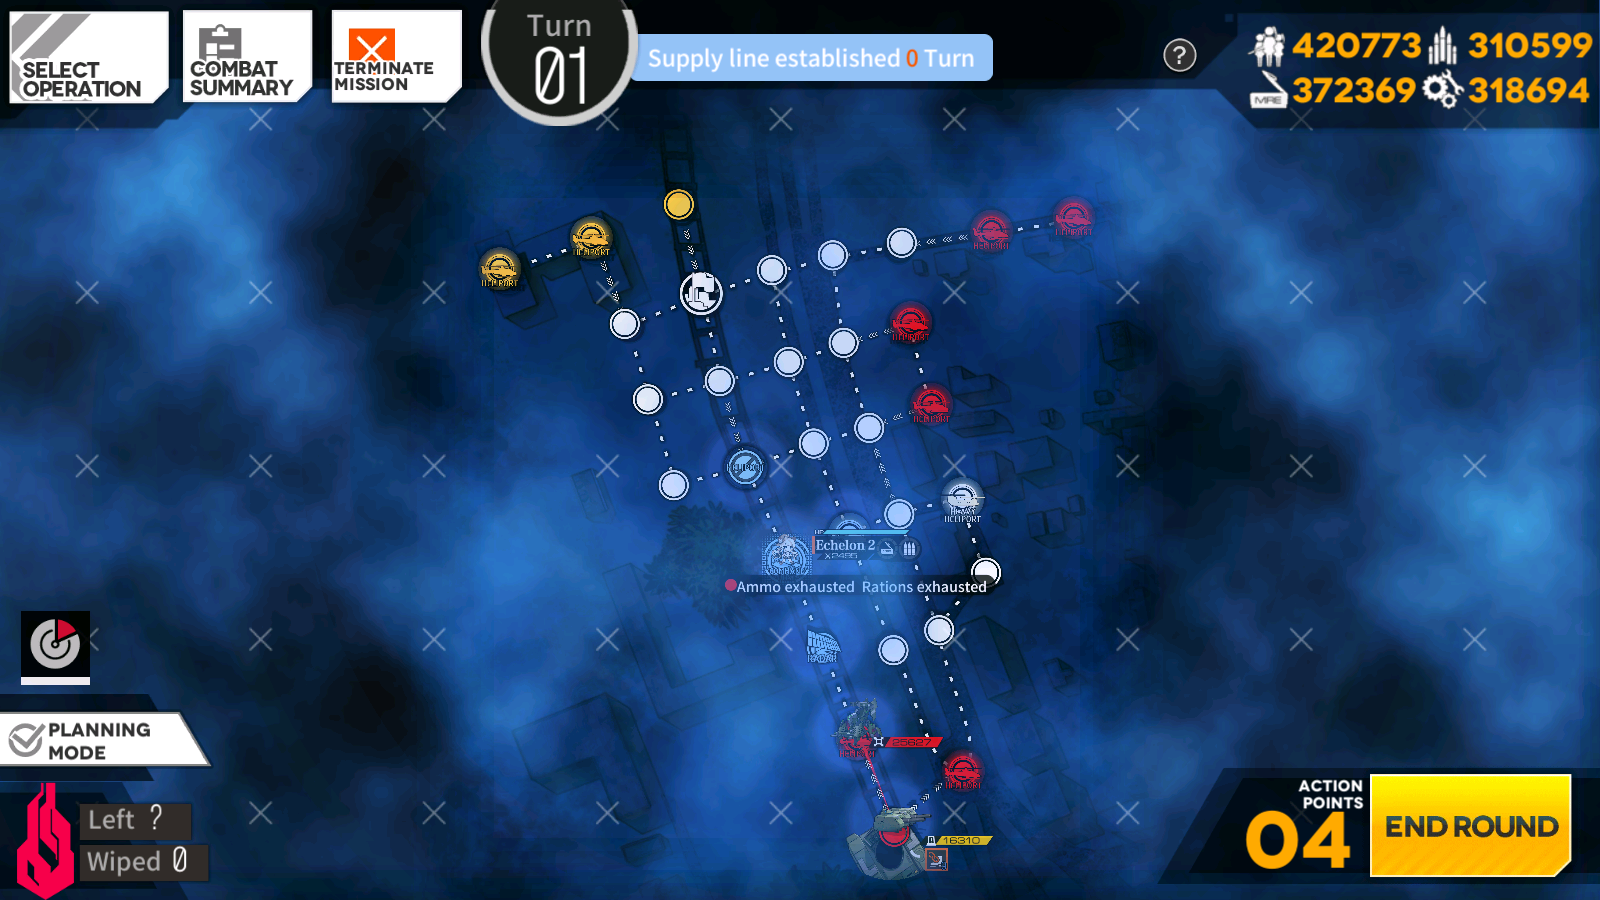
For this map we need to make our way to the Rally node and set up a supply line. We got four different nodes we need to defend to maintain the line, which can be a fair bit difficult with the enemies that this map has. The majority of the enemies that spawn in will be unarmoured Military units that can do a number on you. Thankfully, we do have easy access to repairs for the map, making it a tad bit better.
To start us off, deploy an AR/SMG echelon to your Command Center and deploy a dummy echelon on the Heliport. Move your dummy echelon to the unoccupied Heliport to the right of the Gustav; we don't want anything spawning in there to make things harder. Deploy your second AR/SMG echelon on the Heliport, then move your first one up to the closed Heliport with start with. Deploy your RF/HG echelon on your Command Center so you have some defense for the incoming Military units. It'll be fine to chilling there for the rest of the map.
On turn two, we can establish our supply line. Move your first AR/SMG echelon up the left side of the path up to the Rally node, so you can deal with all the zombies. You'll be taking the Rally node with that echelon, so move your second AR/SMG echelon up the right side to the node below the Rally node. This should establish the supply line. With your remaining AP, deploy a second dummy echelon on the Heliport we started with.
Now for the rest of the turns, we'll be defending the supply line. A bunch of Military units should be showing up on the right side of your supply line. Use your two AR echelons to take them all out. We should have enough AP to do that and then set up a sort of conga line that we can abuse for resupplying/repairs. Once you've cleared out that side of the supply line, move your two dummy echelons up so that one's on the Heliport, one is on the node above the Heliport, and your two combat echelons are on the two nodes above that. Use this time to repair and resupply your two combat echelons as needed. Once you've stocked up, you can break the line up. Have one combat echelon on the Rally node, and your other combat echelon somewhere along the conga line we set up. Move your dummy echelons to a safe node so nothing can attack them.
For turn four, it's just simply clearing out the enemies that are threatening your supply line. If you need to, go repair. You should have enough AP to do whatever you need to. Once you've cleared out the trash, you can end the turn, and at the start of turn five, you should be victorious.
Video of me clearing this map
Author: Kazuki
Tags: Shattered Connexion