


Shark and the Sea III EX
Objective: Capture enemy Command Center
Recommended Echelon(s): MG/SG, AR/SMG (x2), Dummy
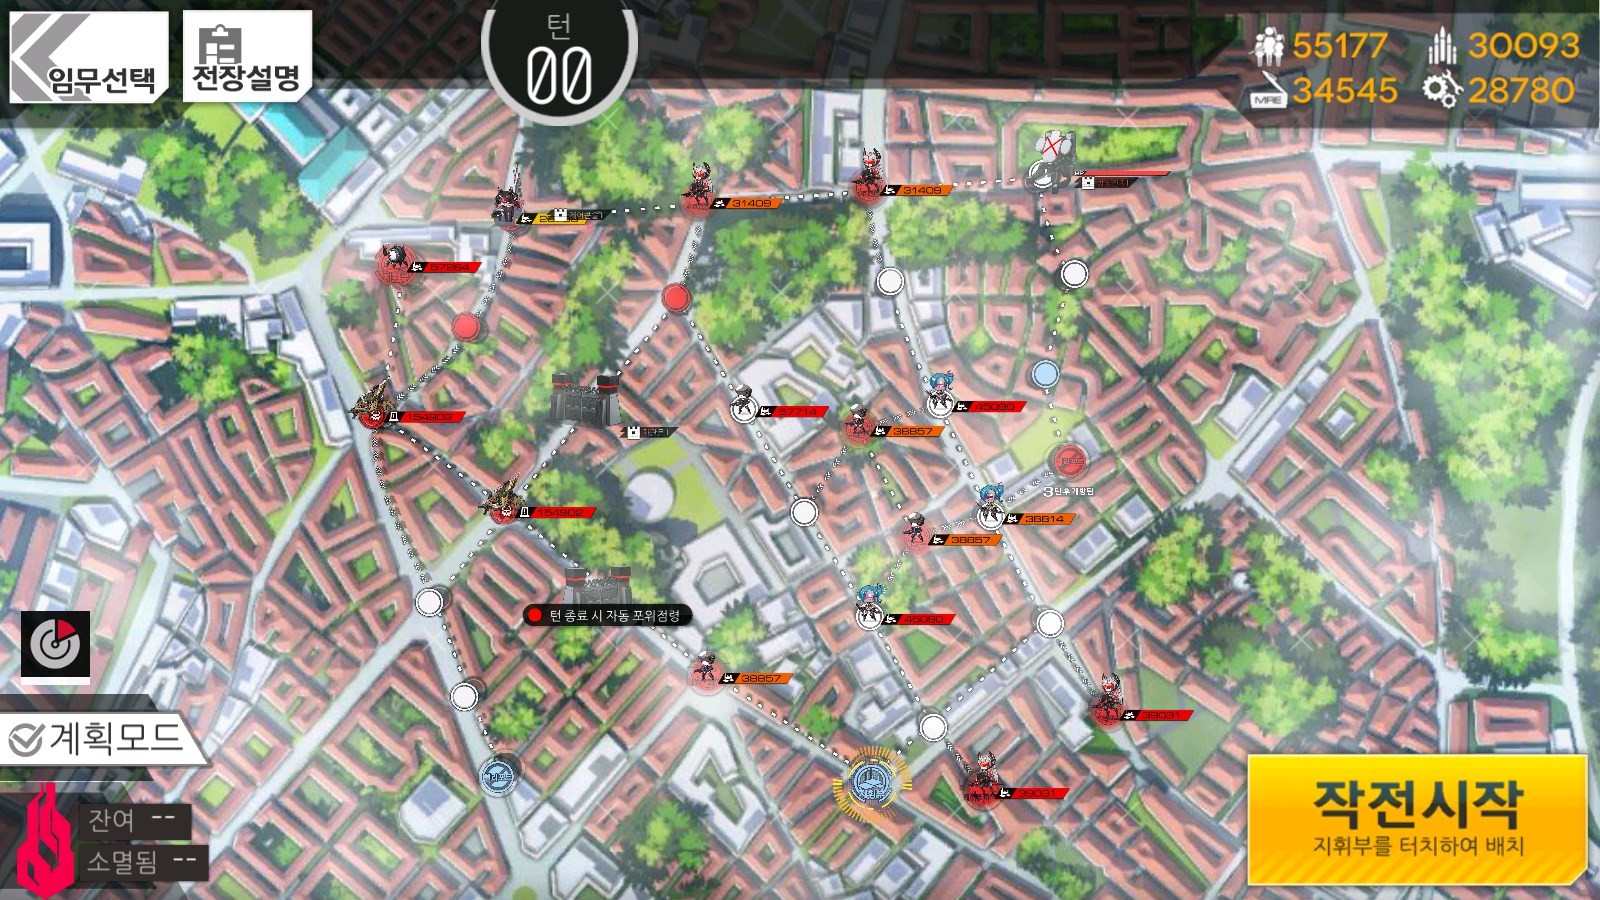
Your first exposure to SWAP units (probably) in Isomer and boy, is it annoying. We have a few things that need to happen in this map for a proper solve. First, we need to open up the gates so the Manticores can be dealt with. But to do that, we have to get to the gate switch alllllllll the way across the map in bumfuck nowhere.
Once ALL of that is done, we can bait Manticores away to allow for an echelon we deploy on the closed Heliport we start with to get to the enemy Command Center. Yeah, it's a long list of things to do and we got a lot of enemies to deal with. Have fun and hopefully don't die.
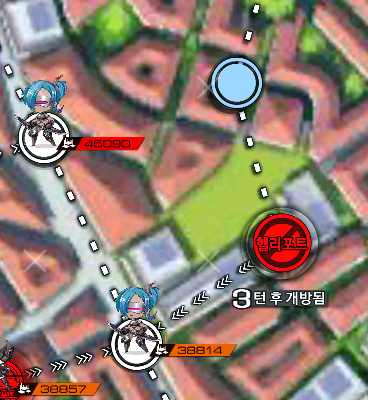
To get to the gate switch, we need to surround capture an enemy-controlled closed Heliport next to a one-way path, specifically the one shown here:
First priority is to make sure we don't lose our Command Center immediately. Kill the enemy on the Heavy Heliport next to your Command Center to make sure it's safe. You'll get some additional AP out of this, and it also sets you up to deal with the Manticores in the future. With your remaining AP, deploy a second combat echelon and start moving towards the Closed Heliport we need.
Turn two is where things start getting real scuffed, you'll start seeing why SWAP SF units are studs pretty quickly here. For now, the SWAP Dragoons won't move due to AI pathing, so you don't need to worry about them just yet. However, it's time for you to push up next to the Closed Heliport to surround capture it. With your remaining AP, deploy an MG/SG echelon for this, since the Brutes are dead now. SGs with some armour buffs can eat a lot of shots from some of these enemies with little issue. This is completely doable without this, but hey you need a Judge killing echelon later so...you'll also want to deploy a dummy just for some extra AP.
Turn three, we have another turn before we can start progressing on the objectives, so it's time to set up more AP and defend. You don't need to do much this turn, I would suggest surround capturing another one of the Heliports on the right side, past the one-way paths. But you can pass this turn, really.
On turn four, it's time to open up the gates blocking our way. Deploy a combat echelon from the temporarily opened Heliport we took and run it over to the console. You can use the echelon you pushed to the Closed Heliport with if you don't mind dropping ranks. Open the gate and be sure you're still defending your Command Center. During the enemy turn here, the Manticore will move into the gate. On the next turn, you'll slam it on it a billion times so it has no HP. Now you can let it walk into the first echelon we deployed.
On the next turn you can now retreat the echelon you sent up to the console, and redeploy it on the Closed Heliport that just opened here:
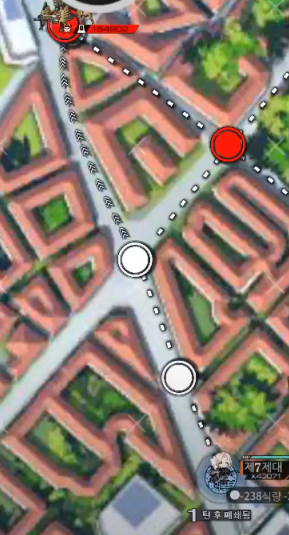
Or you can deploy a whole new echelon, your call. This is what will go and capture the enemy Command Center once that Manticore leaves. Move it up to the one way to properly aggro the Manticore so it moves. On turn six, you'll have a straight shot to the enemy Command Center to deal with that Golyat echelon. Have fun killing it, cause it sucks to with the wall of SWAP Dragoons. Once you've killed it, you've cleared the map.
Video of me clearing this map
Author: Kazuki
Tags: Isomer