


That Which Must Be Protected EX 2
I had to write a new strategy cause stuff seemingly got messed up just for EN. I made some superfluous moves, but I'm just transcribing them as made here because I just solved it as I went. This section and the corresponding video should now work for EN. Sorry if anyone tried the old non-parachute method and it didn't work. -Miyako
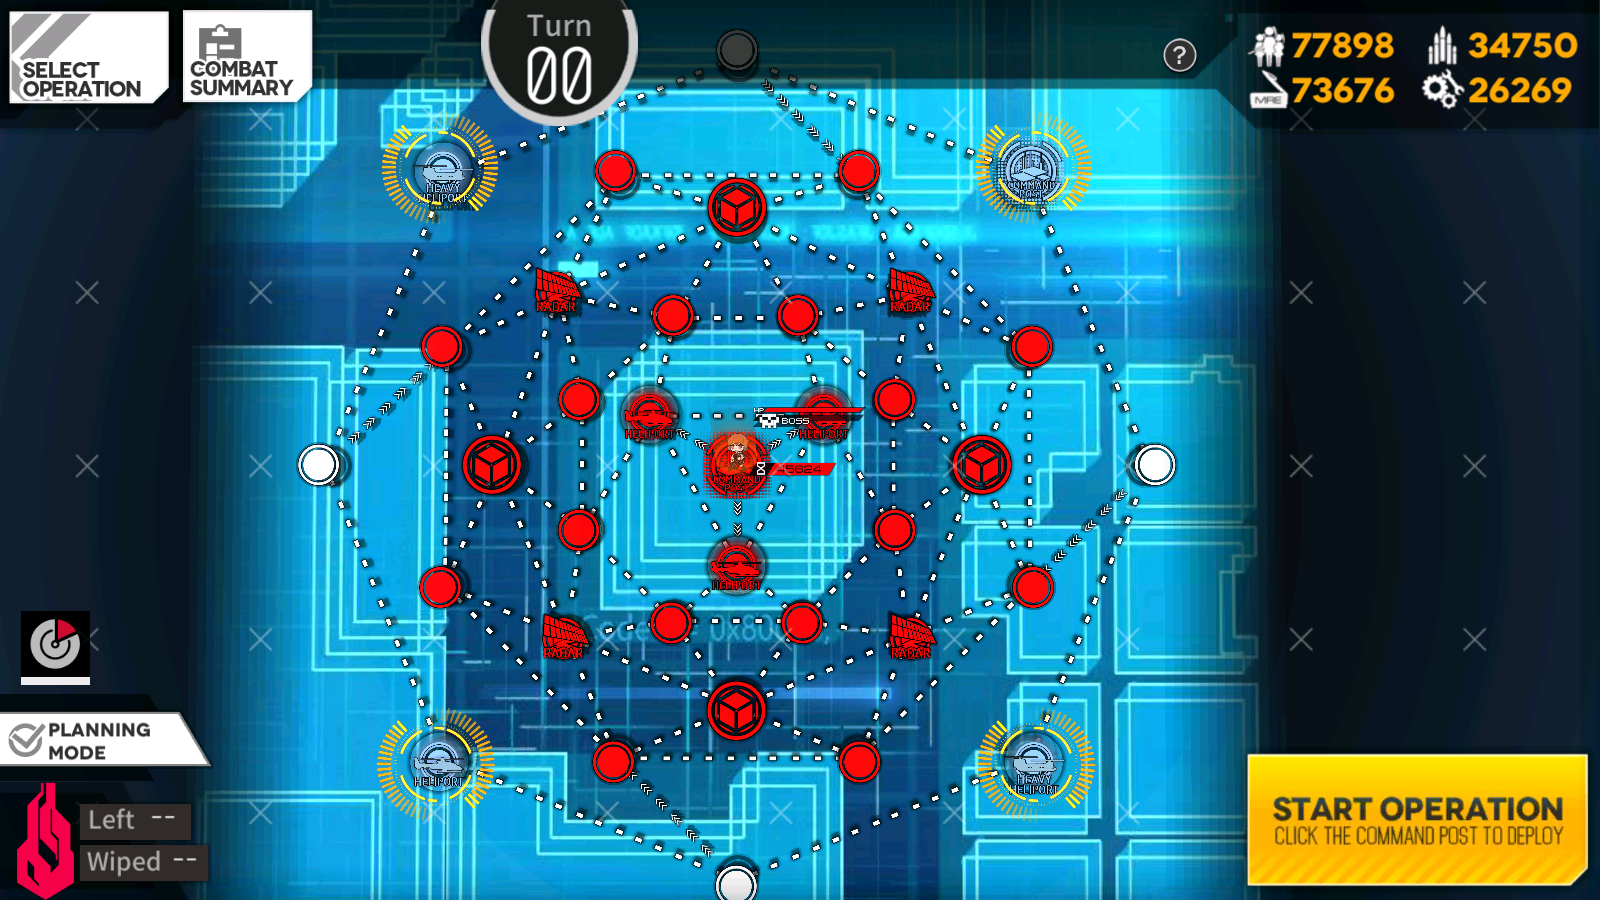
Objective: Capture enemy Command Center
Turn Limit: 9
Echelon Limit:
Recommended Echelon(s): RF/HG or MG/SG (x3), Dummy
This map is basically the same as the last one, but with enemies and more annoying. Once again, it may be best to just reference the video, as it's easier to follow. It's worth mentioning that you can use two Parachute Fairies to bypass all this shit, 'cause despite the nodes being impassable, you can parachute to them. You need two of them to cheese it, as the nodes will be recaptured due to encirclement mechanics if you just use one fairy.
For the parachute strategy, all you need to do is parachute to the Heliports near the enemy Command Center. That's it.
Do note that the enemy spawns in this map are RNG. The main issue with that is the exact locations of the Red Golyats in the map will vary, so if you're doing it the hard way, try and reset the map until you get a setup similar to mine.
Alright, so if you're doing it the hard way, assuming you got a similar setup, my version of this clear ain't as pretty but just follow the instructions and it should work out. You'll make some dumb mistakes like I did but hey, it's a 4-turn clear at least.
Deploy three rifle or machine gun echelons and a dummy echelon on each heliport. The upper left Heavy Heliport should have a rifle/machine gun echelon on it, which will be referred to as "Echelon 1" from now on. The Command Post in the upper right should have a second rifle/machine gun echelon on it, and that echelon will be called "Echelon 2" in the guide. The Heliport on the bottom left should have the third rifle/machine gun echelon on it, which will be called "Echelon 3". The Heliport on the bottom right should have the dummy echelon on it, which will be called "Echelon 4" going forward.
This setup step seems complicated, but if you set your echelons up similarly, hopefully it will make giving directions easy and cause you to make less mistakes following the guide. You can always look at the video if you get lost. I make some superfluous movements, but they should be mirrored here just so you can follow along.
Hopefully for those of you unfortunate enough to have to suffer through this map as I did, it works for you this time.
I will be emphasizing which echelons to select when swapping; every little detail like that can change the map state so don't get lost or do a step the other way around!
For turn one, select Echelon 1 and move it southwest, then northeast over the one-way path, then move it onto the Resupply Node to the southeast. Kill any Black Golyats you run into along the way. Select Echelon 3 and move it southeast, then move it northwest over the one-way path, then northwest a second time onto the Radar Node (the rightmost of the paths in that direction), killing any Black Golyats on the node. Move Echelon 3 north, killing any enemy on the space, and Echelon 3 should now be just southeast of Echelon 1. Move Echelon 1 southwest onto the node to the left of the Radar Node. End the turn.
On turn two, select Echelon 1, and move it southeast onto the Radar Node, taking the upper of the two options. Select Echelon 4 (your dummy echelon), and move it southwest on the perimeter, then move it northwest across the one-way path. You should now have your three echelons on the left in a slightly-offset vertical line. Select Echelon 4, and swap it with Echelon 1. With Echelon 4 still selected, swap it with Echelon 3. Move Echelon 4 northeast onto the Heliport next to Henrietta. That's one of three down. However, we're still vulnerable to the Red Golyat (if your layout matches mine), so select Echelon 1 and move it east, and then move it back west to its original position near the one-way path. With Echelon 1 selected, swap it with Echelon 3 to the northwest. Now you should be able to move Echelon 1 north one space, below Echelon 4, which should lock its node and prevent entry to that Heliport, including from the enemies. Echelon 3 is still in danger though, provided your layout is the same as mine, so to avoid this simply move it northwest to the leftmost space it can go, to the left of the Radar node. This will put it out of the Red Golyat's alert radius, and it shouldn't move on the enemy turn as a result. Since everything is safe (or should be), end the turn.
For turn three, select Echelon 3 and move it to the southeast. Our echelons are now a bit stuck, so select Echelon 2 and move southeast, then southwest across the one-way path, then southwest again (taking the rightmost/lower path), then straight west. With Echelon 2 still selected, swap Echelon 2 with Echelon 3. This will bail out two of our echelons so they can move again. Select Echelon 1, and move it southeast, killing any Black Golyats on the node. Since this node had an arrow on it and it's next to the Heliport below Henrietta, we should now be able to go northeast and capture the Heliport with Echelon 1. That's two-thirds of the map taken care of.
Now we will be replicating the part where I was stupid, so bear with the repetition here. With Echelon 3 selected, swap it with Echelon 2, then with Echelon 3 still selected, swap with Echelon 2 again. Swap with Echelon 2 a third time while keeping Echelon 3 selected. Swap with Echelon 2 a fourth time with Echelon 3 still selected. Now select Echelon 2 and swap with Echelon 3, finally achieving the desired effect of locking the Red Golyat from moving onto the echelon to its southwest. End the turn while everything is safe to get some AP back for the final turn. Kill any enemies that may attack between turns, which should just be Black Golyats if anything.
On turn four, move Echelon 2 east. Select Echelon 1 and move it southeast. Select Echelon 2 and move it northeast, taking the rightmost path of the two (which should be the only one, since the Radar Node should be locked at this point), then step onto the hopefully newly-unlocked Radar Node to the southwest. Now that we can't go any further with that echelon, bring Echelon 3 up behind, moving it southeast, then east. With Echelon 3 still selected, swap it onto Echelon 2's space, which should unlock the path to the Heliport. Move Echelon 3 northwest, which should be the space northeast of Echelon 1, and then finally move it onto the last Heliport to the northwest. Now we'd normally be done, but there's one loose end here. Select Echelon 1, and move it southeast onto the Radar Node, which should lock Echelon 1 and Echelon 2 from being attacked, protecting them from the Red Golyat that is nearby if your layout was like mine. End the turn and, aside from any battles with Black Golyats, the map should be completed.
Video of this clear
There is an alternate method that Kazuki came up with previously; it seems like it has worked for some people but we redid everything in case it broke. If your RNG looks similar to this one you could maybe try it, although the written guide for it isn't up anymore. Try at your own risk, but it might help reduce amount of resets if it does work out for you. The video is below:
Author: Miyako
Tags: GSG