


Traitor I
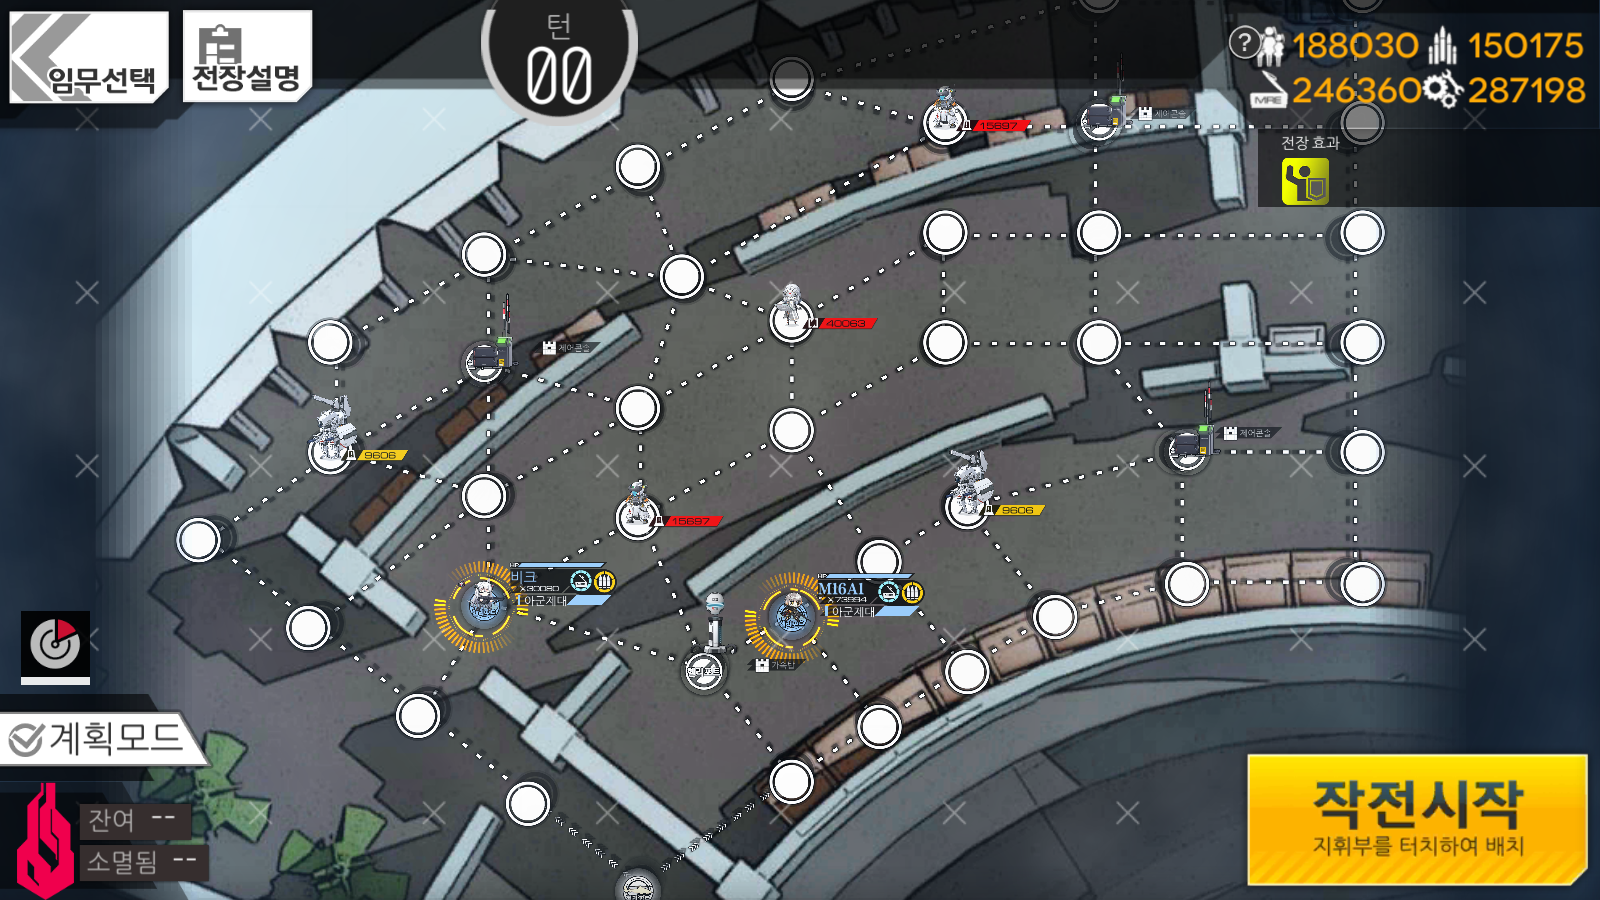
Objective: Use 3 consoles, then capture the marked Heliport.
Failure Condition: M16A1 dies
I'm pretty sure this is the actual hardest puzzle map in the game. I certainly had a fun time figuring out a method of clearing this map, but it boiled down to one very simple concept: you can block enemy spawns. Do this and the map is cake. Yes, this means you need to have foreknowledge of the enemy spawn patterns, but that's what guides or running the map a bunch of times is for, yeah? Still not a fan of the map.
Anyway, this map gives us a few things we can work with. First, M16A1 is broken as fuck. Second, Beak is extremely strong. Third, we have a device near our Heliports that allows for three free moves. Lastly, we have extra units that spawn in on our side after every console M16 uses. Very helpful. However, the MAIN problem that this map has is the effect the consoles have on M16. She becomes unable to move for a few turns and has drastically lowered stats. Basically, it's like if she got hit with an EMP, and we all know how strong those are. That's about it, so, let's begin.
For turn one, we want the Heliport on the bottom of the map. Move M16 to the device to the left and use it to apply the buff to Beak. Move M16 down so she's on the right of the Heliport. Next, move Beak to the other side of the Heliport. End the turn here.
On turn two, move M16 back up to the device. A Commander should've taken the node and we want to kill it. Once it's dead, use the device on Beak once again. Move her back to where she started the map on, then head up two nodes to the console. End the turn here.
On turn three, use the device and apply the buff to Beak a third time. Have M16 move to the right to take out the Doppel to the right, since it took our Heliport. Next, move Beak to the left to take out the Doppel near her, then move back to the console so you can go up one node to take out the Commander there. Once that's done, have her move back to her starting Heliport. End the turn.
On turn four, make sure you're resupplied. Move M16 to the left onto the device and then swap her with Beak. Move M16 up to the console two nodes up and DO NOT start using it. End the turn here.
On turn five, have Beak use the device on herself and then move up one node, then two nodes to the right. This will position Beak to be where one enemy spawns, while the Command Nyto covers the other enemy spawn. Since that's sorted, you can now use the console. Two additional units will spawn in at the starting Heliports, along with some extra enemies. Our goal now is to cover M16 until she can move again.
With the Hydra that spawned in on the left Heliport, move up one node, left one node, then up one node to take out the Nyto unit near M16. Move it to the right two nodes after you've cleared that enemy. End the turn here.
On turn six, move Beak to the right one node, then down one node so that she's on the bottom right console. Move the Cyclops to the right one node, then up one node. End the turn there.
On turn seven, M16 should be able to move again. Move her down right one node, up right one node, then right two nodes until she's on a second console. Once again, do not use the console yet. Move the Cyclops up one node. Move the Hydra to the right one node. End the turn here.
On turn eight, move the Cyclops to the right one node. Once again, we're in position to block enemy spawns. Use the console with M16. This triggers another set of allies and enemies. The new set of allies are just going to be hydra 2/cyclops 2, old ones will just be 1. Move Hydra 1 to the right one node. Move Cyclops 2 to the left one node and use the device on Beak. Move her down one node then back to the console and then head to the left to have her resupply at the Heliport there.
On turn nine, move Cyclops 1 down one node, right one node, then down one node, so it's on the last console. End the turn there.
On turn ten, M16 can move again. Now we can use the last console. Move her down two nodes and swap with Cyclops 1. We can immediately use the console here to activate the second objective of the map, which we've already completed. End the turn here and that should end the map.
Video of me clearing this map
Author: Kazuki
Tags: Fixed Point