Wolf and Owl I EX

Objective: Capture enemy Command Center
Recommended Echelon(s): RF/HG (x2), Dummy (x2)
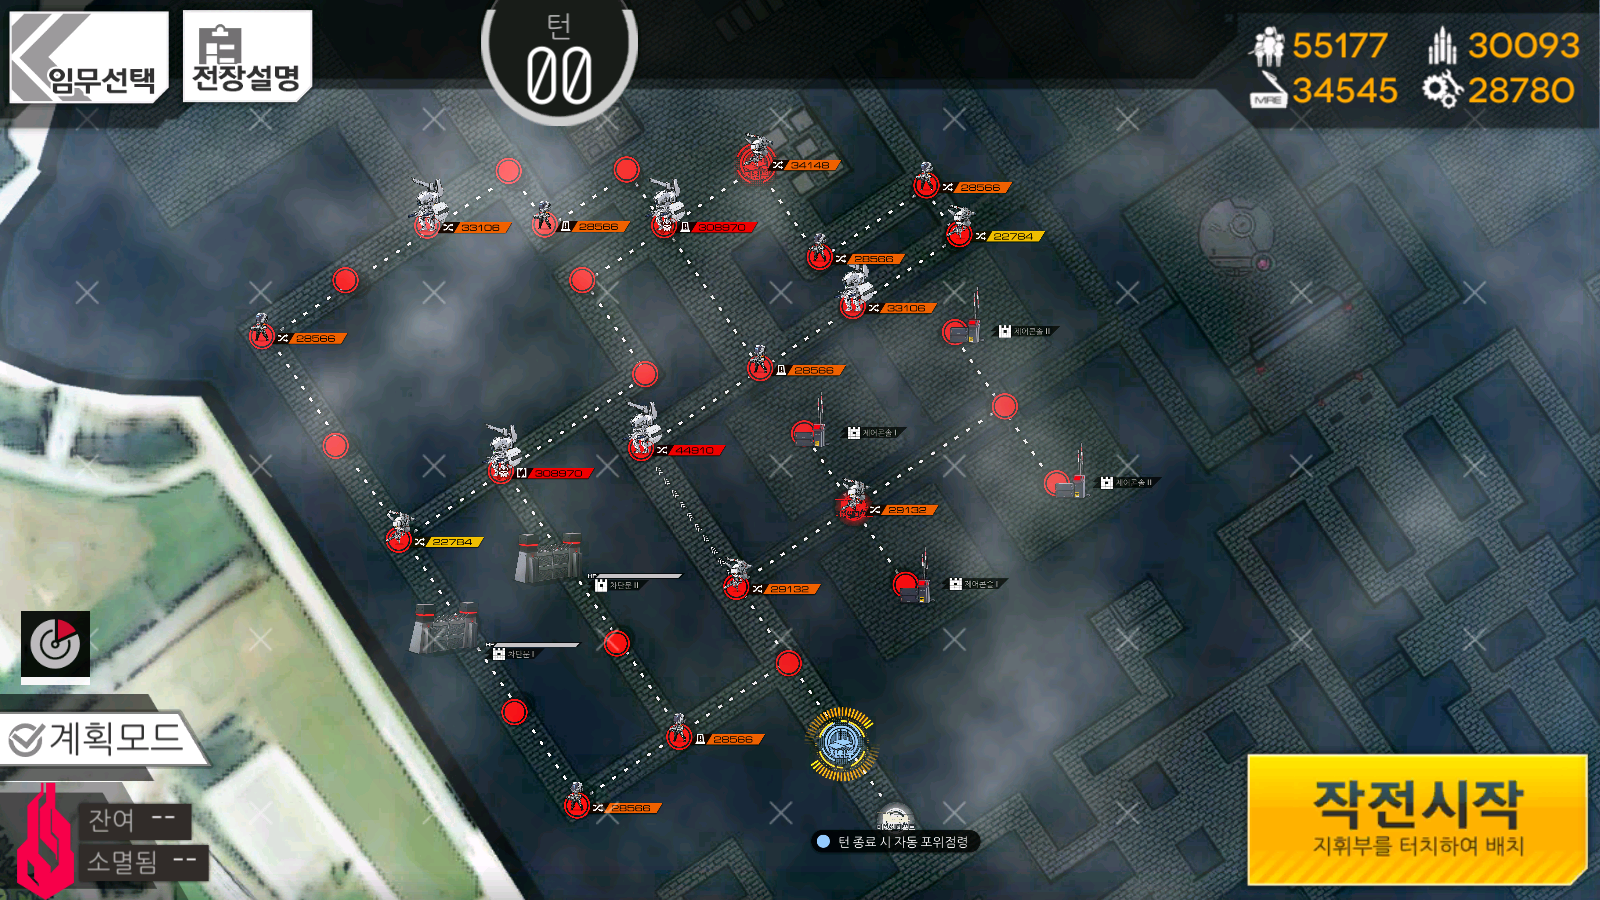
For this map, we have to go through a wall of enemies to get to the enemy Command Center. There's the option of going through the left side of the map and doing some bait strategy to move the Gundam death stack, but that's overly complicated. Let's keep it simple.
We're going to go through the 44k CE Gundam stack past the one-way route in the middle of the map. To add to that, we need to also have enough resources to get through all of the enemies. There's a total of six enemies after the stack we need to kill, but no way to resupply. If we linger around too long, the death stack will come down and block us here as well.
So for this, we need to (a) get enough AP ready to run past the death stack with two echelons, more or less, and (b) have a HOC ready to assist with killing the 44k CE Gundam stack. Let's get started.
The name of the game here is to stack AP and get the units you need ready to go through the one-way path. We want to clear the area around our Command Center to be safe while grabbing the Heavy Heliport near the consoles on the right.
For the first three turns, this is the goal. Pull out a HOC on turn two to help deal with the Rodeleros, and deploy two dummies alongside that. Once you've gotten the Heavy Heliport on the right, now's a good time to position yourself to kill the Gundam on turn four.
Make sure your two echelons are fully supplied and have your HOC in range for the Gundam. Then cross the one-way path into it to take it out. After that, kill the next enemy in your way. From here you can use your other echelon to clear out the remaining enemies, so move it past the one-way path and swap to ensure your first echelon won't get destroyed by the death stack. You can wrap up the map by clearing the path to the Command Center full unga smash style now.
Video of me clearing this map
Author: Kazuki
Tags: Isomer


