


Operation Arctic 1-1
Intro and Discussion#
(As always, if you don't want to see the introduction bs, you can skip down to the strategy section for the meat of the guide.)
Here we are with the second major event for Girls Frontline, Operation Arctic. This is where we get a real taste on how events will be structured from here on out: three chapters divided up into four missions each. Each chapter has a different level of difficulty. As it seems, chapter one is for people new to the game and should be able to be cleared by anyone. Chapter two is for people in the mid range of levels, around level 70 with four linked t-dolls. Chapter three is where you should be pulling out all the stops to clear the content.
With this in mind, I'm unable to do the same thing I did with cube. Starting a new account and doing it from scratch wouldn't give me a good way to do chapter 3, so I'm continuing with the account I cleared cube with prior. This gives me an advantage with the first chapter, but I'll be starting to see some difficulty going into chapters two and three. Just keep in mind the scaling of chapters and you should be fine.
Going into this, I'm using two echelons for now. Full disclosure, I've been pretty lucky with my rolls in KR, which gives me a bit more to work with. However, the intent of this guide is to give you the strategy needed to clear this maps, and so, any tactics I do should be able to be replicated. I'm also not using fairies for this, since EN is confirmed not to have fairies on arctic's release. somethingsomethingwhyareyouusingan94then
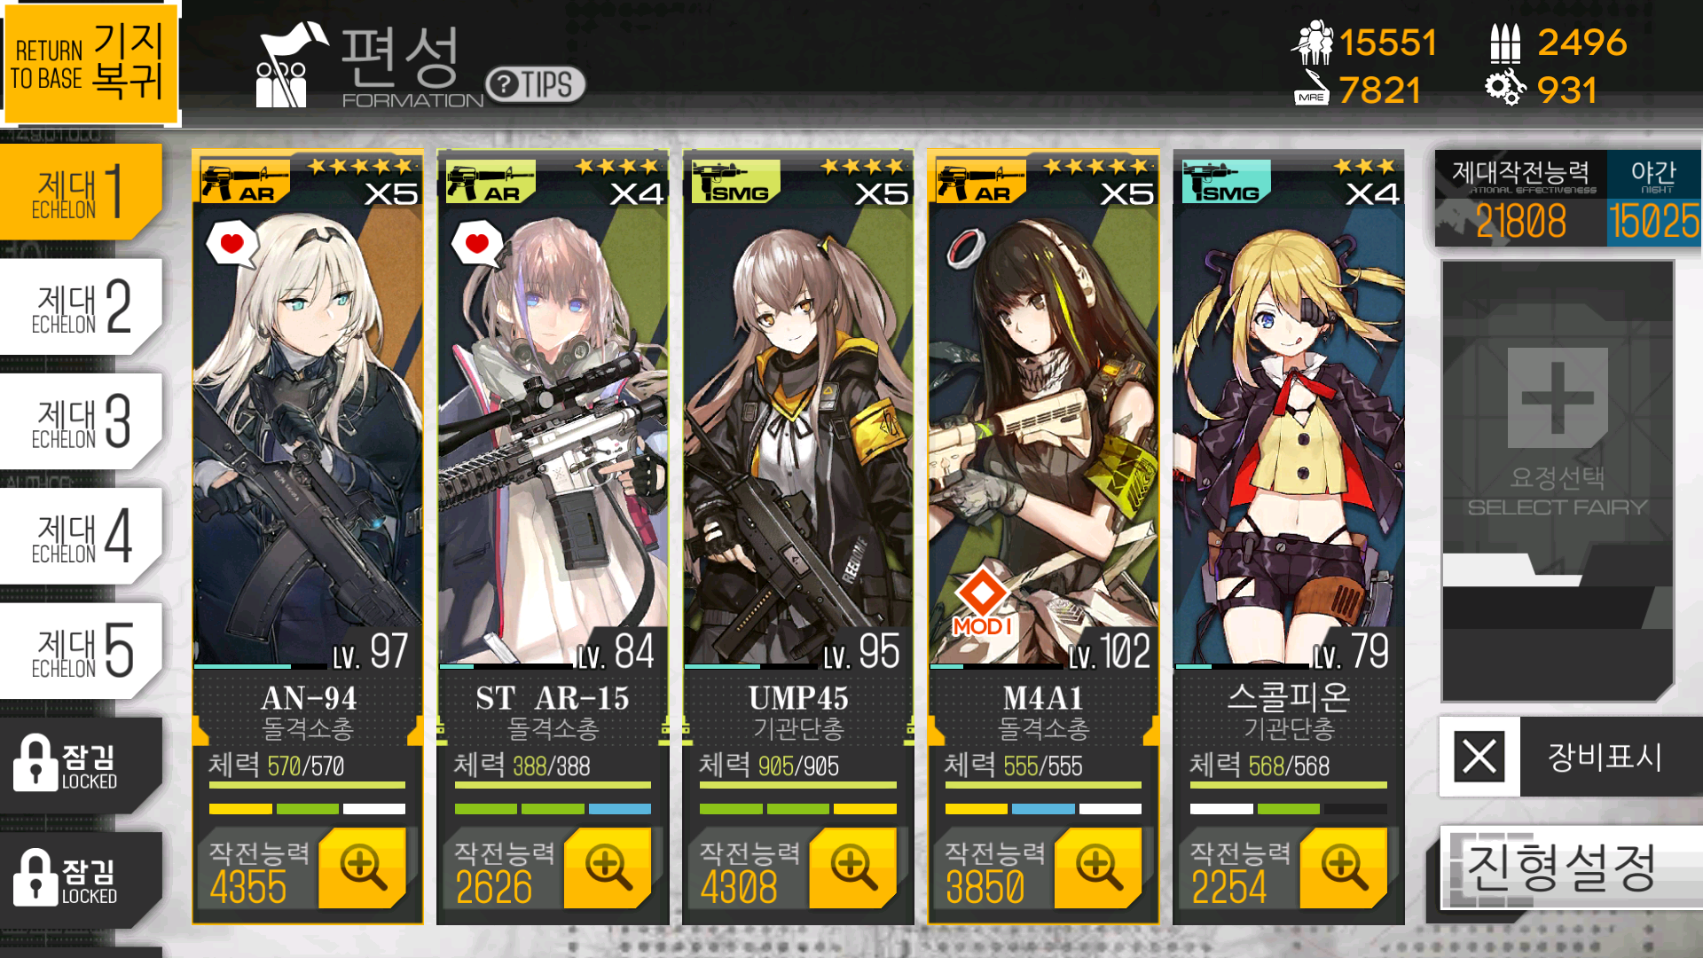
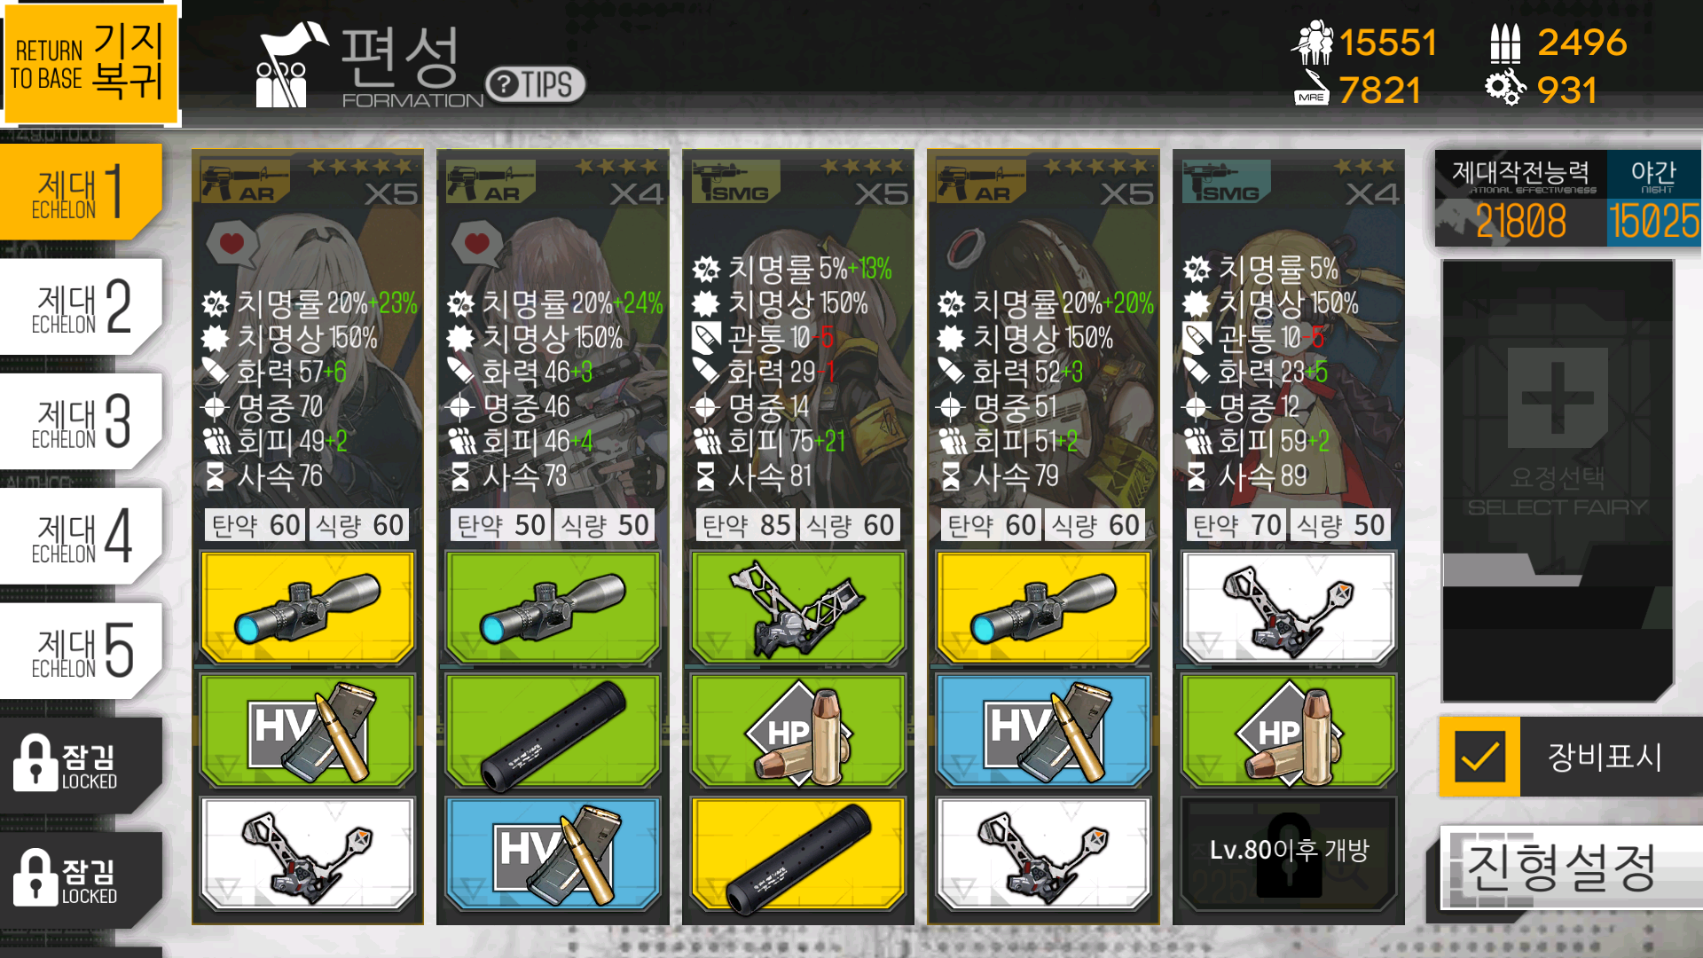
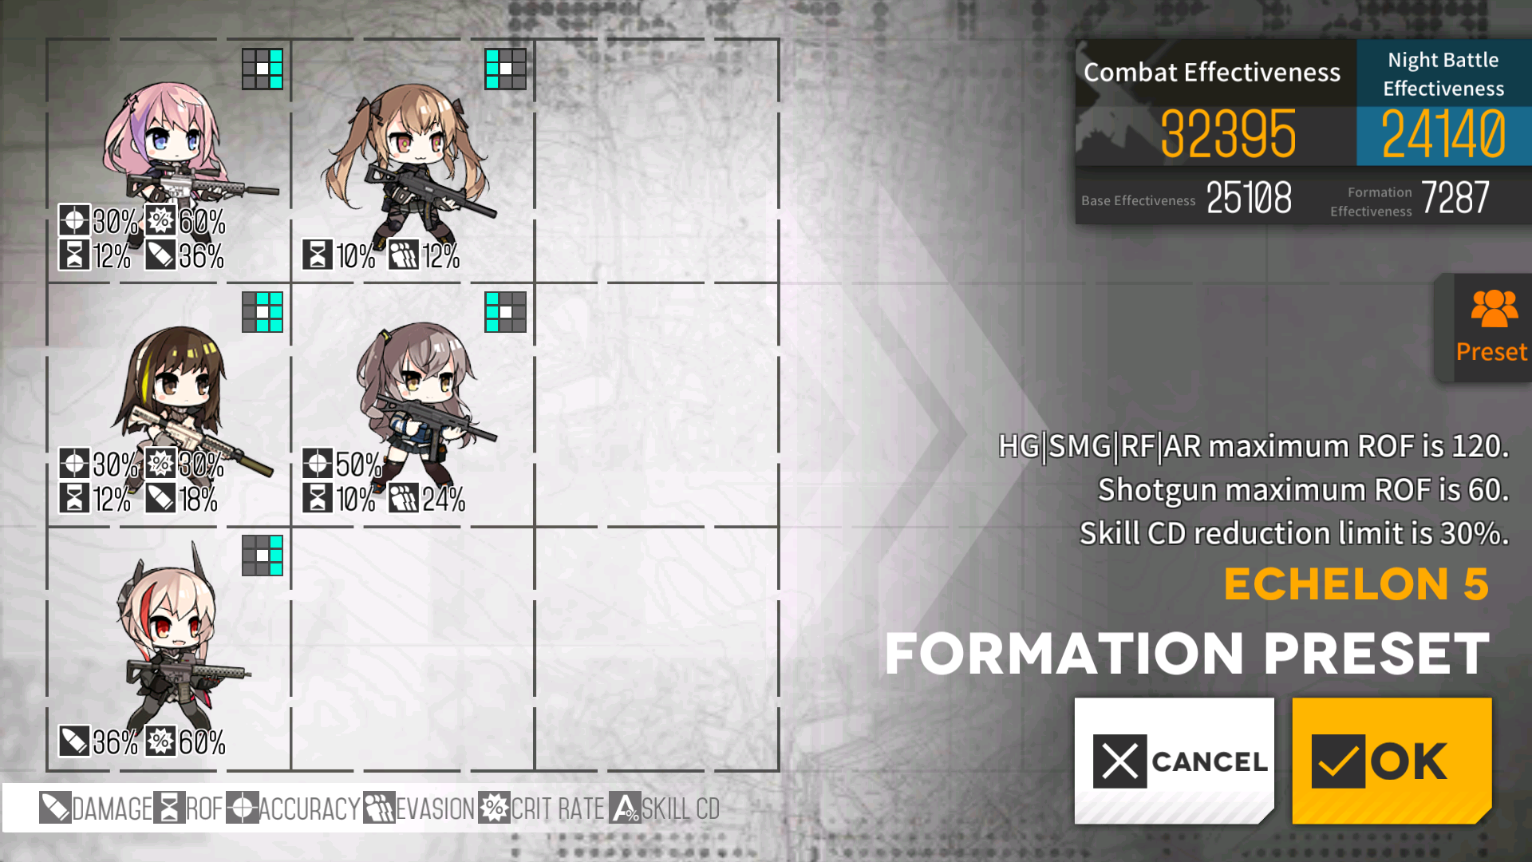
First Echelon:
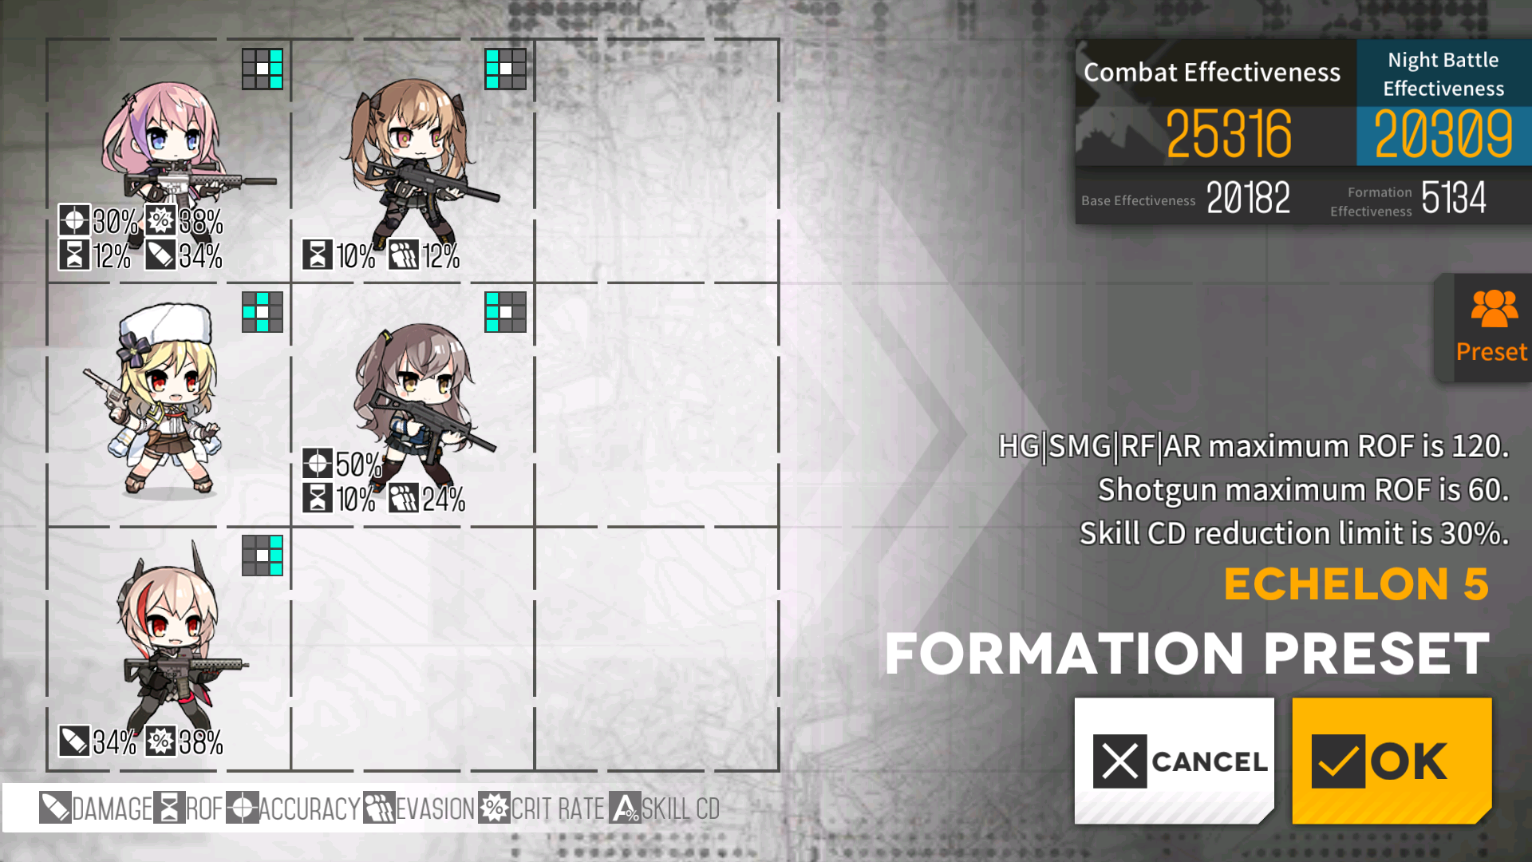
Second Echelon:
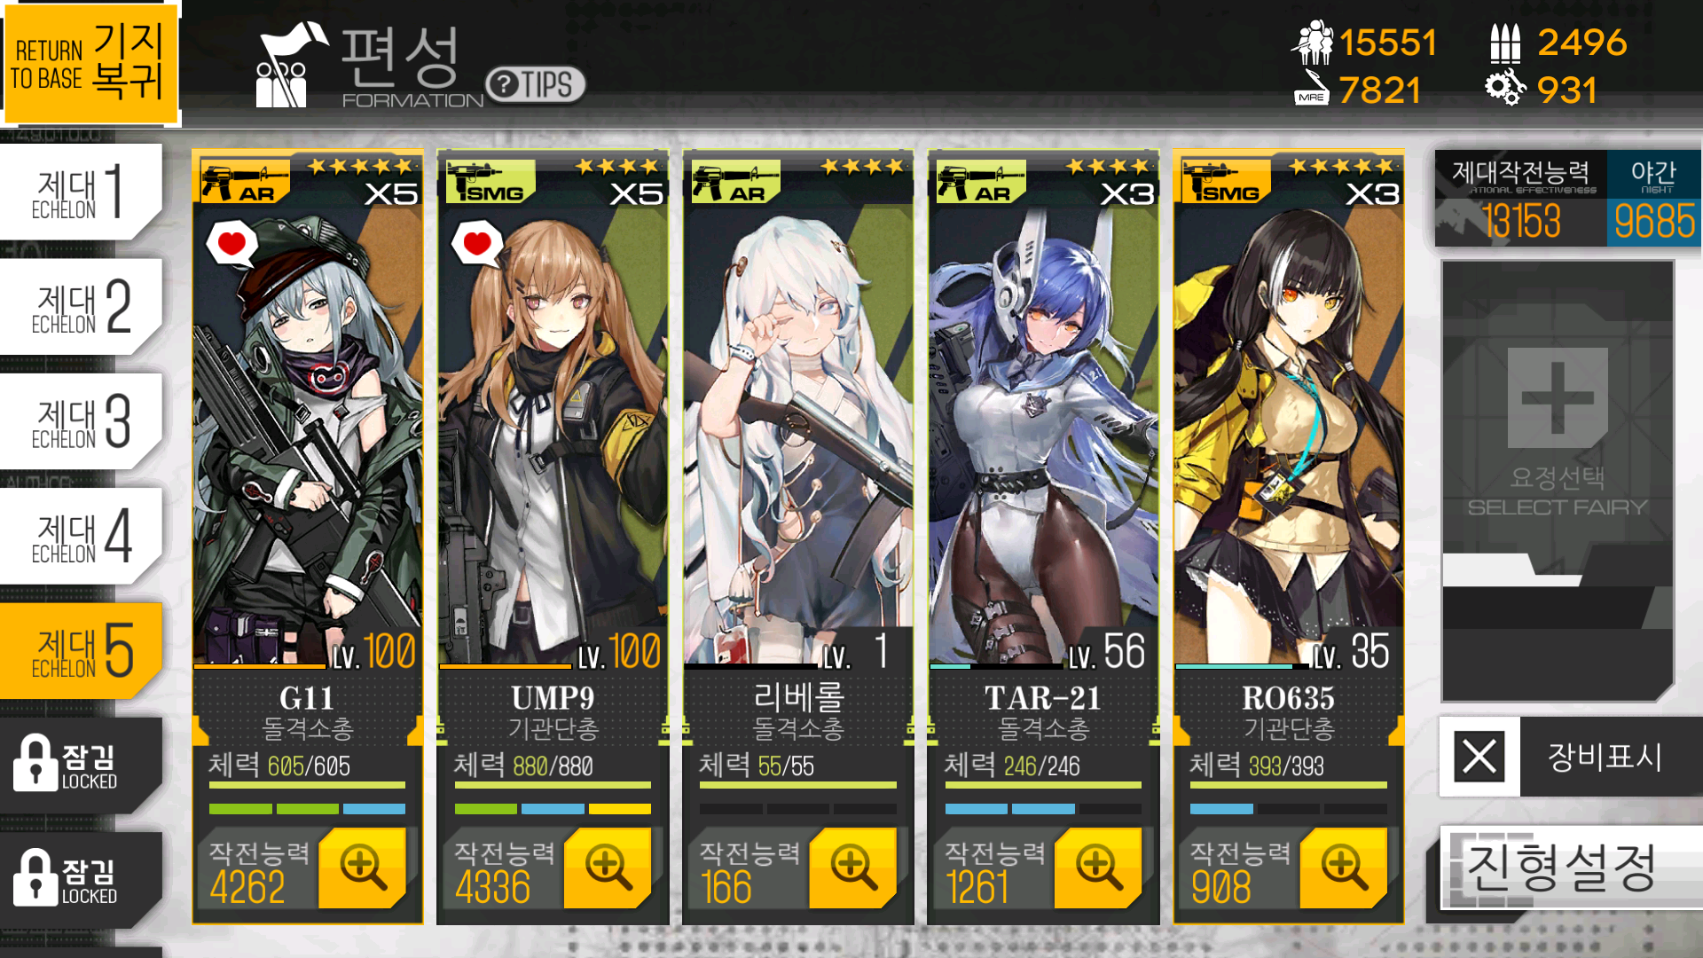
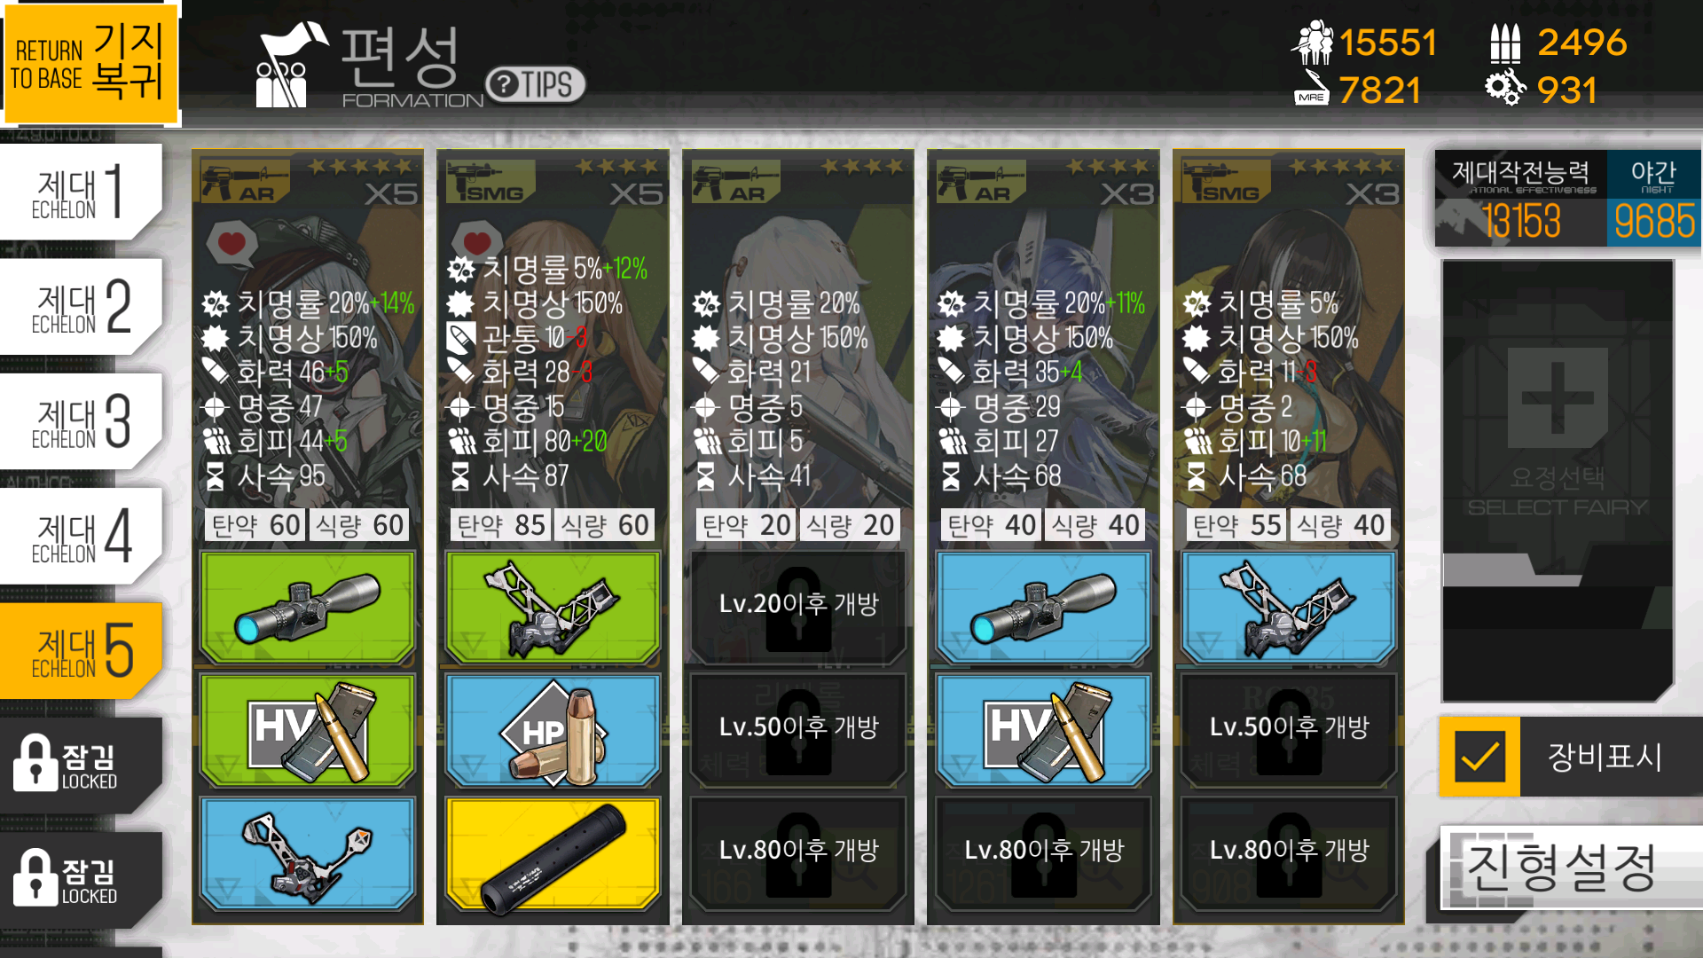
Since I didn't have much of a time limit on how long I could take with this, I upgraded the quality of my roster considerably. Playing off the strengths of the strong ARs at my disposal, I've dacided on doing two multi AR echelons. At the time of writing this first chapter's guide, I haven't looked at what chapter two has in store for me, so I may make some adjustments then according to needs of the present situation. But for now, this is way more than enough to take on chapter one.
A quick tl;dr for why I picked what is:
AN-94, ST-AR 15, and M4A1 are all insanely strong ARs. UMP45 is the best tank that I have currently. Skorpion is just there cause I had her leveled.
G11 is super strong, especially since her skill is Lv 9 now. Ribeyrolls is there to buff G11/TAR-21. TAR-21 is a very high performing 4 star. RO635 is there to be main tank, but I don't have her leveled yet. UMP9 is supposed to be the offtank for this.
F2p/Budget#
This section will be for chapters 1~2. Chapter 3 is really not easy to clear with budget units, because the chapter 3 of events are really made to be only clearable for higher end players. For Arctic Warfare and Deep Dive, it's not quite that hard yet, however you definitely want to be rocking some good 5 star equipment as well as higher end T-Dolls. But for chapters 1 and 2, you have a fair few options.
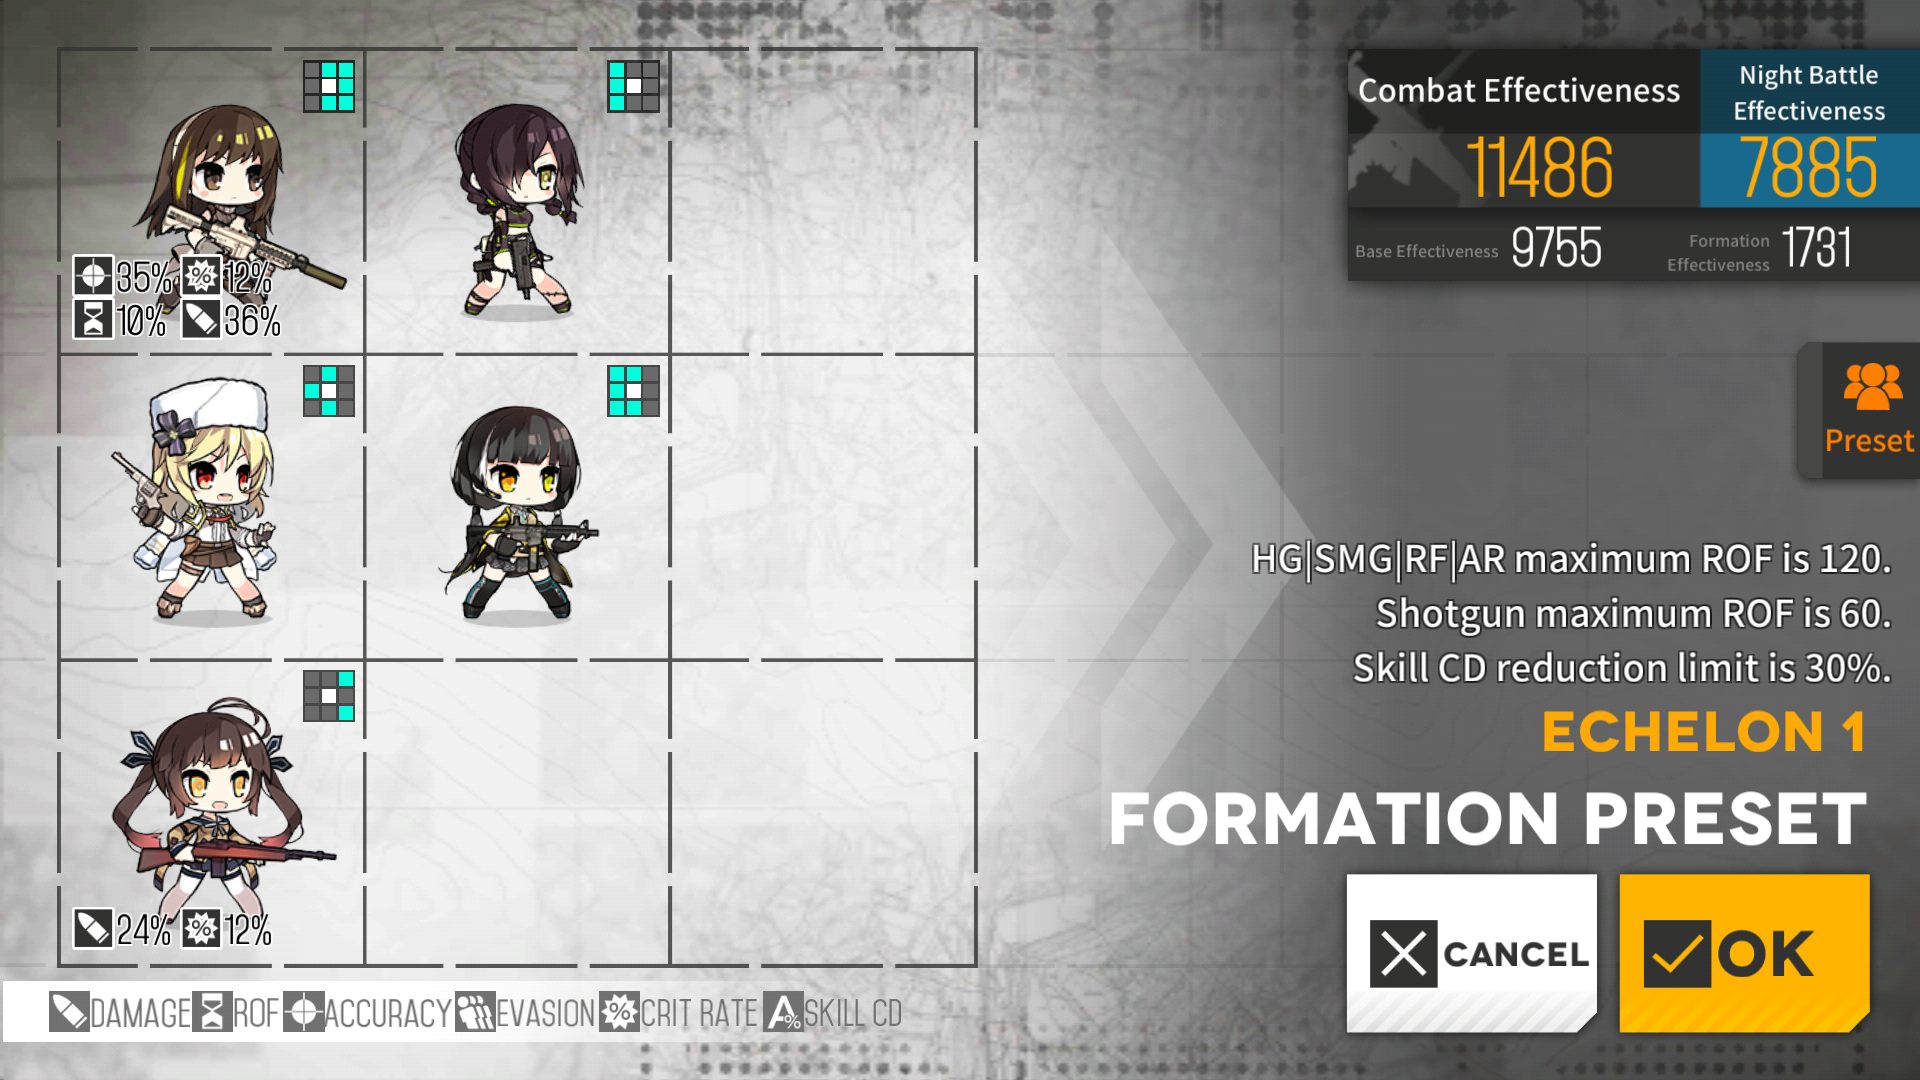
Ch 1 is clearable with stuff around 3x dummy links. Maybe around Lv 30~40. One echelon plus a dummy echelon should work out fine for you here. A good idea setup would look something like:
(Ignore the CE)
However, if you can't get one of the UMP twins, you can sub in Skorpion as an offtank. A new player should 100% be trying to build for at least one of the UMP sisters, so I'll assume you would have atleast one of them. They're pretty much the best easily obtainable SMGs in the game.
AR team, likewise, are the strongest ARs that you can get very easily. If you can't get them, you're most likely not strong enough to start Arctic yet.
As for chapter two, you can use more of the same units from chapter 1, but this time you want to have two echelons and sub in a HG for vision at night. You also want to be around Lv 70 or higher. Preferrably 90 to make Architect much easier. You can probably drop M4A1 from the first echelon, since the most you'll lose is her firepower. A HG will at least make up for her buff tile loss. So, it'll look something like:
(Keep ignoring that CE...)
The second echelon you use is ideally going to use RFs due to the armored units that are present that will give a weaker AR/SMG team trouble. So something you can use for RFs would look like:
You'll be using an AR/RF hybrid, since the requirements to make a pure RF echelon can be a little taxing. Ideally, if you're finishing Arctic Ch 2, you can finish Ch 7, even if you're abusing friend partners to clear the boss.
OPTIONAL:
This is entirely optional, please don't think you need this. It does make things easier to do, especially in chapter 2 when farming Architect kills. You can also abuse mechanics to kill Jupiter Cannons that aren't "intended" for you to kill.

This setup involves the use of a single good AR that can kill the Jupiter Cannons (most of their combat power is from their firepower and armor) before all your handguns die. It takes a little micro to properly do this strategy. The idea is, the forward-most T-Doll will take the hit from the Jupiter Cannon, then die. You will then move up another T-Doll to take their place, and so on. Hopefully the Cannon dies before your AR gets targeted.
Do note that doing this ruins your affection with the AR you're using, so keep that in mind when doing this. The benefit is that the HGs you'll be using can be any level, since they'll only be taking one hit regardless. So afterwards you can just scrap them. I hope you're happy, you monster.
There's an advanced form of this strategy that involves retreating each doll before the hit from the Jupiter Cannons arrive, but I won't cover that properly here. If you can pull that off, I doubt you need this guide.
Strategy#
(Just as a fyi, since the picture doesn't show it, echelon power of enemy units is between 600 and 1500.)
The goal for this chapter is to just capture the command center.
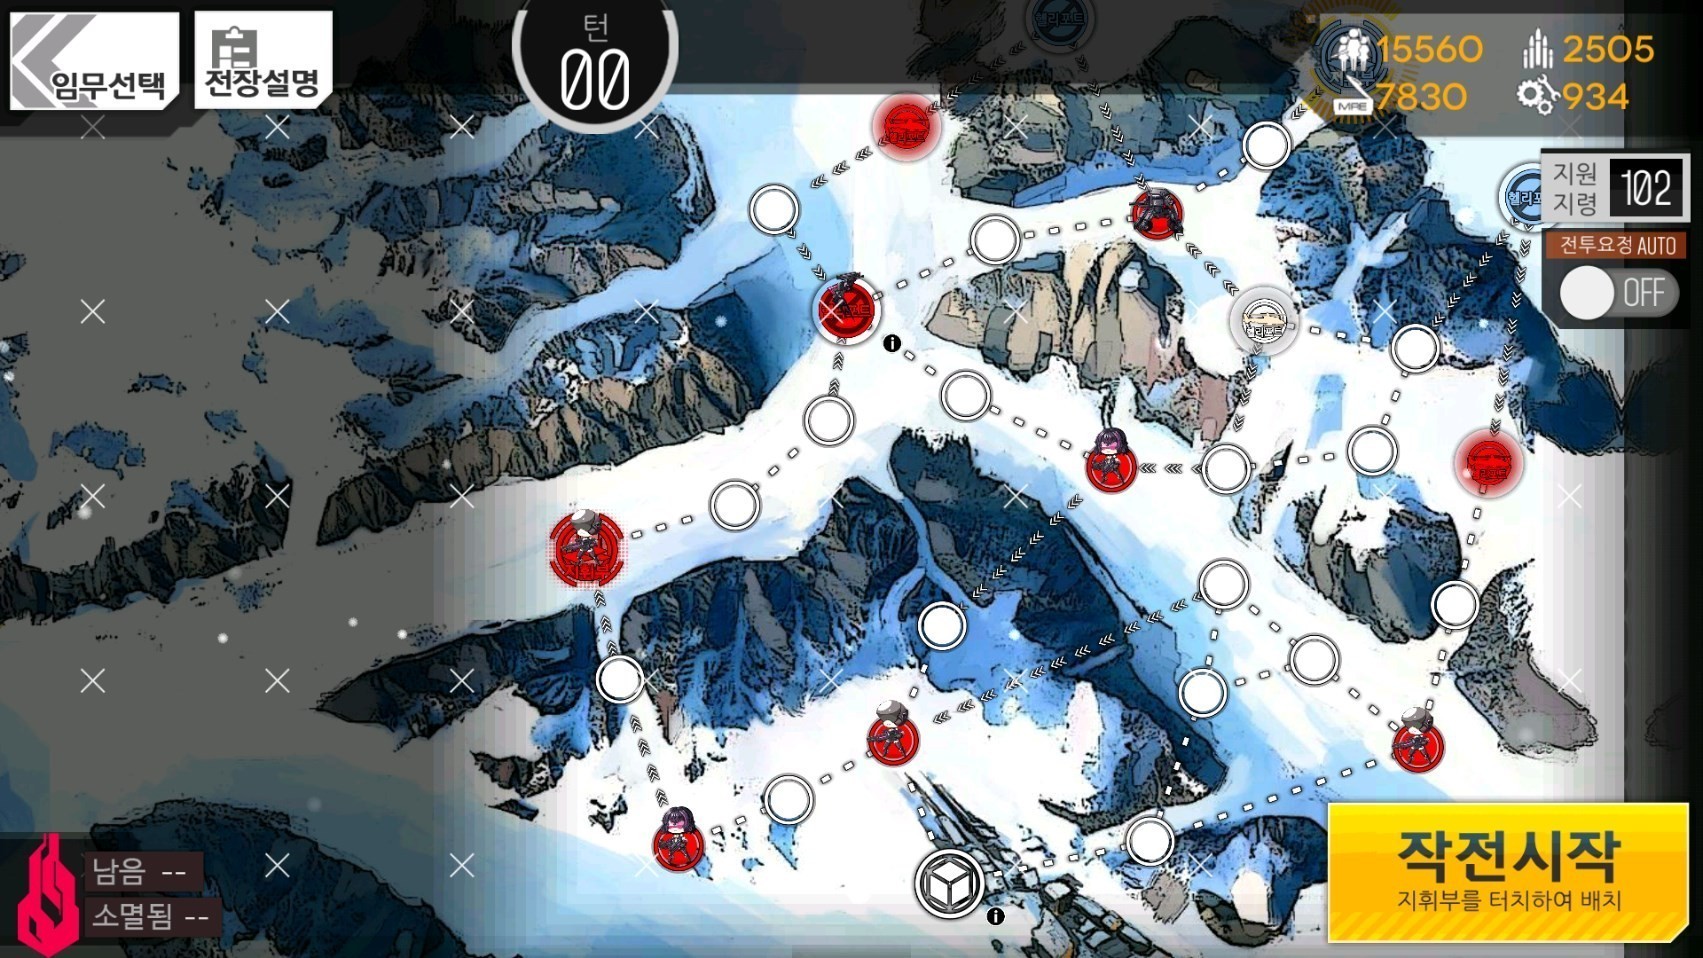
Going into arctic, you'll be encountering a few new mechanics. Three of which will be introduced in this first chapter.
First of which, is the pathing between nodes sometimes has a directional arrow pointing in a direction. This is an indication of a one way path, meaning you can't move in the opposite direction of those arrows.
Second, is those spaces with a cross sign over them. These are closed heliports. They function the same as regular heliports, however they're not always open for use. However, they will always give action points, so keeping them captured isn't too bad of an idea. I'll go over these in more detail in later chapters since the ones in this chapter don't reopen. For now, treat them as extra action points.
Third, the random node that has an extra large box over it compared to normal. This is actually a node that lets you resupply at it once, just once. Why it needs to be basically the same as a random node is a mystery I can't solve. You can instantly resupply the second you're on it, regardless if you hold the tile or not.
Since the goal is to capture the command center, you don't need much in the way of special tactics for this. Just keep in mind the new mechanics and you should be able to clear this easily. The big thing is resupplying at the resupply point, since you're liable to be nearly out of ammo by the time you get there.
Here's the video of me clearing this.
Do note that me stopping to take the resupply tile was due to not knowing how the mechanic worked at first. I have since corrected that.
Author: Kazuki
Tags: Operation Arctic