


Operation Arctic 2-1
Intro and Discussion#
So, as with chapter one of arctic, a significant amount of time has passed since I wrote anything for a guide. Since the KR/CN event Continuum Turbulance came out, I had to do some significant upgrading to what I had available. Because of this, I'm significantly stronger now, so it's a little hard to get a more objective look at the content's actual difficulty.
Since I can't delevel T-Dolls, I'm forced to limit myself to accomplish this. The limits I'm placing are: Unenhanced green gear only, no modded T-Dolls (Namely STAR-15 and M4A1), and no fairies. This should be enough to give some idea of how strong some things are going to be for the typical EN player.
Onto the chapter's content itself.
As mentioned in 1-1, chapter 2 is where you want to be in the midrange of levels to clear it reliably; meaning, around Lv 70 with 4x dummy links. Not mentioned, however, is that chapter 2 is entirely nighttime. So do account for power loss of needing to use PEQ units for night vision. You'll also be seeing armored units here, so keep that in mind.
A good approximation of how hard this is would be in comparison to Cube, would be that if you could clear it entirely, you should be able to clear Arctic chapter 2.
I will give one forewarning going into this, the Jupiter Cannon spawns in quite a few nodes of the maps are random. Meaning, you may come up to a route I used and it will have a Cannon blocking the way forward. Unless otherwised noted, there is usually a way around it. It just involves looking for the correct path. This applies for both chapter 2 and 3.
Now, for my echelon setups I'm using for this.
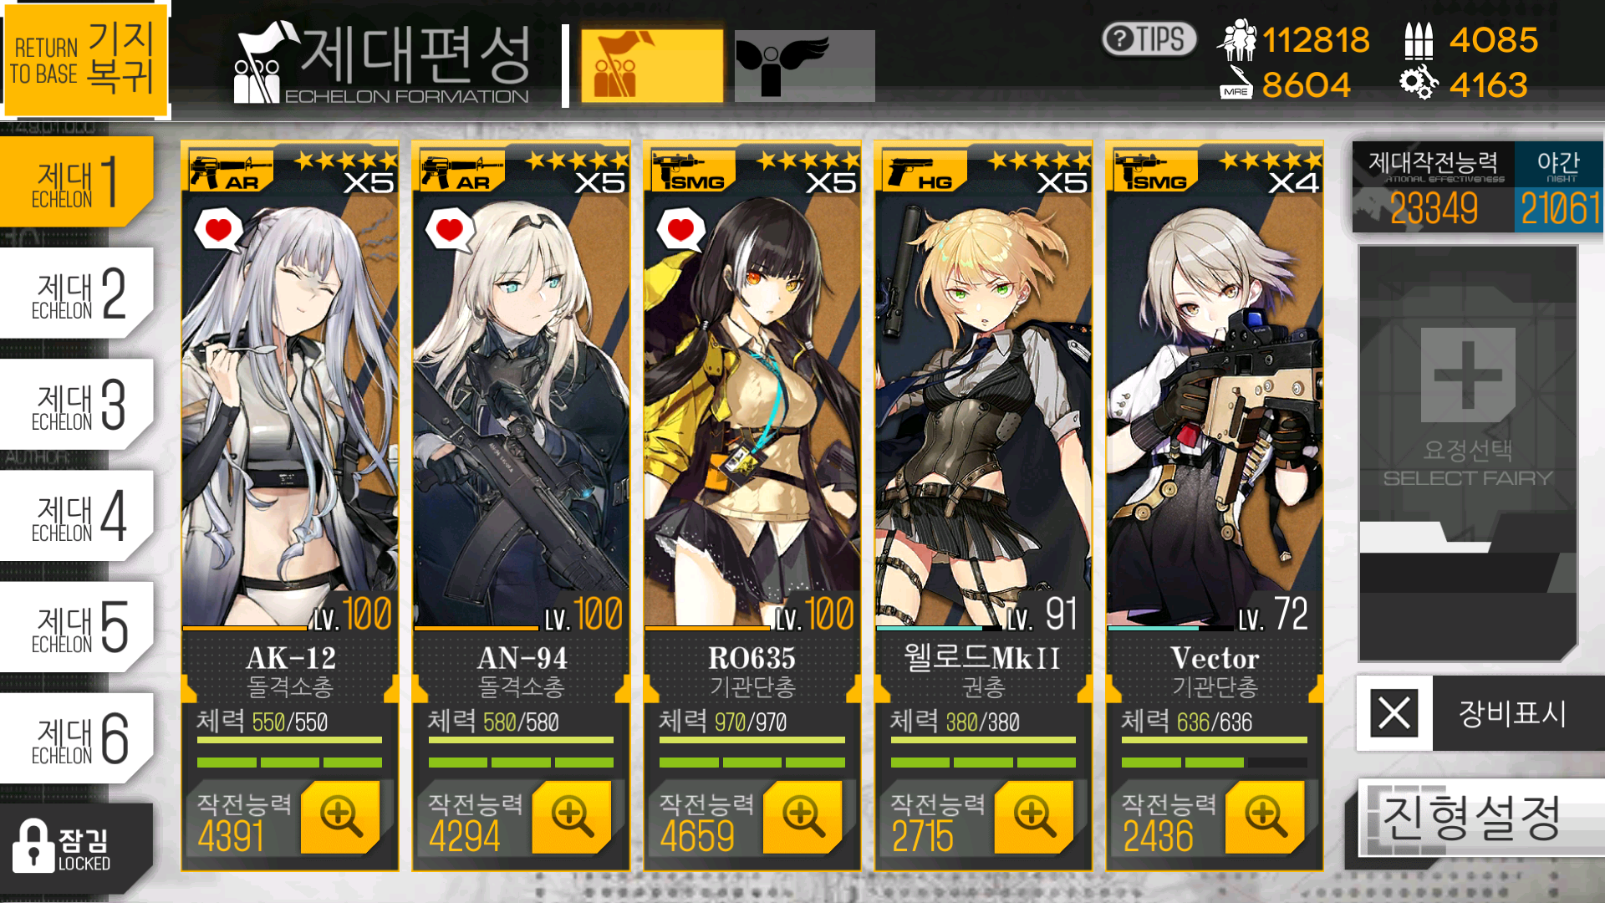
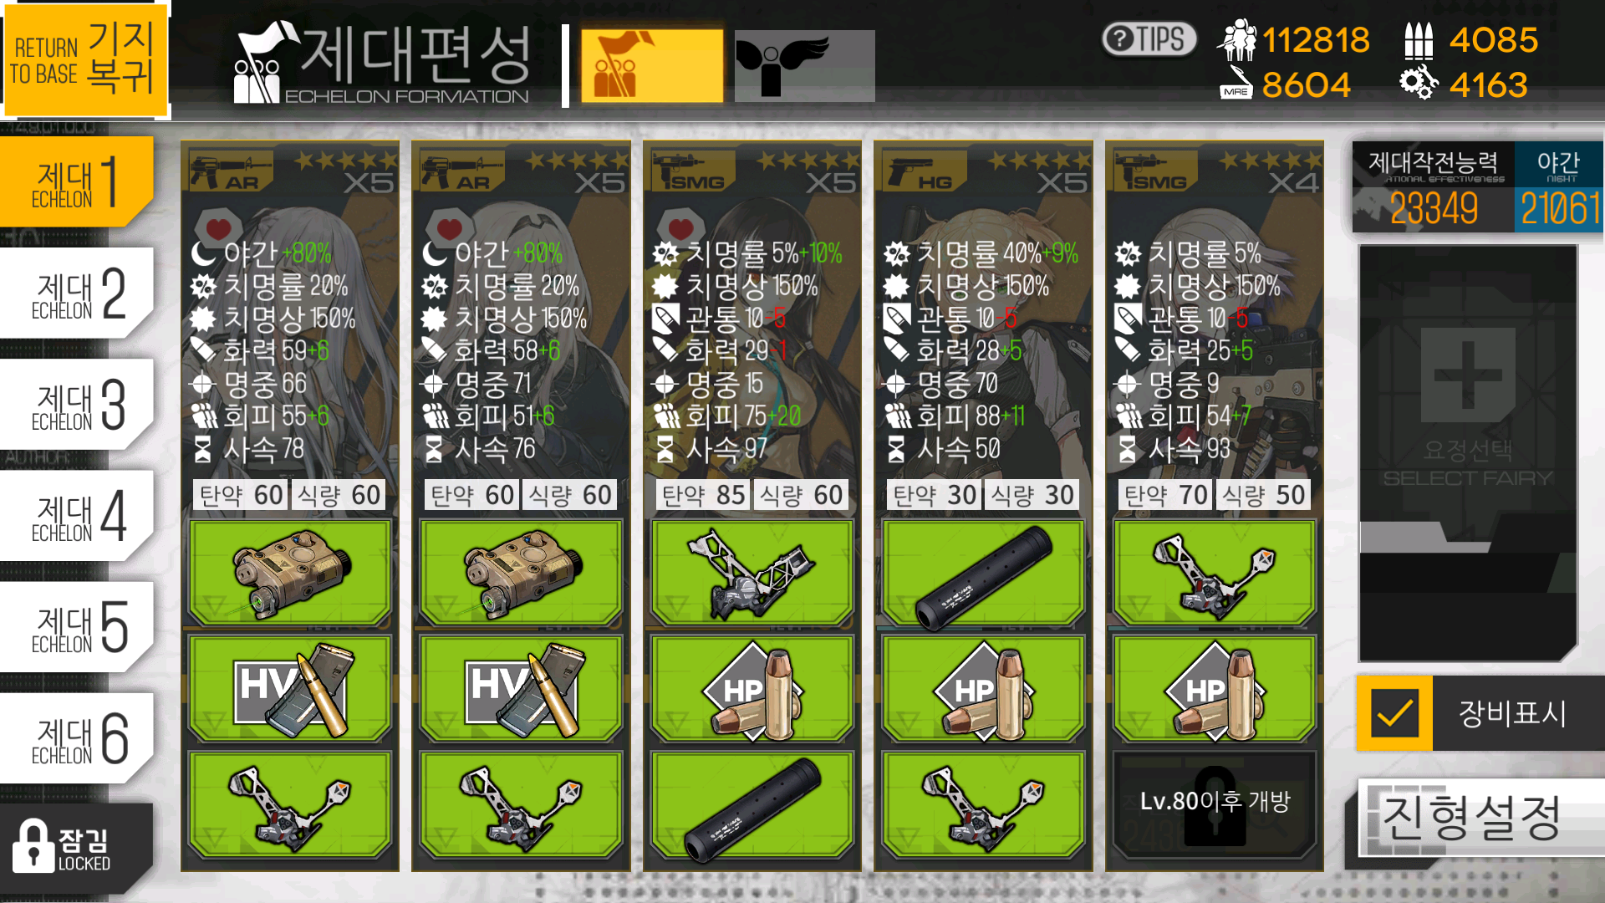
First Echelon:
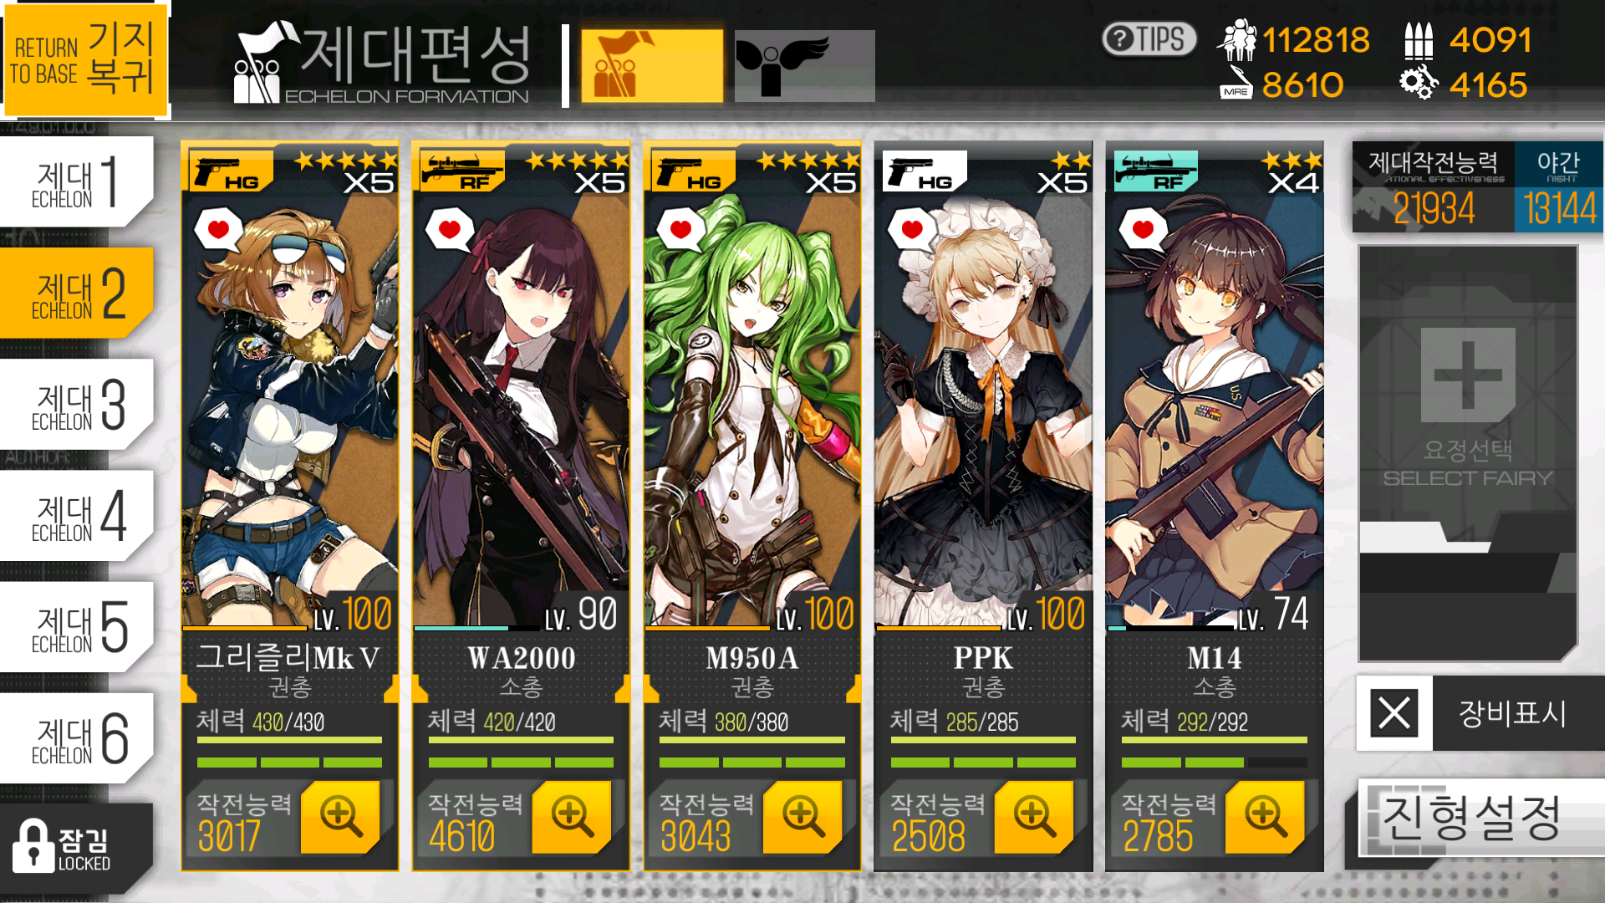
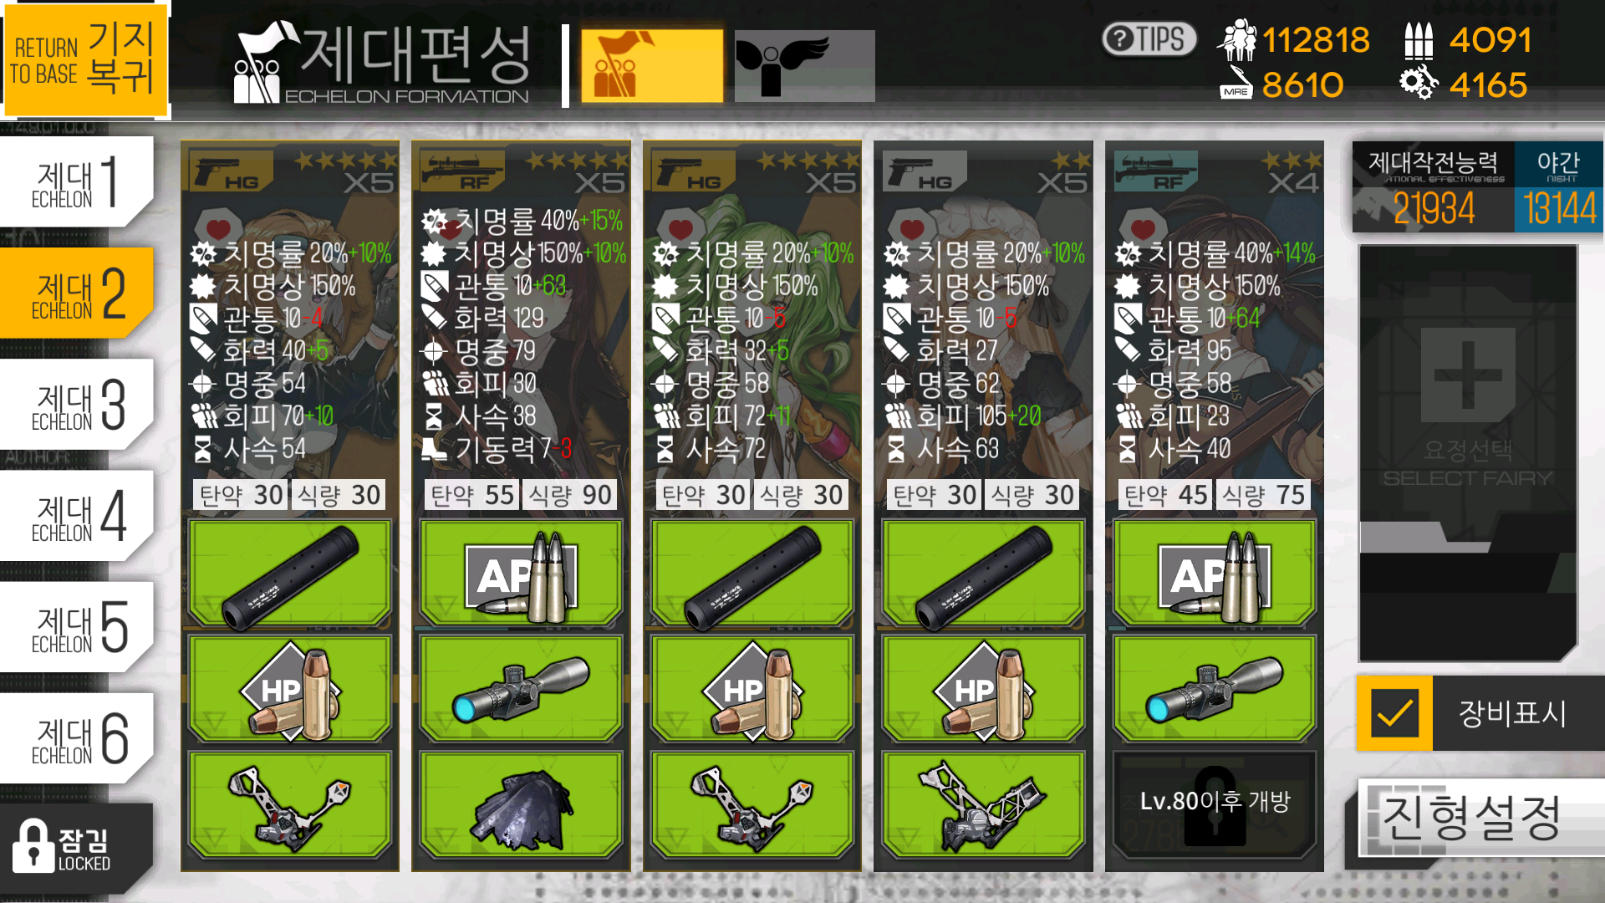
Second Echelon:
Echelon formations all end up in the standard F formation. Let's take a look at why I have these picks.
Both AN-94 and AK-12 have extremely good firepower mixed with buff tiles that compliment the F formation used. They're also, admittedly, the few ARs I have leveled to a usable state that aren't modded. G11 would be stronger overall instead of AK-12, but her buff tiles would go to waste in combination with AN-94's.
Welrod is the only mostly replacable part that I can steal from my RF echelon that isn't contender. I need a HG for night battles, so I opted to use her in my AR echelon.
Grizzly and M950A(calico) are both taken for their buff tiles. Calico should be enough to push WA2k to her RoF cap, and Grizzly is there for extra damage. PPK is used as a replacement for Welrod in this formation, and I have her buffing M14 since M14 needs the RoF more than WA2k.
RO635 is a solid main tank as well as free from the story. Vector is there for an off tank and to further boost AN-94's damage.
Do keep in mind that for the majority of this, I'll most likely just be brute-forcing it with my AR echelon, rather than using my RF echelon.
Strategy#
The goal for this chapter is to capture the enemy HQ. The map is pretty big, so I have to cut this up into two different pictures.
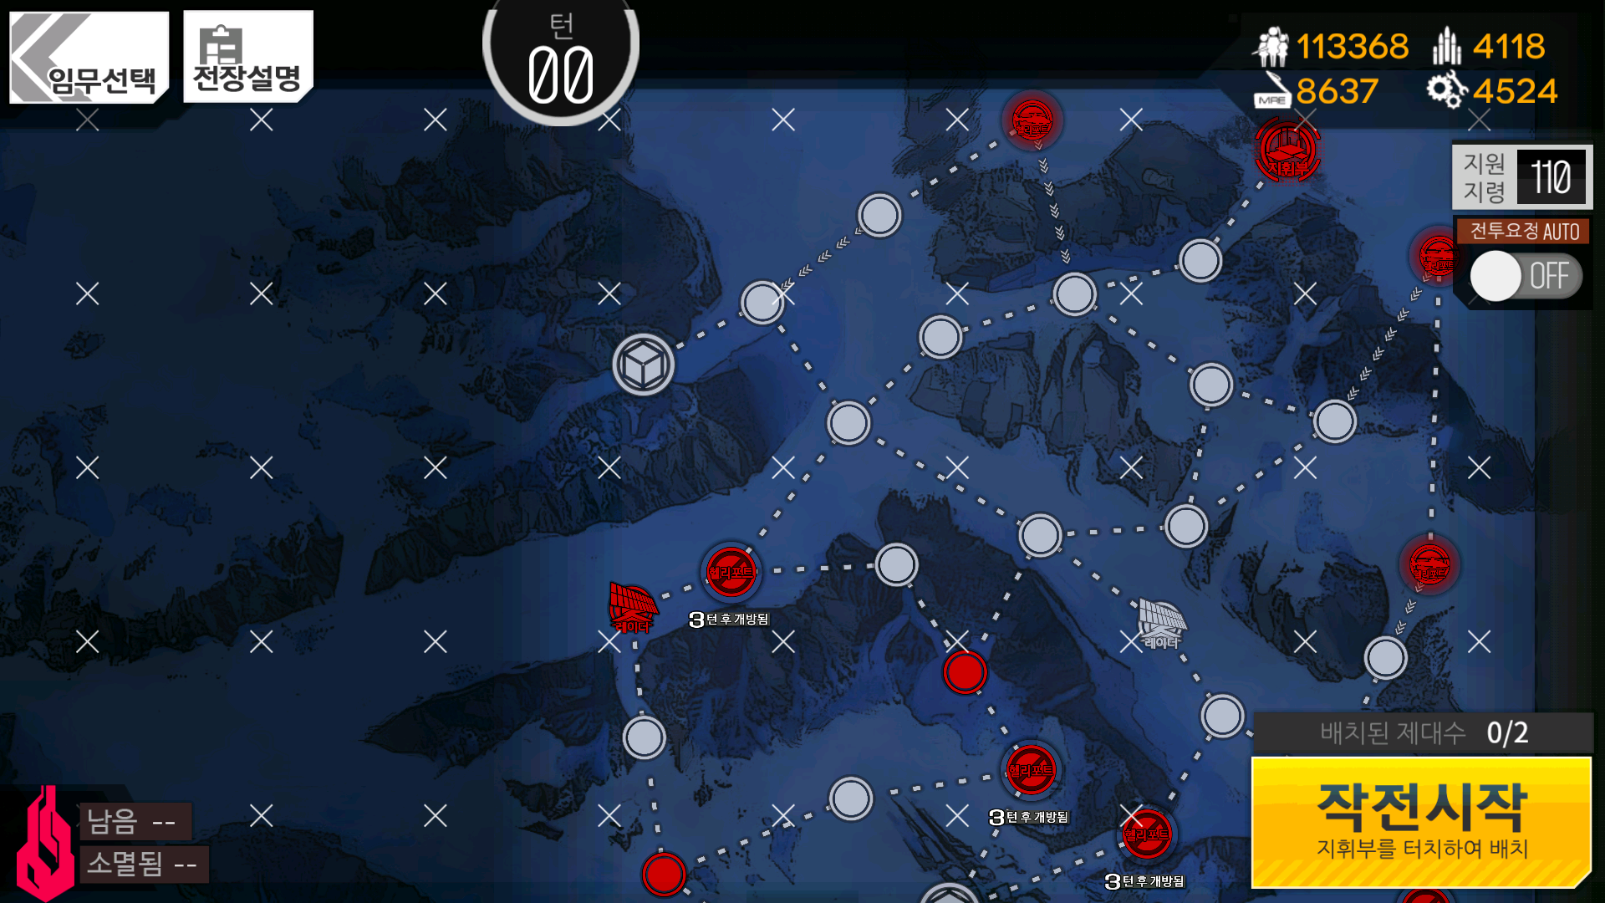
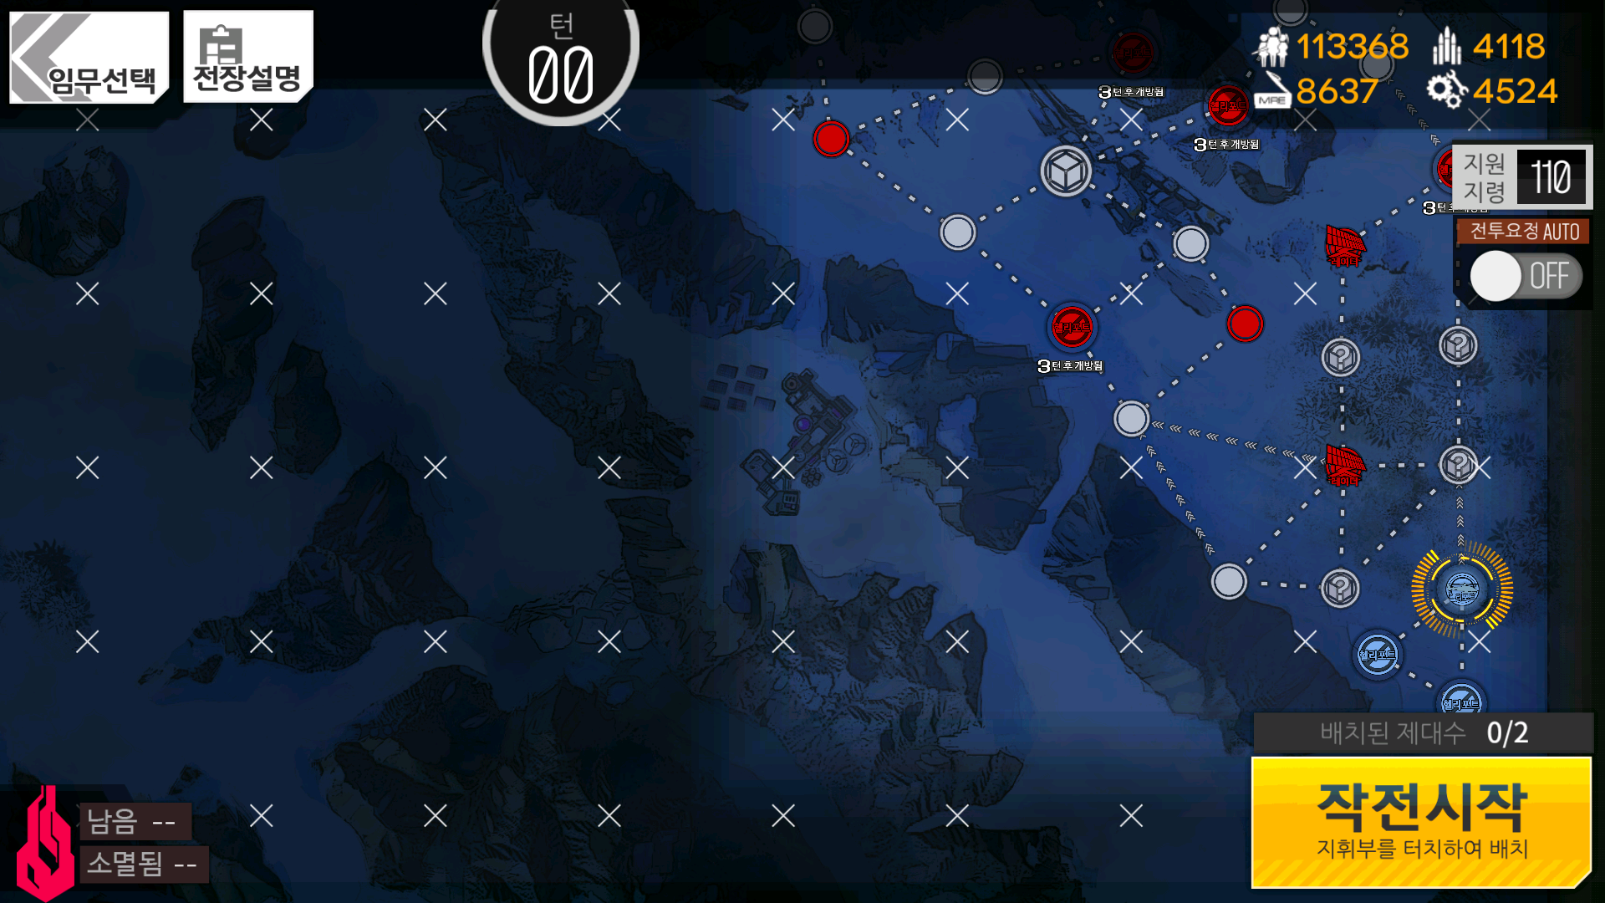
Chapter two is bringing the mechanics we went through in the first chapter into a nighttime setting. The big one that gets changed is that you now can't see where Jupiter Cannons are until you're right up next to them. A good rule of thumb is to assume a Sangvis Ferri held heliport has a Jupiter Cannon on it. However, this isn't always the case.
As you can see on the map of the area, there's closed heliports on every path up to the enemy HQ. For this map, you need to find which one of these doesn't have a Jupiter Cannon on it. I believe it's random, however, I've always been able to go through one of the middle closed heliports. Specifically:
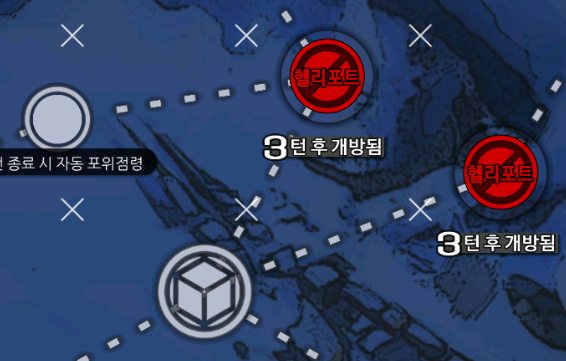
These two.
However, if you can't go through those, just look through the other closed heliports. Keep in mind that you don't have a turn limit for this, so you can take your time. You also don't have to worry about the few helipads you have on the bottom right being taken, since there's a one way path blocking entry to that area.
The major concern is ammo consumption. If you want to refill ammo, you either need to use the resupply points, or kill a Jupiter Cannon to take a helipad. You can go without any Jupiter Cannon killing, provided you're smart with your ammo on the way up. Ideally, you want to have two battles worth of ammo going into the enemy command center. There's a good chance of at least two enemies there.
Here's a video of me clearing this map.
Author: Kazuki
Tags: Operation Arctic