


Operation Deep Dive 1-1
Intro#
Operation deep dive, the second real major operation (Cube doesn't count, I swear). We're looking at three chapters and 4 maps per chapter worth of brand new content. It also features the second ranking map, in which you'll be assailed by the bosses of the operation, plus some extras while defending a supply route to your HQ! All for a grand prize of a unique equipment for 9A91. Yes, you do want to get that.
Like Arctic, each of the chapters represents a jump in difficulty, the difficulty ramp is a bit sharper this time around though. Chapter 1 is meant to be completed by newer players; chapter 2 takes a step further by making you want fully leveled T-Dolls for the content; and chapter 3 starts throwing in more difficult maps to push you even harder. Another thing it does, is to force you to adapt to new win conditions in maps, forcing you to use new strategies to clear the content. But hey, don't worry about that, it should, probably, be fine. Probably. Maybe.
As for this guide specifically, I'll be doing some restrictions for myself in an attempt to accurately reflect the difficulty of these maps. For chapter 1, I'll be limiting myself to an AR SMG team, I'll show later in this post. For chapter 2, I'll be using proper teams with fairies, same goes for chapter 3. The difficulty doesn't really go up much between later chapter 2 and chapter 3, at least in my opinion. I won't be using any strategies that involve use of specific fairies as well, they would be used as purely stat sticks.
I should also note that this will be the last major op I'll be restricting my usage of units. I really can't afford to keep low level stuff around as a f2p, the storage issues is pretty hard for me to deal with at times.
Echelon Stuff For Chapter 1#
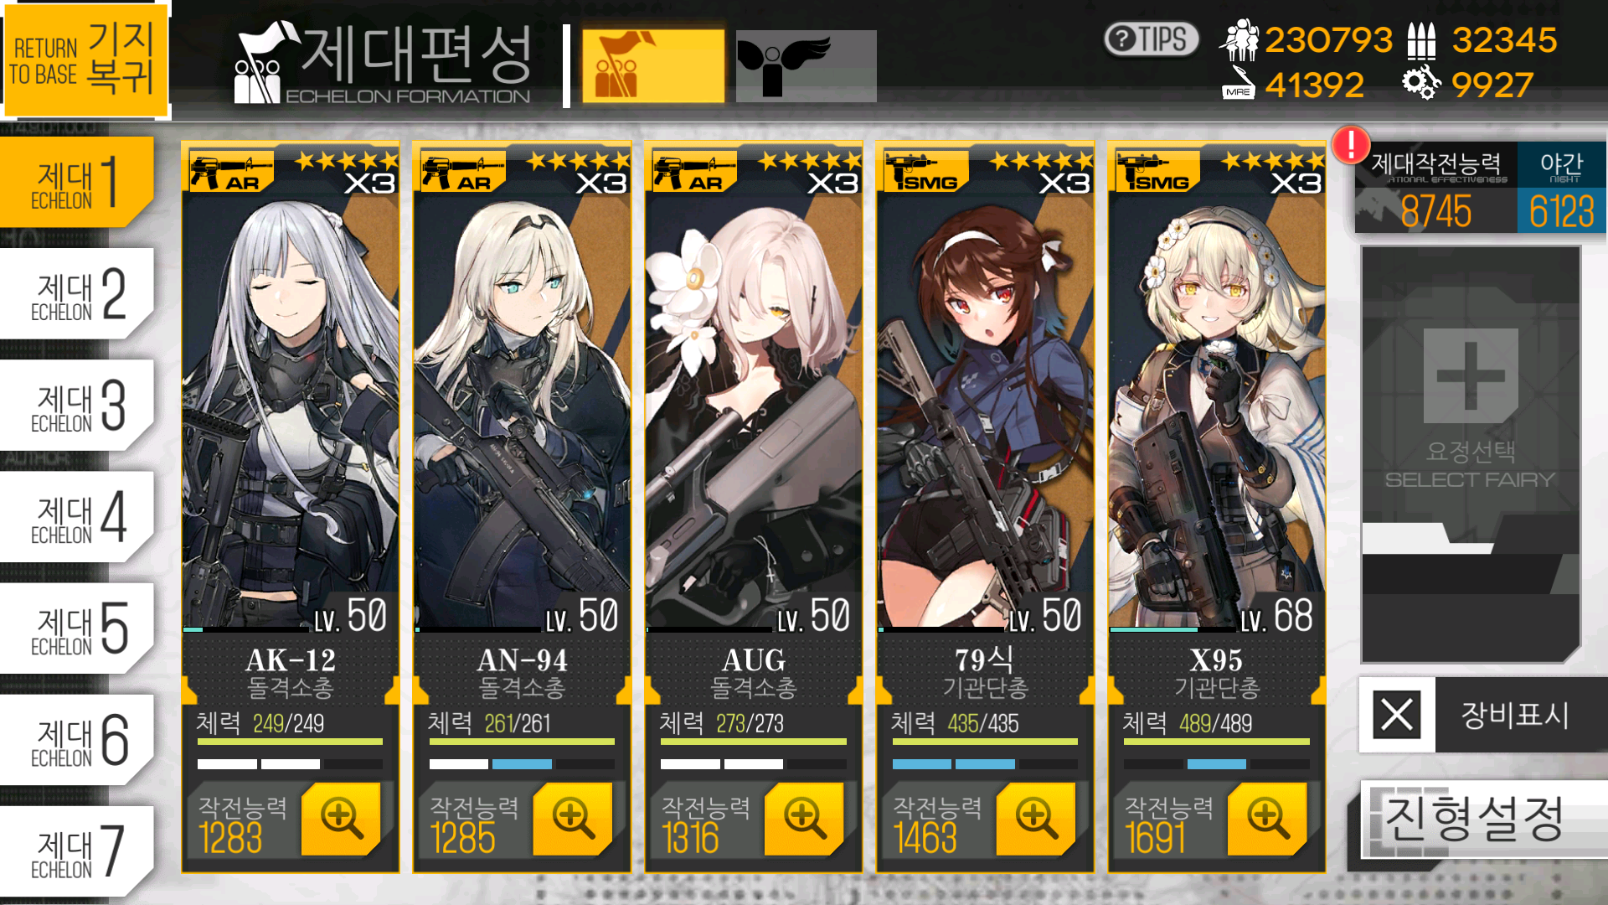
I didn't have anything else lying around that I was willing to level, so fuck it. I'm also not using fairies because a new player is definitely not going to have those ready. You can do this chapter with one echelon, so just focus on having a good one. If you can clear chapter 5 in the regular story, you should be fine to clear without much trouble. You could do it earlier if you burn quick repairs. The one thing you'll find difficult if you're doing this as a lowbie are the scouts in 1-4, so if you need a bit more juice to clear it, run something with a grenade/molotov, like Skorpion.
My recommendation for an Echelon setup for this chapter is just a single generic AR/SMG echelon. The more the better, though. You have to do supply line maps, and extra echelons can always help for that.
Example:
Levels aside, a comp like that can work. Your freebie AR team will forever be the go to units. SMG wise, you can use whatever you have. UMP45+Skorpion would be a good cheap option to use.
Recommended T-Dolls/Echelons #
Note: This isn't purely for chapter 1, this is for all of Deep Dive. This doesn't really even apply to chapter 1 either.
I covered this a bit in the prep post I made awhile back, but it's worth mentioning again here. Deep dive is less of a test of strength and more of a test of utility. You'll be encountering a fair few problems that can be made much easier to solve by having the proper tools to deal with them.
One of the biggest problems are golyat+'s. These guys have insanely high HP and will basically one shot your entire echelon(read: bring them into critical damage if they're not already). The way around this is to use a force shield and any utility grenades to stall them to safely detonate them on your force shield tank. So, things you may want to make your life easier is Thompson, M1911, UMP45, UMP9, and other units with utility grenades or force shields.
Example of clearing a golyat+:
Aside from that, you don't need specific setups for the story maps. Chapter 2 and 3 both have night battles, so be prepared for those. Armoured units also will show up, so keep some armour pen in your back pocket.
Going into Chapter 3, you'll want roughly 4 combat echelons to be able to deal with the demands of the huge maps.
Strategy#
The objective for this map is to capture the command center.
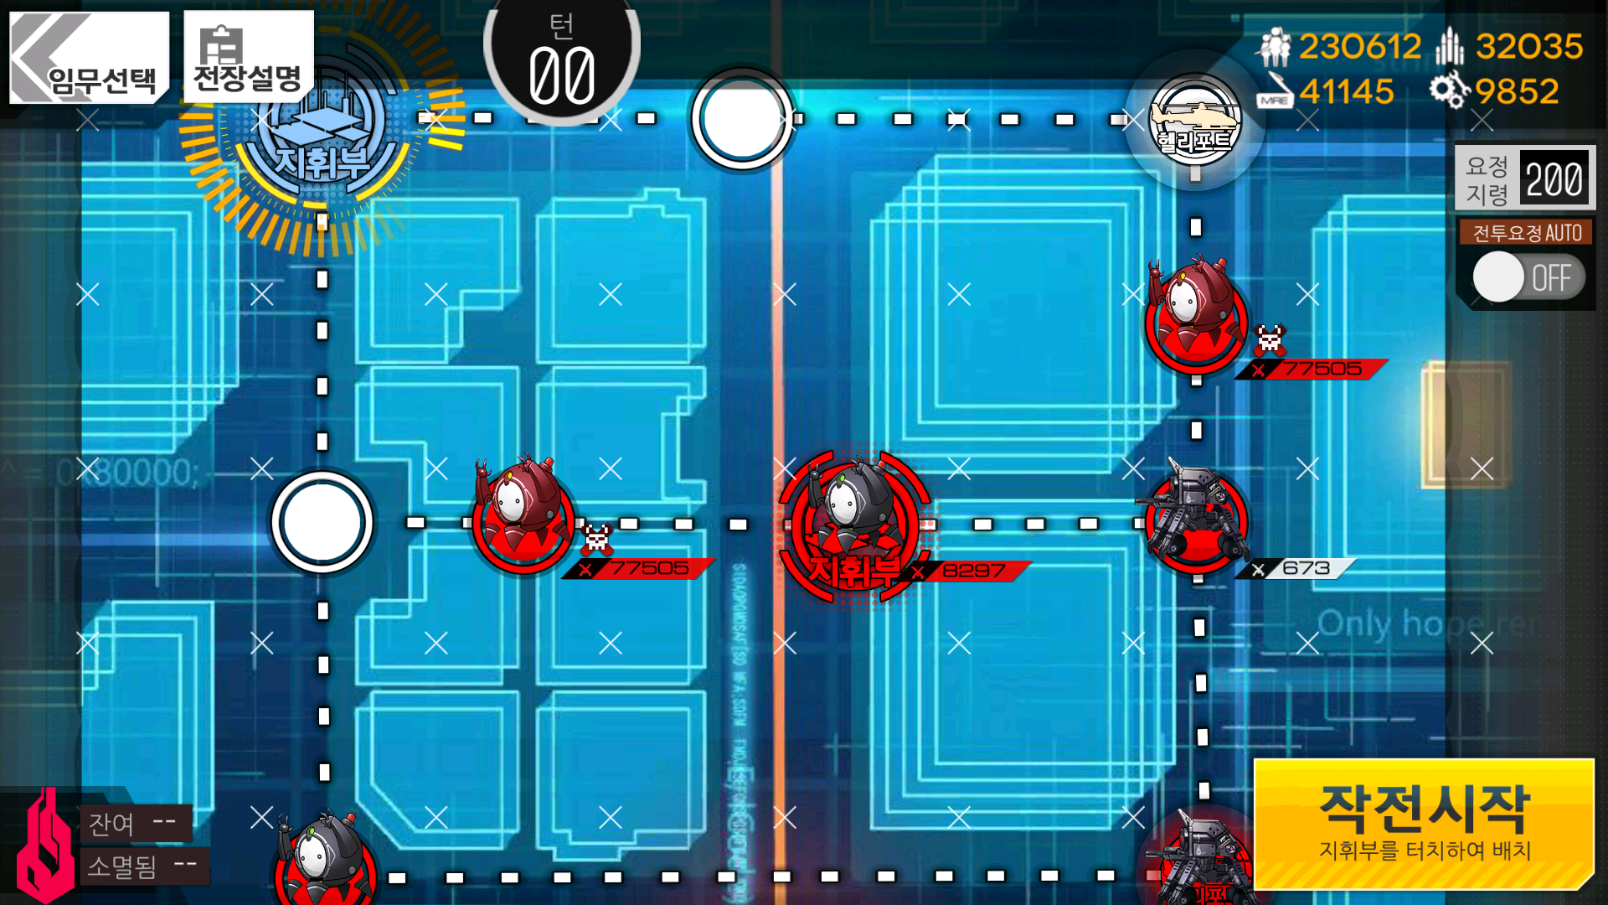
This map is pretty simple, it's mostly a lesson in golyats. Don't engage the red golyats unless you can deal with them. All you need to do is go down towards to the black golyat and clear the bottom of the map towards the enemy HQ. The red golyats don't move, so you don't need to worry about them.
Just in case it isn't clear DO NOT ENGAGE THE RED GOLYATS UNLESS YOU KNOW WHAT YOU'RE DOING.
Go around them. Like:
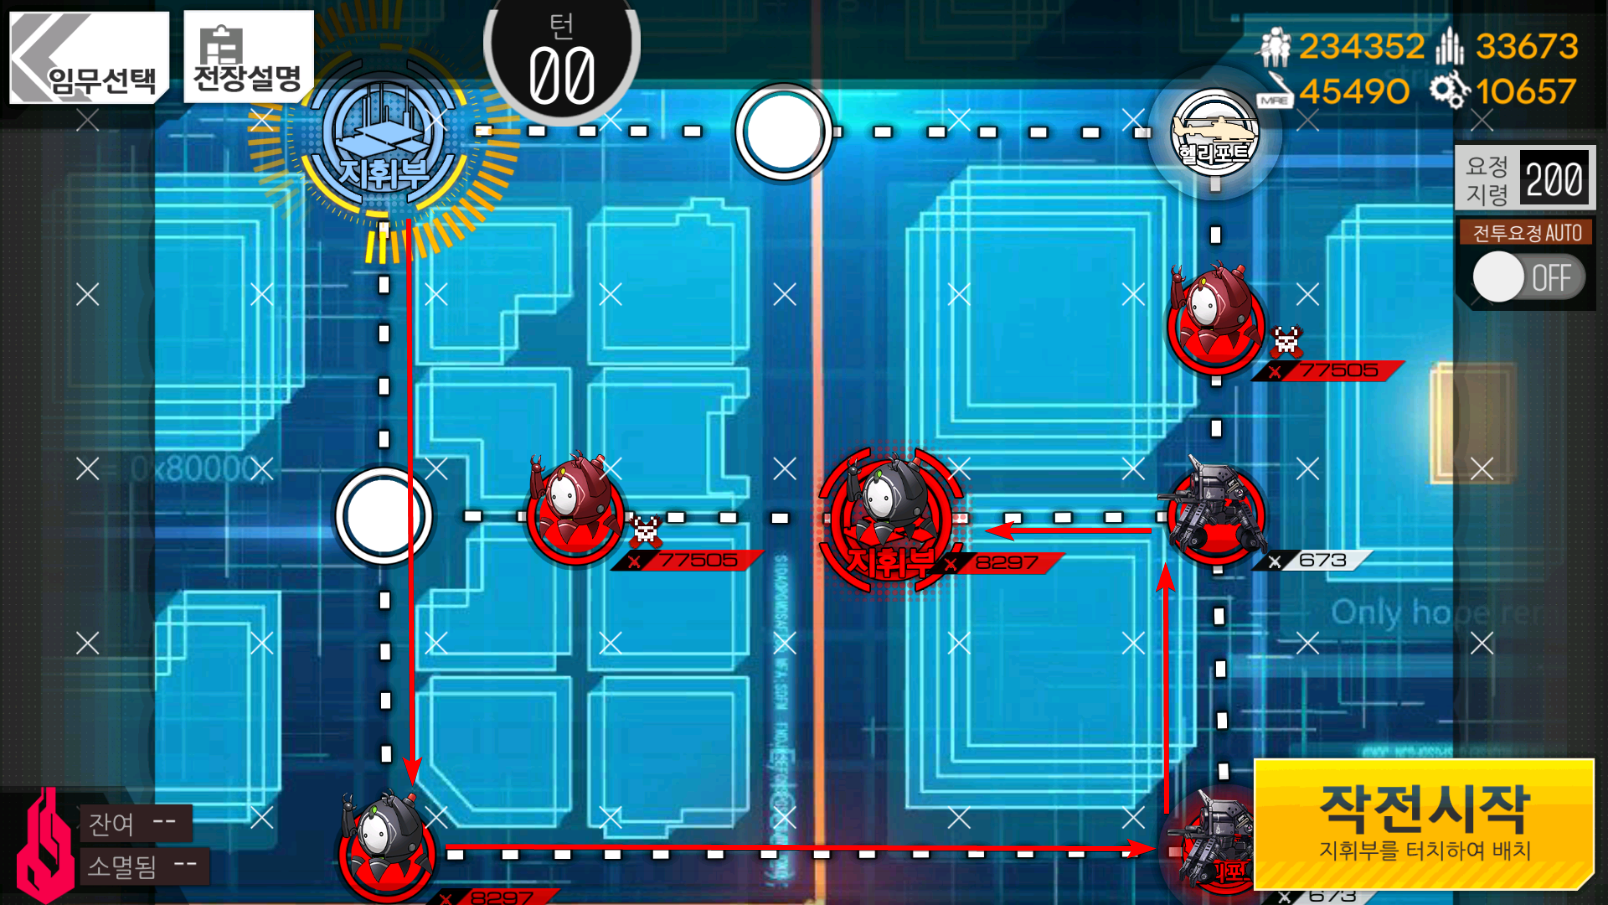
Please.
Video of me clearing this map:
Author: Kazuki
Tags: Deep Dive