


Operation Deep Dive 2-4
Intro#
Okay, so we have the absolute worst map in this game. Yeah, I hate this map. A lot. It's a pile of RNG garbage due to red golyats roaming around the map blocking your way if you're not prepared to cut through them. To top it off, you have absolutely nowhere to resupply, so you can actually completely run out of resources before getting to the ending heliports. However, smart play and careful movement can let you deal with those. Just to make it extra clear: RNG can affect you, but it will never be the sole reason you screw up the map. What it does it make it so you cannot just mindlessly go through the map and have to actually think about your actions, which is annoying.
I'll discuss the red golyat strats if you're going to be clearing them out instead of avoiding them in a seperate section in this post. The first strategy section will go under the assumption that you're going to be avoiding them entirely.
This is also a great map to have a Illumination fairy skill leveled (at least Lv 3) for safety. It's definitely not needed, but it could help.
The other thing you may want to do is to run a second AR/SMG echelon instead of a RF. There's no armoured enemies on the map. You'll also want to bring in a dummy echelon for the extra AP.
Strategy#
The objective for this map is to rescue and extract 1 hostage within 8 turns.
Only unarmoured enemies spawn here. Really bad idea to use anything aside from AR/SMG here.
Echelon limit of 3.
The map has quite a few Garms (the boss) roaming around it.
The map is (poorly) stitched together, for the record.
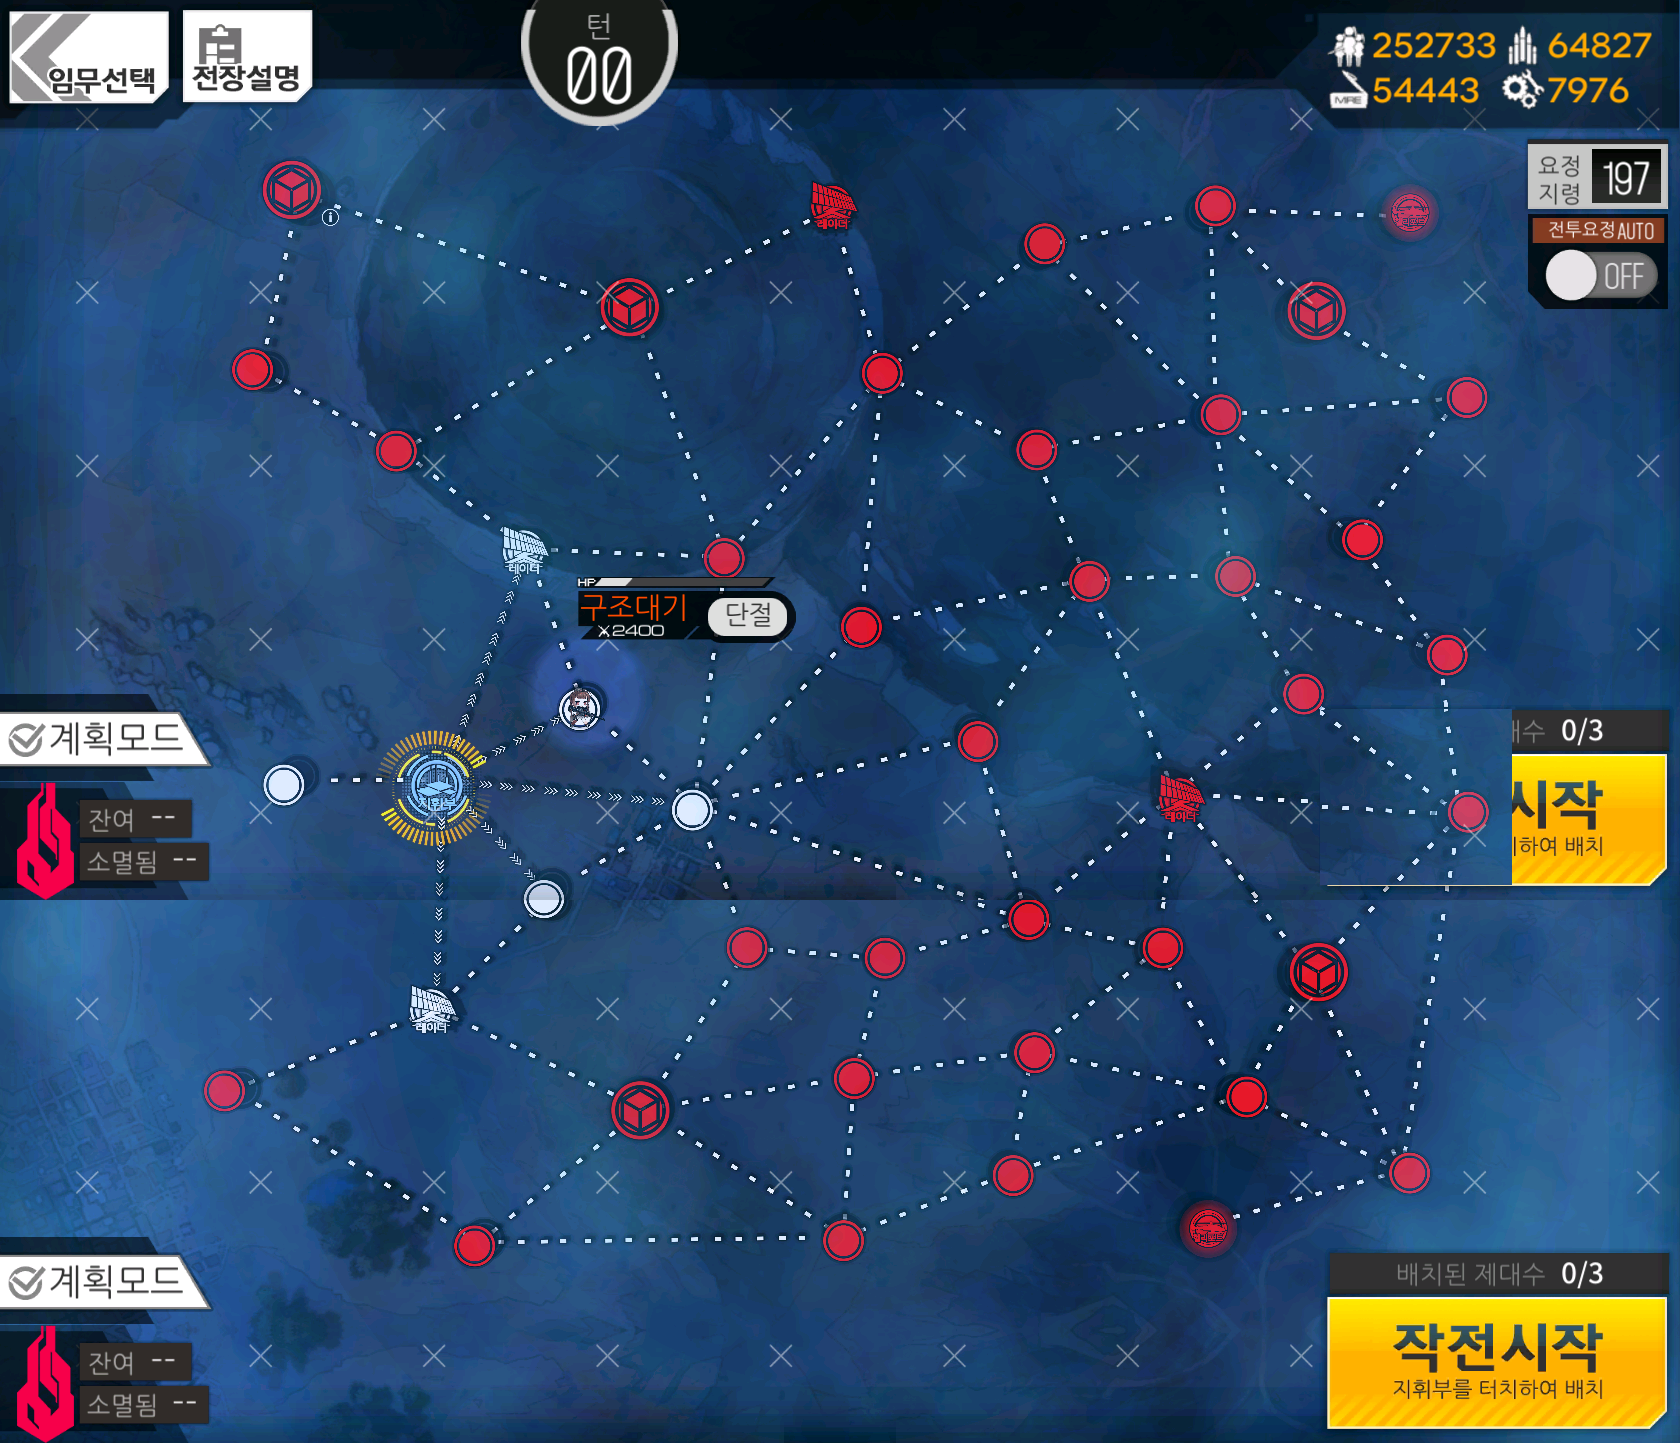
So this map is a pile of RNG garbage. That's about as good as it gets for ya. The goal of the map is to take DSR from near your Command Center, to one of the heliports across the map. Now, every node besides the few around your base are taken by sangvis, so this makes things interesting. You'll have to take two echelons over to a heliport and take two nodes there to be able to extract DSR. While conceptually very simple, this map has quite a few obstacles in your way to make this true suffering.
First, and most annoyingly, there's red golyats everywhere on the map. You have two options: clear them out, or avoid them. Taking them out has its own section down below, so yeah. Avoiding them is more annoying and can lead to a few problems. As mentioned above, you need to actually take two echelons over to a heliport to capture them. So you can be left without enough AP to move any echelons in danger of getting attacked by a red golyat.
Secondly, because of the awkward movements you have to make while going through the map; you may, very easily, run out of ammo or MREs for your echelons. This is far less common if you have two proper echelons moving to the heliports, but it's still a possibility.
And lastly, if you do need to fight Garm multiple times, you can take a fair bit of chip damage from it's hyper beams. This could be an issue if you're not quite strong enough to go through the map without much difficulty.
The general strategy is to slowly work your way from your HQ to one of the heliports on the other side of the map. You don't need to go for a specific one, but I prefer the top one. You'll have to pick up DSR ASAP, since she only has 1 HP. After that, you'll want to start pulling out your other echelons for the bonus AP.
Due to the enemy spawn RNG in this map, you can't have a concrete strategy to go through all of it. You'll have to be flexible and think about your echelons. The biggest issue you'll have is running out of Ammo and MREs, so be very aware on how much resources you have left. The resupply nodes aren't always an option to go for, so don't count on getting them everytime you do the map.
As noted in the intro, you can also use an illumination fairy to give yourself a little more information to plan around the golyats a bit better. Just keep in mind that it does have a cooldown and only lasts a few turns.
Once you've captured the heliport, you can extract DSR and end the map.
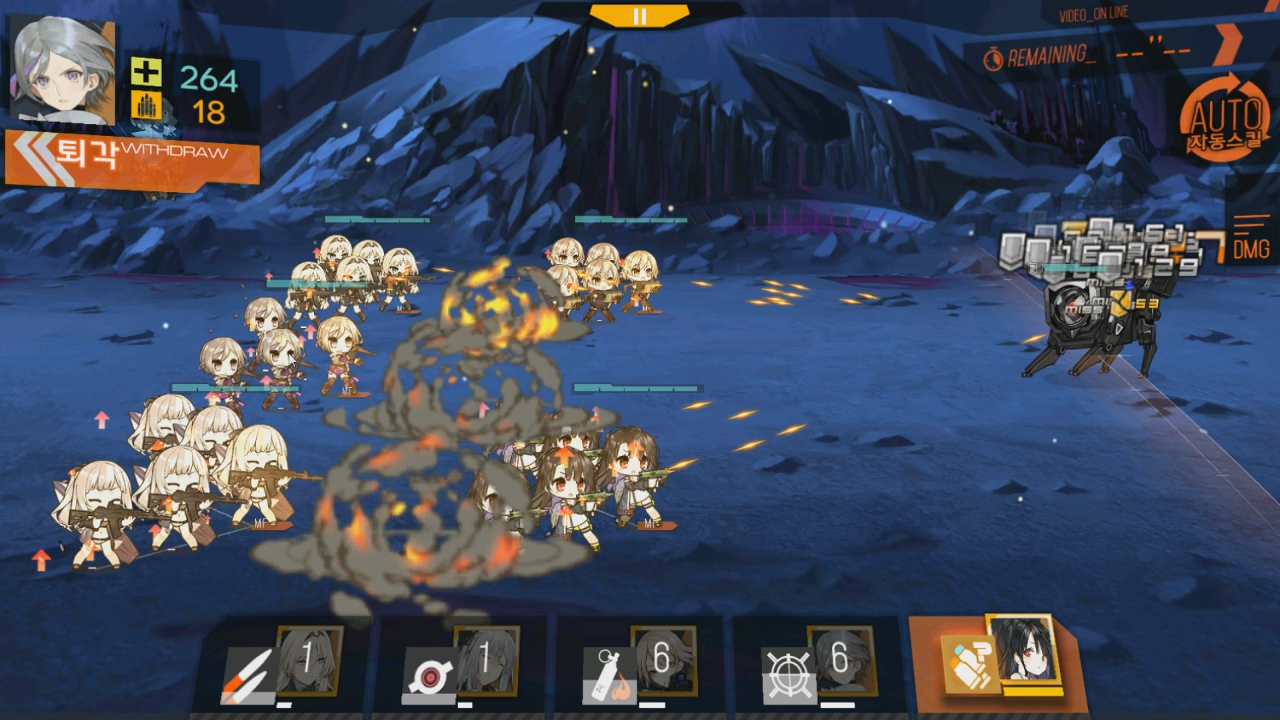
Garm#
Garm is a relatively simple boss to deal with in the story maps. In the ranking map it's significantly harder, but that's not something to cover here.
It has two special attacks to deal with.
The first is a column wide round of rockets. This doesn't have any tile indicators, and it'll do it every so often. It only ever hits the middle column (8,5,2), so if you keep that empty, you won't have to deal with it. Garm does have a physical indicator that they're about to do this. It stops shooting for a second, then does a jump. However, it's hard to react to it unless you're moving a HG around.
There's one issue with that, however.
Garm's second attack is where things get slightly more complicated. Hyper Beam is Garm's skill that it'll do at around 66% and 33% health. This is a line AoE that targets two full rows. It'll always hit the middle row (4,5,6), but it's RNG which of the other rows it'll hit. What's important is that you do not want to be on the middle row when it goes off. The other row it targets only does a small amount of damage (not enough to knock off a dummy link of an AR at Lv 90+).
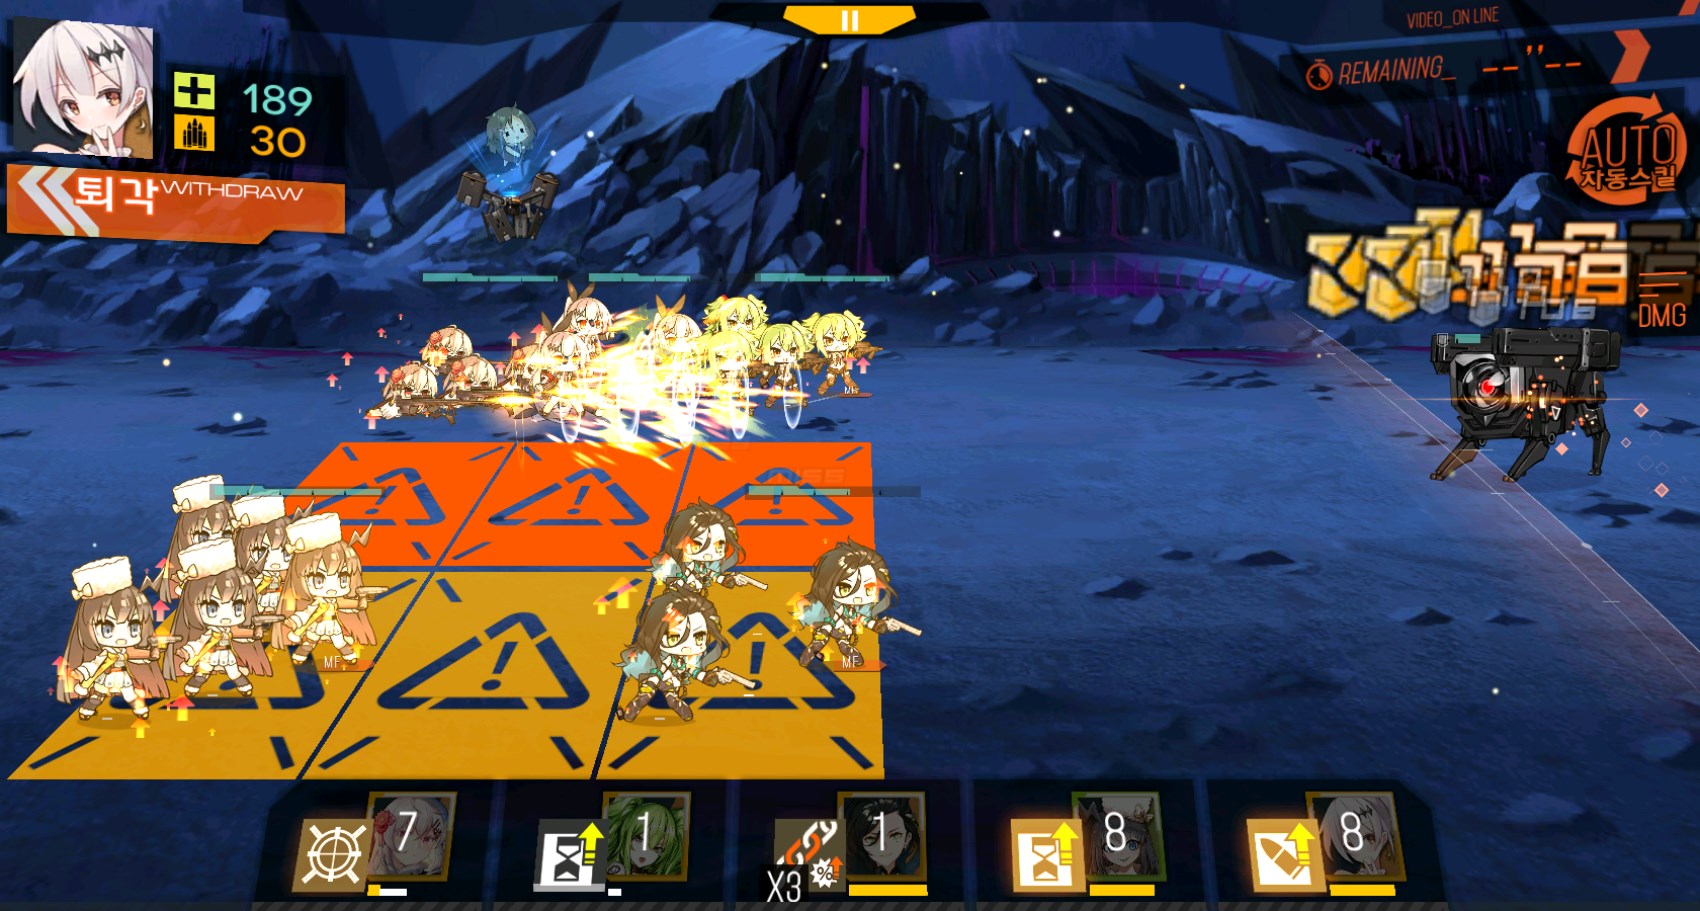
You're not gonna be able to dodge that, so it's essentially some chip damage to your echelon. If you're not retreating a T-Doll, you'll have to micro one of them to dodge Garm's skills, since you'll have to dance between not being in the middle row, or the middle column.
Garm doesn't do anything else special and the story variants should go down pretty quickly.
Golyat clearing#
Here's someone else doing it cause I really don't want to actually do it myself and I have a deadline to meet:
This method is...very particular. The idea is to get M9 to a 30% skill cooldown reduction via RFs, so she'll throw the flashbang at the right time. If you don't, she'll chuck it into Africa and you'll die a horrible death via ECKSUPROSION. You'll also want her to be on the 4 position for the same reason.
The absolute minimum for skill level on both M9 and Thompson is Lv 8, but you'll ideally want it at Lv 10 for safety.
Vector in this video is purely for dealing with other enemies, as this is a farm echelon.
Video of me doing this map
| Previous map | Next map |
Author: Kazuki
Tags: Deep Dive