


Operation Arctic 3-1
Intro/Discussion
#
As mentioned in chapter 1's intro, chapter 3 is meant for higher end players to complete. Difficulty wise, the first two maps of chapter 3 are about the same as chapter 2, however at 3-3, you'll have a large spike in difficulty. The upside is, 3-3 and 3-4 are both day maps, so you won't need to worry about night vision.
Going into chapter 3, you're going to be needing three echelons that are Lv 90+ and five linked. The type of echelon you field doesn't really matter; just be sure it can survive multiple turns of combat without repairs. I would recommend using AR/SMG or MG/SG echelons over RF echelons, but you can field whatever you want.
As for limitations, I'll only be limiting myself to no fairies. Since my account is about two months old and f2p, I don't have a deep pool of T-Dolls I can use. It's hard to get suitable replacements for some of my units that are modded to properly field 3 echelons.
These are the echelon setups I'll be using for this chapter. Do note that it may vary depending on the chapter. If I make any changes I'll note them in that map's guide. Because it's a mixed map composition, I won't be showing my equips. If it's night, I'll have PEQ boxes equipped, if it's day I'll be using crit scopes for my ARs or red dot sights for my MGs.
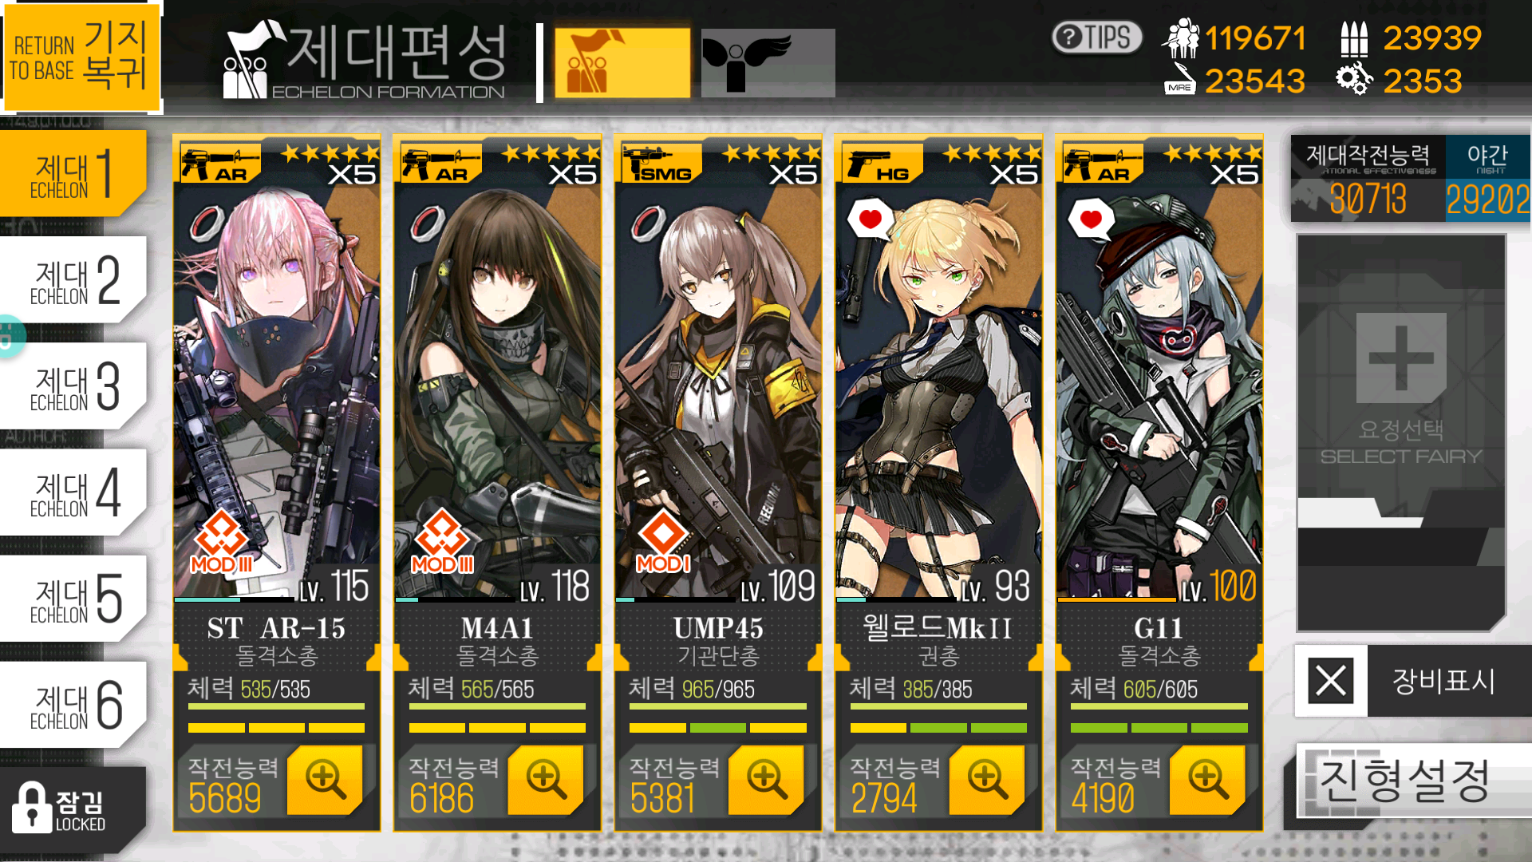
First echelon:
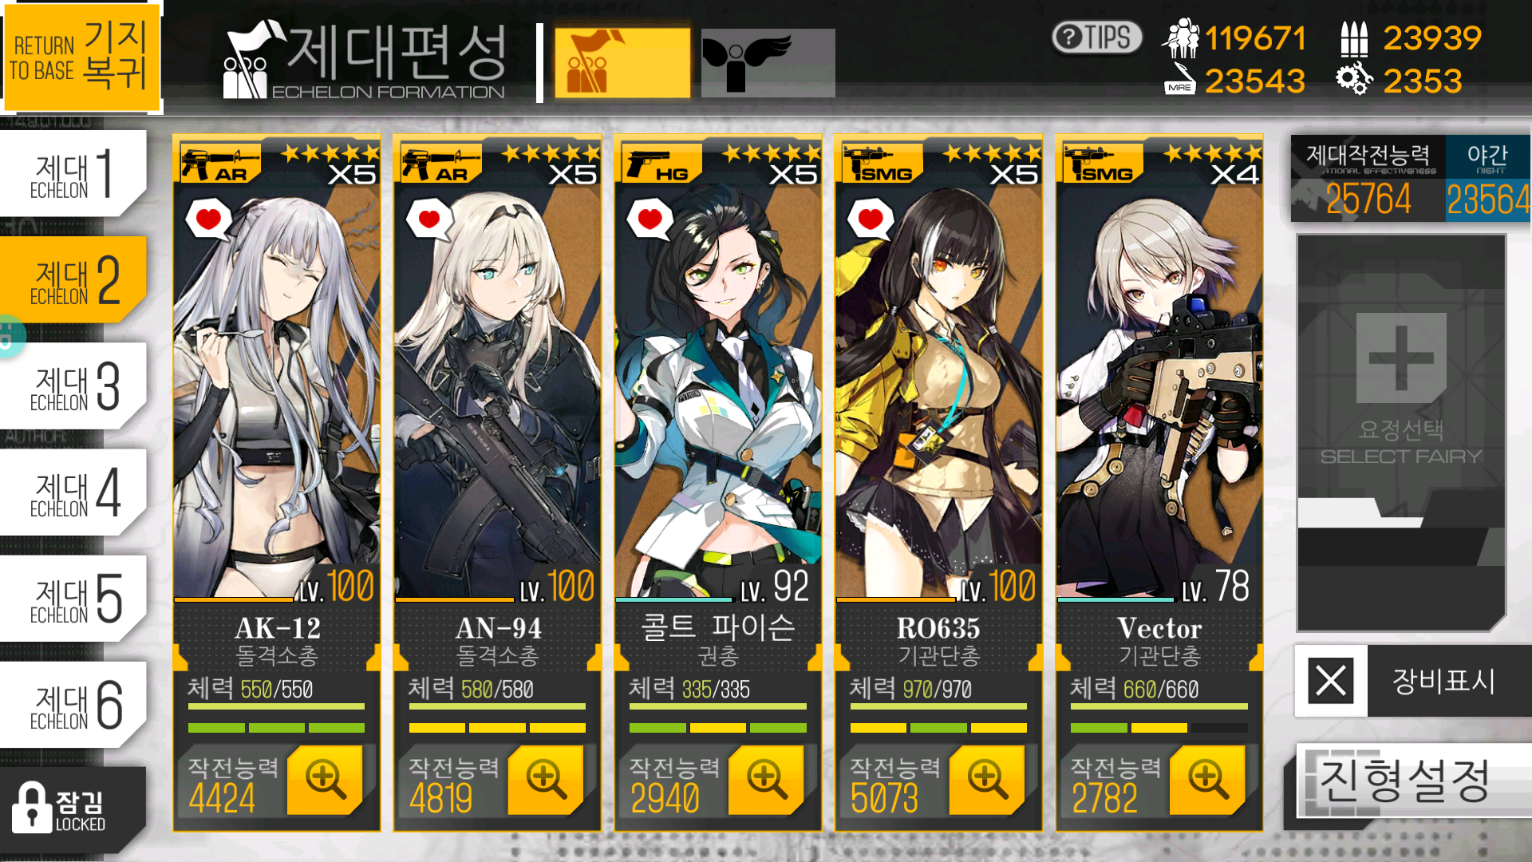
Second Echelon:
Third Echelon:

For my first and second echelon, it's a standard F formation. My third echelon is a T formation to properly buff MGs.
My first echelon is meant to do most of the heavy fighting. ST AR-15 is one of the highest performing ARs in the game, and she synergizes with M4A1 insanely well. G11, likewise, is one of the highest performing ARs, so she gets to stick with the main fighting force. As for my tanks, it depends on if I'm in a night map or not. Welrod is only there because I need night vision, so she's going to be the offtank during 3-1 and 3-2. She'll get subbed out for SR-3MP for 3-3 and 3-4. UMP45 will be the main tank since she's the best SMG available to me.
For my second echelon, I have AK-12 and AN-94 to carry the DPS since I have a significantly weaker composition in this echelon. Vector isn't even Lv 90 and RO635 isn't skill leveled, making things quite a bit more difficult. I used Vector regardless, since her damage isn't entirely tied to her dummy links and can provide a boost against any armored enemies I may fight. RO635 was one of the few SMGs I had leveled and I prefer using her over UMP9. I used the new HG Python for vision and due to the lack of HGs to pull from. I expected the need to use a 4th echelon, hence I worked under the assumption that my other HGs would be preoccupied. However, this wasn't the case. Given the chance to redo this, I'd pick Grizzly; she's both good and is easily available in EN.
Finally, my third echelon is a MG/SG echelon. I used pretty budget units for this, LWMMG and M2HB are both very good and very easy to obtain. HK21 was a drop from Operation Continuum Turbulance, but I'd say you can very easily replace her with PK. M870 was also a drop from Continuum, and she seemed like a good candidate for solo tanking. Her skill is a shield that allows her to dodge attacks depending on her shield's gauge. With that being said, she would be dodging less and less as her shield decays. In EN, you could really take any shotgun, although Type97S would be the easiest to get. Lastly, I brought Mk23 for her massive firepower boost and as a "tank". I'll explain why she's tanking in 3-3.
Strategy#
The goal for this chapter is to take the enemy HQ.
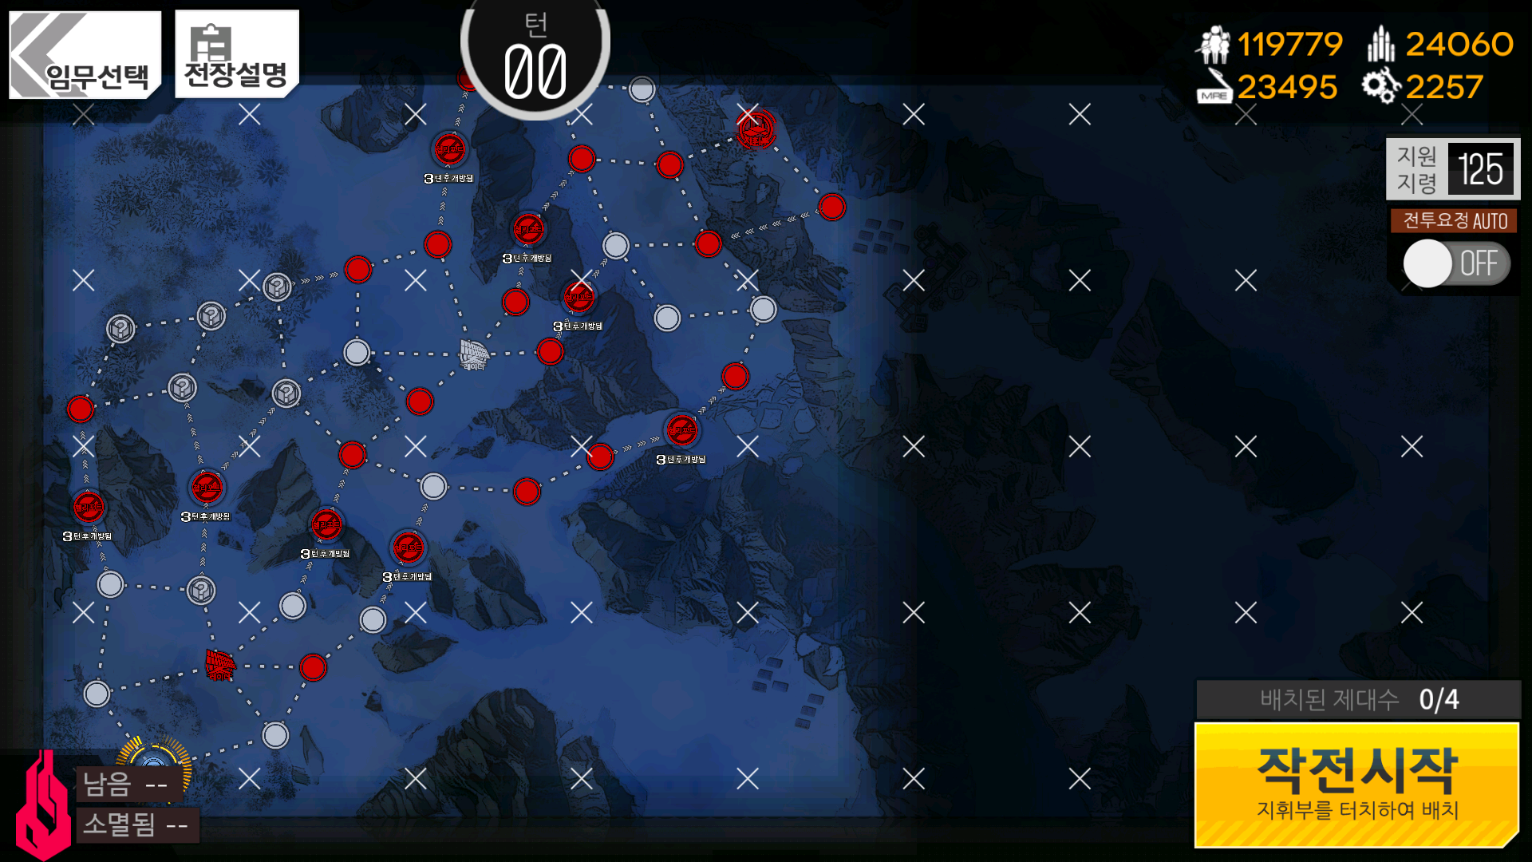
3-1 is more of the same from chapter 2. It acts as a bridge, difficulty wise, between chapter 2 and the end of chapter 3.
The main thing to note about this map is that the route up to the enemy's Command Center is heavily dependent on your luck. Each of the closed heliports could have a Jupiter Cannon, a weakened Jupiter Cannon, or nothing. Because of this, it is ideal to try and stop at each of the radar posts. You'll be able to scout most of the heliports just by using that, so you'll be able to save on time and resources. Find a route that bypasses the full powered Jupiter Cannons, and you should be fine.
It's recommended to take two echelons up, since then you can capture radar towers and closed heliports easily. It can also act as a way to spread out the ammo usage so you don't run out. If you do need to resupply, you can always stick on one of the heliports until you can.
Here's a video of me clearing this map.
Author: Kazuki
Tags: Operation Arctic