


Operation Deep Dive 3-2
Intro#
No echelon changes. I did use a dummy echelon here, though. Keep in mind, this is one of the insanely large maps, so you want as many echelons as possible for this one.
Strategy#
The objective is to take and hold a supply line for 3 turns.
Turn limit of 16 turns.
Echelon limit of 5.
Mixed armour and unarmoured enemies.
There's a sangvis heliport under the start mission button and on the top left of the map. I was lazy and didn't want to stitch together this map. :(
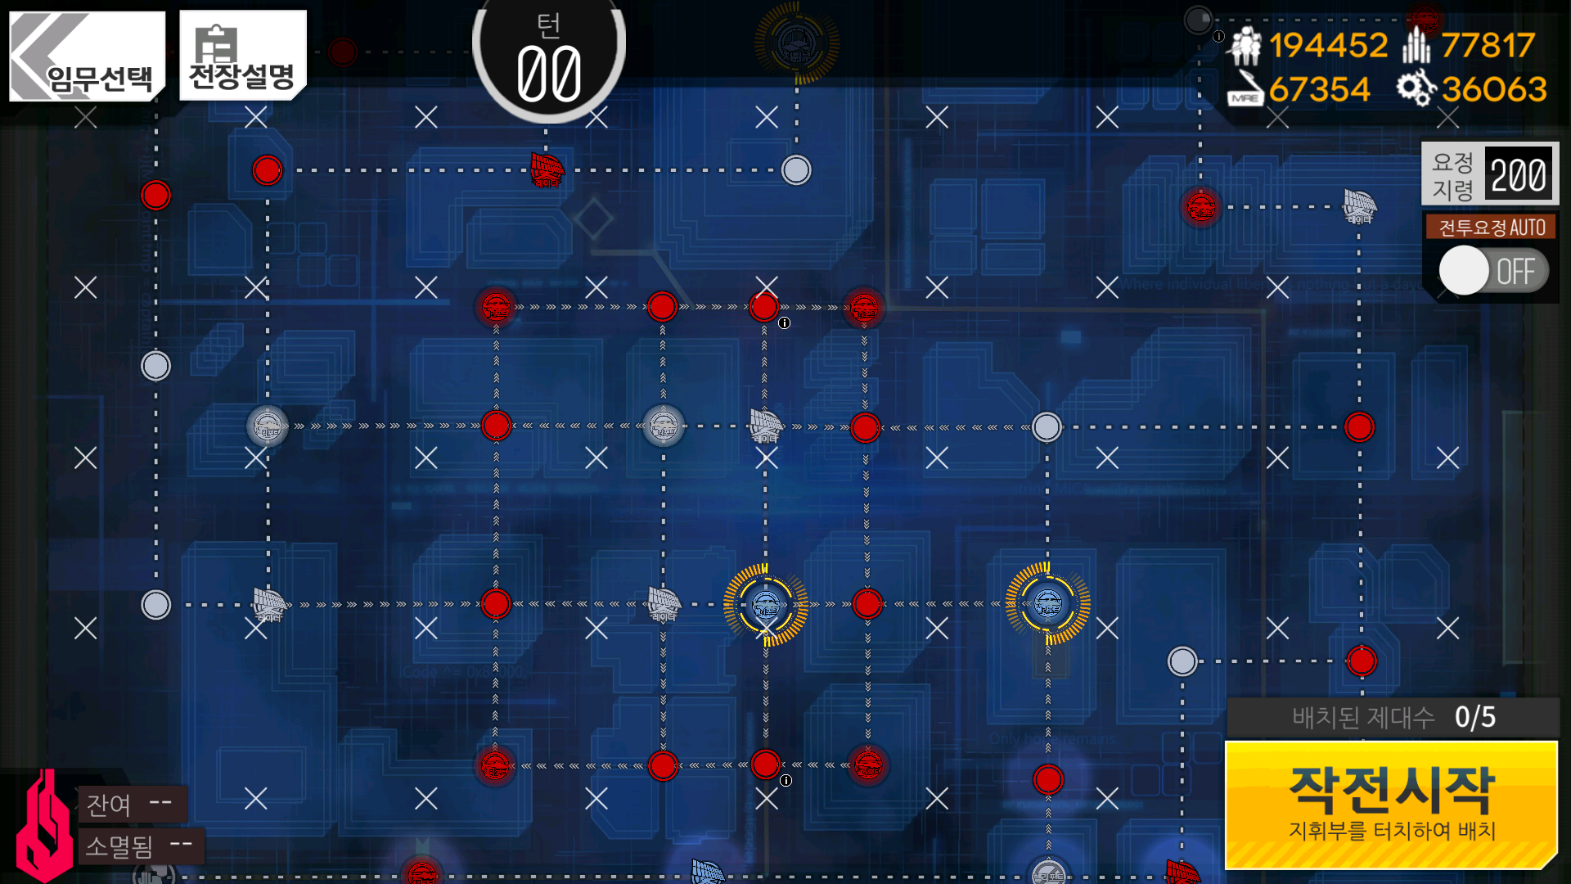
The map's fucking massive. Thankfully, you have a TON of turns to work with here.
I think the best way to understand the map is to cut it up into sections. I'll explain the idea behind each section and your goals for it. Then later, I'll summarize it.
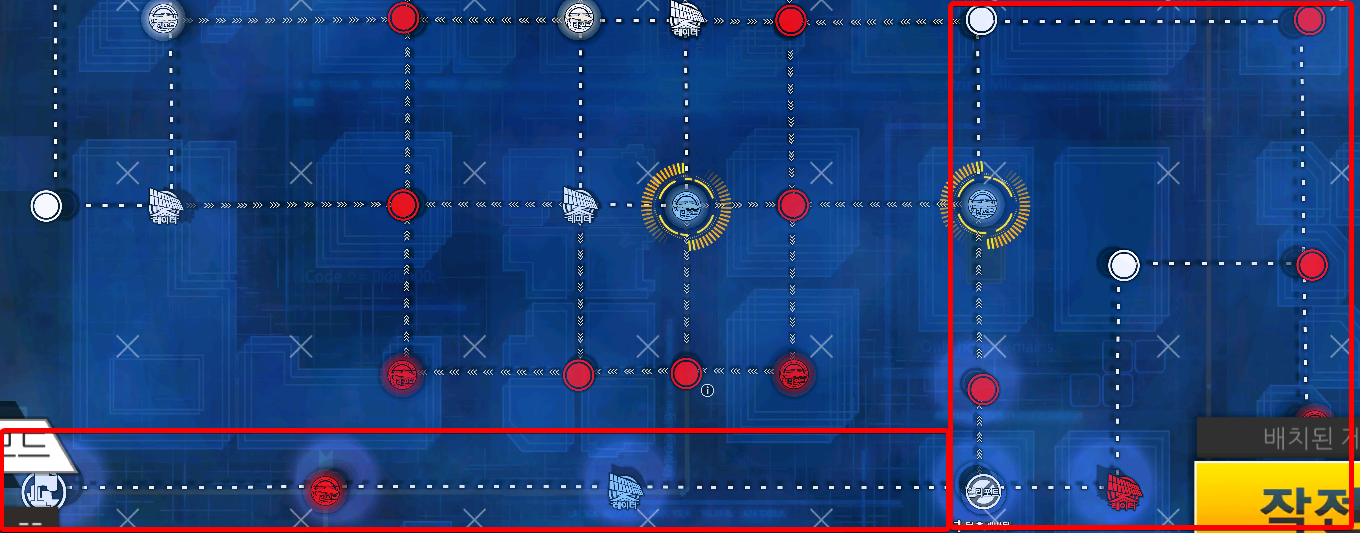
Top section (marked in the red boxes)
This section is entirely armoured. Use a MG or RF echelon here.
The key points you want to have captured are the radar tower next to your base, and the heliport below the marked Jupiter Cannon. It's the shortest route you can take to your Command Center. You'll have to go around the Jupiter, however.
I think it's best to take this bit slowly, capturing up to the heliport at the very top left, then blitzing all the way to the next heliport in a single turn after you've taking the heliport there. The AP, I feel, is better spent in other sections early on. By the time the armoured unit that moves down and up to that heliport, you'll be in a comfortable spot in other sections.
Once you do have that heliport taken, you can kill the Jupiter Cannon and have the route established for this section. Do note you may need to also take the radar tower below the heliport in the bottom right of this section, if the red golyats from the middle section are going to move on the node connecting the middle section to this section. You do have the spare AP for this in later turns, so it's not a big deal.

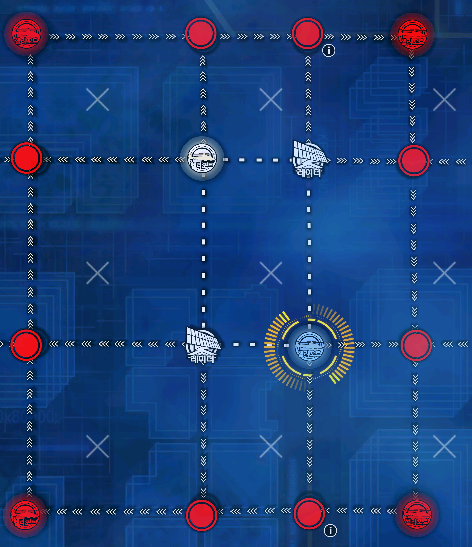
Middle section
This part is all golyats. You'll want to avoid the red ones, but you can clear them to make it marginally easier. Heavy emphasis on marginally. There's a few black golyats here as well, and you will need to take them out. Overall not very combat heavy.
This section requires the least amount of work. You only really need to control the middle nodes that start off neutral, then take the four (to be safe) nodes leading out of the section on both sides. The issue is that there's red golyats going around the outer ring here. So you'll just be playing "retake the nodes you've lost" once you're trying to maintain the two nodes that lead out of the outer ring.
To be safe, you'll likely want to start the supply line (if possible) with the red golyats on either the top or bottom of the ring.
Bottom and right section (marked in red boxes)
This is all unarmoured units. You'll see some scouts in the dragoon echelons down here. Vector might be a good pick for this section.
This is where the majority of your AP will be spent each turn. You have a lot of ground to cover to get to the supply node, and you'll need a second echelon to get it done in a timely fashion. The main idea for this section is to move down towards the supply node while taking out the enemy reinforcements that come in from the heliports in the area. You can easily stop two of them, but one of them you'll have to move of the section to stop. You can do that or you can hold the top right node of the section. Either works. You'll be able to get two AP total from clearing it out, so it's not a horrible idea to do so. The main thing is you don't want to lose the starting heliport you have in this section.
Your other echelon that won't be holding the heliport will be moving down towards the resupply node. Just make sure the heliports are all taken to prevent reinforcements. Once you've taken the supply node and have the line going, make sure you take out the Jupiter Cannon that you will always surround. Like the other Jupiter in the top section, it'll interrupt the line if you don't.
To summarize each of the sections... Your goal is to slowly build a supply line that looks like:
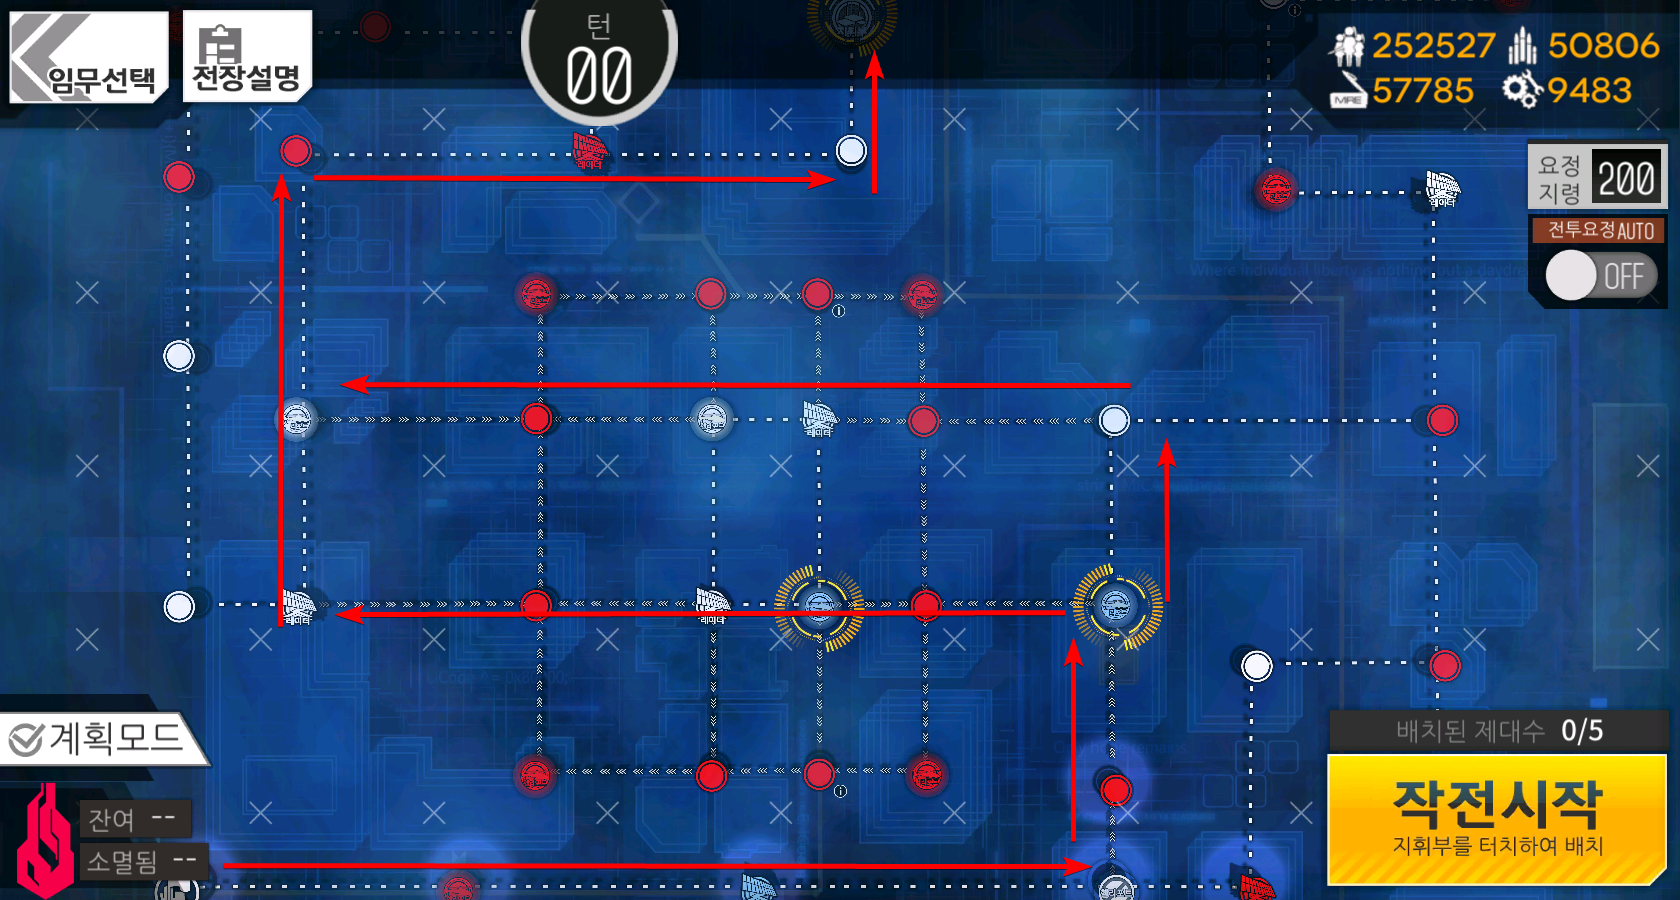
Depending on where the golyats are, you may need to have the supply line run through either of the paths through the middle section. To be safe, you may as well take both.
Your main focus is on the bottom and right sections, with the top and middle sections being worked on slowly. Turn 1 should be used to deploy the rest of your echelons and to take any nearby heliports if possible. Turn 2 is when you'll really start wanting to make progress towards making that supply line.
Key points on each section is the two jupiters on the map, the ring around the middle section, and the node that gives you access to the bottom of the map. All of these are key choke points you want to focus on.
Parachute Strats#
A parachute fairy can speed up the bottom right section. Since you have vision, you can parachute onto the closed heliport here:
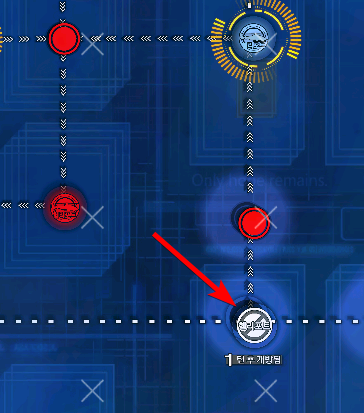
This will save you the struggle of going all the way around, and let you set up the supply line a bit faster. Just remember that you'll have enemies coming at you, so mind the parachute fairy's debuff. A good plan would be to parachute in, take the closed heliport, then deploy another echelon on the next turn. After that, send one of your echelons to clear up the Jupiter and to defend your supply route into the middle section of the map. This frees up a lot of AP to work on the other sides of the map as well.
Video of me clearing this map
| Previous map | Next map |
Author: Kazuki
Tags: Deep Dive